How Long Does Tint Take to Cure A Professional Explainer
Wondering how long does tint take to cure? Our guide explains curing times, key factors, and essential aftercare for a flawless, long-lasting finish.
Dec 25, 2025
generated
how long does tint take to cure, window tint curing time, car tint aftercare, ceramic tint cure, new tint rules

You just got your windows tinted, and your car looks fantastic. But now comes the most important—and often misunderstood—part of the process: the curing time.
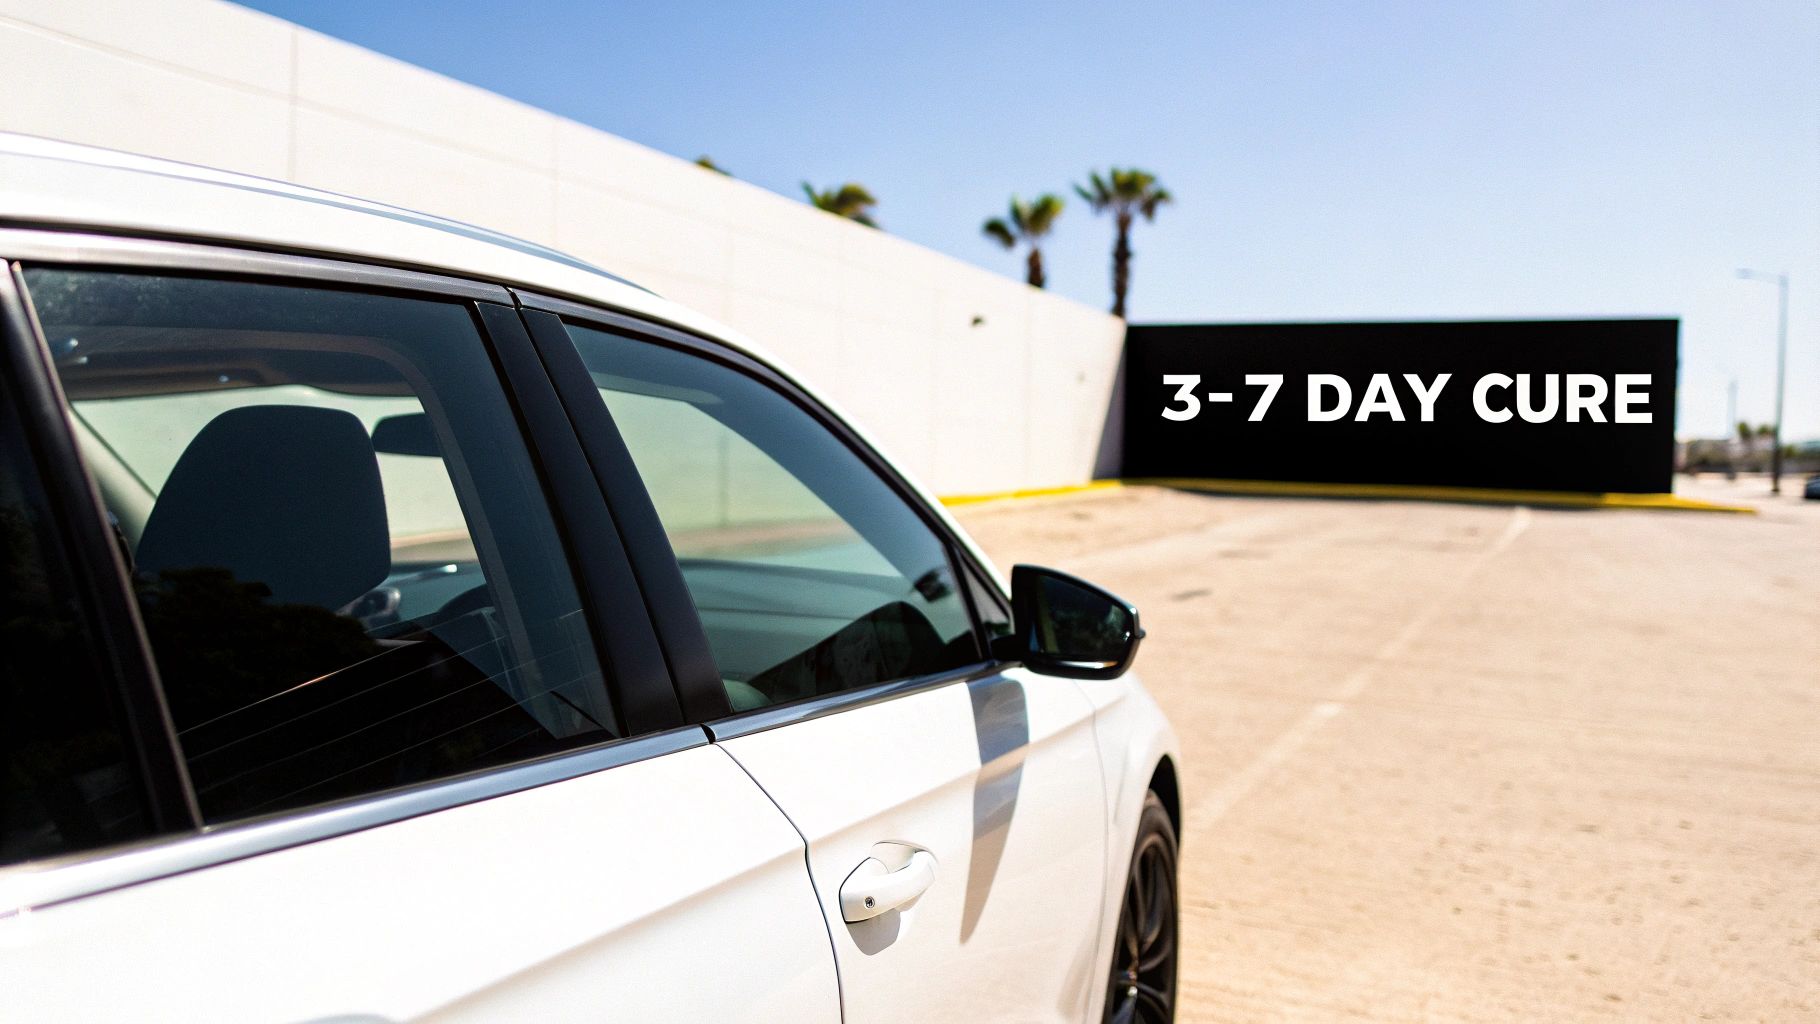
While you can drive your car right away, the film itself isn't fully settled. On average, you can expect most window tint to take 3 to 7 days to fully cure. However, high-performance films, especially dense ceramic tints, can take several weeks for the adhesive to completely bond to the glass. This waiting period is non-negotiable if you want that perfect, long-lasting finish you paid for.
Your Quick Guide To Window Tint Curing Times
Getting new tint is an instant upgrade, but that post-installation waiting game can be a bit confusing. It's easy to mix up "drying" with "curing," but they aren't the same thing. Think of it like pouring concrete for a new patio—it might feel solid to the touch in a day, but it takes weeks to reach its full, load-bearing strength.
Window tint curing works similarly. It’s the process where the last bits of the application solution (mostly water) evaporate through the pores of the film. This allows the specialized adhesive to form a permanent, crystal-clear bond with your car’s windows.
During this crucial phase, don't be alarmed if you see a slight haze or even a few small water pockets trapped under the film. This is totally normal! In fact, it's a sign that the tint is doing exactly what it's supposed to do. Patience is your best friend here. If you get impatient and roll down the windows too soon, you risk peeling the edges and ruining a perfectly good installation.
To give you a better idea of what to expect, let's break down the typical timelines for different types of window film.
Curing Time By Film Type
The material your film is made of is the single biggest factor influencing how long it takes to cure. Thinner, standard dyed films are more porous, which allows moisture to escape pretty quickly.
On the other hand, premium ceramic and carbon films are much denser. That dense construction is what gives them their incredible heat-blocking power, but it also means moisture takes a lot longer to evaporate out. Knowing these differences helps set the right expectations, and you can explore more about the various window tint options we offer to see what’s best for you.
To make it simple, here’s a quick overview of the estimated curing times for different films under ideal, sunny conditions.
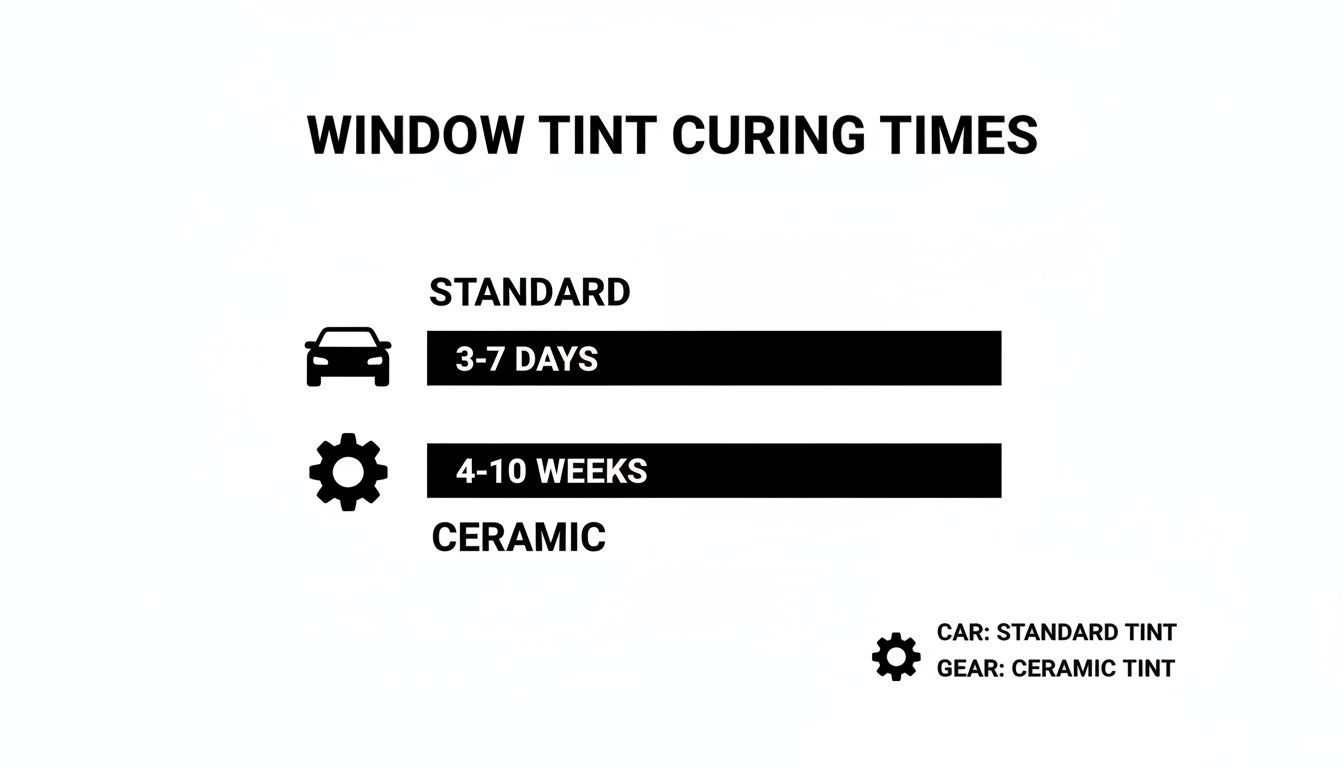
Estimated Window Tint Curing Times by Film Type
Film Type | Average Curing Time | Key Characteristic |
|---|---|---|
Dyed Film | 3 - 5 days | Thinner and more porous, allowing for quick moisture evaporation. |
Carbon Film | 1 - 2 weeks | Denser than dyed film, offering better durability and heat rejection. |
Ceramic Film | 4 - 10 weeks | Very dense with ceramic particles, trapping moisture longer. |
As you can see, the higher the performance, the longer you'll need to wait for a full cure.
This chart gives you a quick visual of just how different the timelines can be for the most common film types.
It’s clear that the same technology that gives ceramic tint its superior heat rejection and clarity also means it requires a much longer curing period. It’s a trade-off that’s well worth the wait.
What Curing Really Means for Your New Window Tint
Before we talk about timelines, let's get on the same page about what "curing" actually means. It’s not just about the tint drying out—it’s a crucial process where the film forms a permanent, rock-solid bond with your car’s glass.
Think of it like putting on a giant, high-tech screen protector. To get it positioned perfectly, we use a special "slip solution," which is essentially soapy water. This solution lets us slide the film around on the glass until it's lined up just right, without any creases or dirt trapped underneath.
The curing process is simply the time it takes for every last bit of that slip solution to evaporate. Window film is microscopically porous, a design feature that allows this trapped moisture to escape. As the water works its way out, the film’s powerful adhesive finally makes full contact with the glass, creating that strong, lasting connection.
Why Your New Tint Looks Hazy at First
For the first few days after your tint job, you’re going to see some weird things. A bit of cloudiness, maybe a few small water pockets—don't worry! This is completely normal and, frankly, a good sign that the tint is curing properly.
Here’s what you might notice:
A Slight Haze: The glass might look a little foggy. That's just the super thin layer of water still sandwiched between the film and the glass.
Small Water Pockets: You might also spot some tiny, isolated moisture bubbles. These are just concentrated pockets of that slip solution slowly making their escape.
These little imperfections are the visual proof that the moisture is evaporating. As the tint gets some sun exposure over the next few days, you'll watch them shrink and vanish, leaving you with that crystal-clear finish you were expecting.
Key Takeaway: A hazy or bubbly look right after installation is a totally normal part of the curing process. It’s just the trapped moisture evaporating so the adhesive can do its job and permanently bond to the glass.
This is exactly why patience is so important. You have to resist the temptation to roll down the windows or try to clean the glass. Messing with the tint during this critical phase can break that fragile, developing bond, leading to peeling or permanent bubbles that only a pro can fix. Every day you wait, that bond gets stronger, ensuring your investment looks great for years to come.
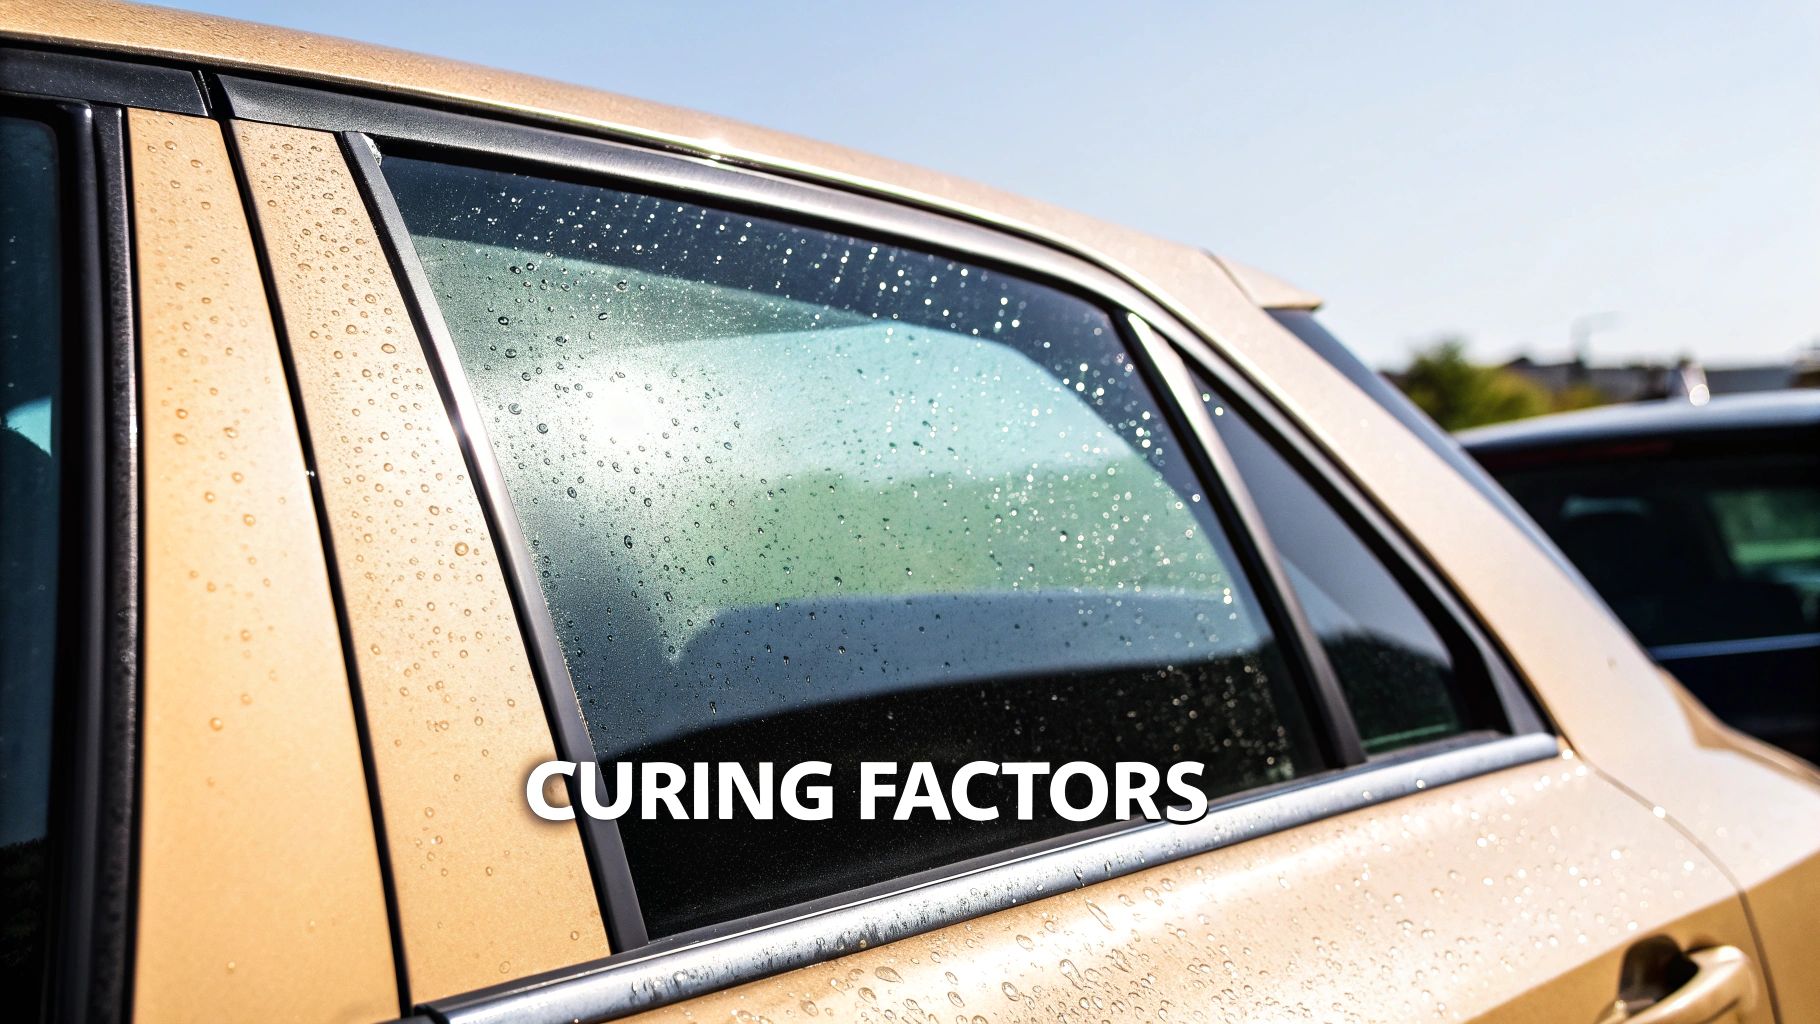
What Affects How Long Your Tint Takes to Cure?
Ever had a friend whose tint looked perfect in just a few days, while yours still had a bit of a haze a week later? It’s a common experience, and there’s a good reason for it. There's no magic number for how long window tint takes to fully cure; it's a unique process for every single car.
Think of it as a mix of science and environment. The kind of film you picked, the weather during and after the install—all these pieces come together to create your specific timeline. Knowing what’s at play helps you understand why patience is so important for that flawless, long-lasting finish.
It All Starts With the Film Itself
The biggest factor, by far, is the type of tint film we install. The material and construction directly control how easily moisture can escape. It's like drying laundry: a thin t-shirt is dry in no time, but a thick, heavy towel holds water for much longer.
Dyed and Standard Films: These are the workhorses of the tint world. They're generally thinner and more porous, which is great for a quick cure. The moisture used during application can evaporate out pretty fast, often in just a few days if the weather cooperates.
Carbon and Ceramic Films: This is the high-tech stuff. These films are packed with multiple, dense layers to give you that incredible heat and UV rejection. The trade-off? That dense construction makes it much harder for water to find its way out, meaning they simply need more time to cure.
So, while a standard dyed film might be crystal clear in 3-5 days, a top-of-the-line ceramic film could easily take a few weeks to fully set.
It’s a classic trade-off: the better the film’s performance, the longer the cure. Those dense, high-quality films that block so much heat just need a little more patience while they lock into place.
The Weather Plays a Huge Role
Where your car lives for the first few weeks after tinting makes all the difference. Sunshine is your best friend here. It provides the gentle, consistent warmth needed to help that trapped moisture evaporate.
Picture two freshly tinted cars. One is parked outside on a sunny, dry week in Phoenix. The other is stuck in a damp, chilly garage during a rainy spell in Portland. The Phoenix car is going to cure worlds faster because the sun is actively working to pull the moisture out from behind the film.
On the flip side, humidity is the enemy of a speedy cure. If the air is already full of moisture, the water under your tint has nowhere to go. Cold temperatures have a similar effect, slowing down the evaporation process to a crawl. Window tint curing time typically ranges from 3 to 7 days, but your local climate can stretch that out. For example, here in coastal California, a spring install might cure in three days, but a foggy summer week can easily push that to seven days or more. You can learn more about how different conditions impact curing times on lmcardetailing.com.
Why Ceramic and High-Performance Tints Take Longer
If you've invested in a premium ceramic tint for its incredible heat rejection and clarity, you've made a fantastic choice for your car. But that high-end technology comes with a different kind of price: a much longer curing period.
While a standard dyed film might be ready to go in just a few days, a high-performance ceramic tint demands more patience. This isn't a defect or a sign of a bad install—it’s a direct consequence of the advanced construction that makes the film so effective. Think of it as a trade-off for getting the absolute best performance and protection.
The Science of Dense Film Construction
The main reason for the longer wait comes down to how the film is built. High-performance tints are constructed with dense, multi-layered sheets packed with nano-ceramic particles. These microscopic particles are absolute champs at blocking infrared heat, but their density also makes the film far less porous than a simple dyed film.
Here’s a simple analogy: imagine hanging two different fabrics out to dry. A thin cotton t-shirt will be dry in no time because air moves right through it. But a thick, tightly woven wool blanket? That’s going to hold onto moisture for a long time.
Ceramic tint acts exactly like that thick wool blanket. Its dense structure traps a lot more of the mounting solution we use during installation, and it simply takes much longer for all that moisture to evaporate out from between the film and the glass.
This is precisely why understanding how long does tint take to cure is so critical if you've opted for a premium film. That waiting period is a necessary part of the process.
Curing Timeframes for Advanced Films
With ceramic films, we measure the curing timeline in weeks, not days. It's perfectly normal for these advanced tints to take anywhere from 4 to 10 weeks to completely cure, which is a big jump from your standard options.
Of course, your local climate plays a huge role. For example, professional installers have noted that ceramic tints can retain up to 30% more moisture right after installation compared to basic films. In a moderate climate like the Bay Area, we often see an average cure time of 5-7 weeks. But in cooler, more humid areas, that can easily stretch to the full 10 weeks. You can get more details on how tinting time varies on jerry.ai.
In the end, the extended cure time is a small price to pay for the massive benefits you get. You're getting superior heat rejection, a non-metallic film that won't mess with your phone or GPS, and color that will stay true for years to come.
Protecting Your Investment: Post-Installation Care
Alright, your new window tint is on, and the car is looking fantastic. But the next few days are absolutely crucial. This isn't just about letting it settle; proper care during the curing period is the final, non-negotiable step to lock in that flawless look for years to come.
Think of it like this: the tint is a delicate new skin for your windows. It needs time to bond perfectly with the glass. Messing with it now is like picking at a scab—you're just asking for a permanent blemish. Following a few simple rules will protect your investment and ensure the film cures into a tough, durable layer that lasts.
The Do's: Your Essential Aftercare Checklist
The best thing you can do for your new tint is also the easiest: let nature do the work. A little bit of sun and heat are your best friends right now, as they're the catalysts that help all that trapped application moisture evaporate.
Park in the Sun: Whenever you can, park your car outside in a sunny spot. The warmth from the sun gently heats the glass, which dramatically speeds up the curing process by pushing moisture out through the film's microscopic pores.
Be Patient with Imperfections: See those little hazy spots or tiny water bubbles we talked about? Leave them be. They are a completely normal part of the curing process and will vanish on their own. Don't even think about trying to push them out yourself—you’ll just cause permanent damage.
The Don'ts: The Golden Rules of Tint Aftercare
While the "do" list is short and sweet, the "don't" list is where things can go wrong fast. Avoiding these common slip-ups is the key to getting that perfect, long-lasting finish.
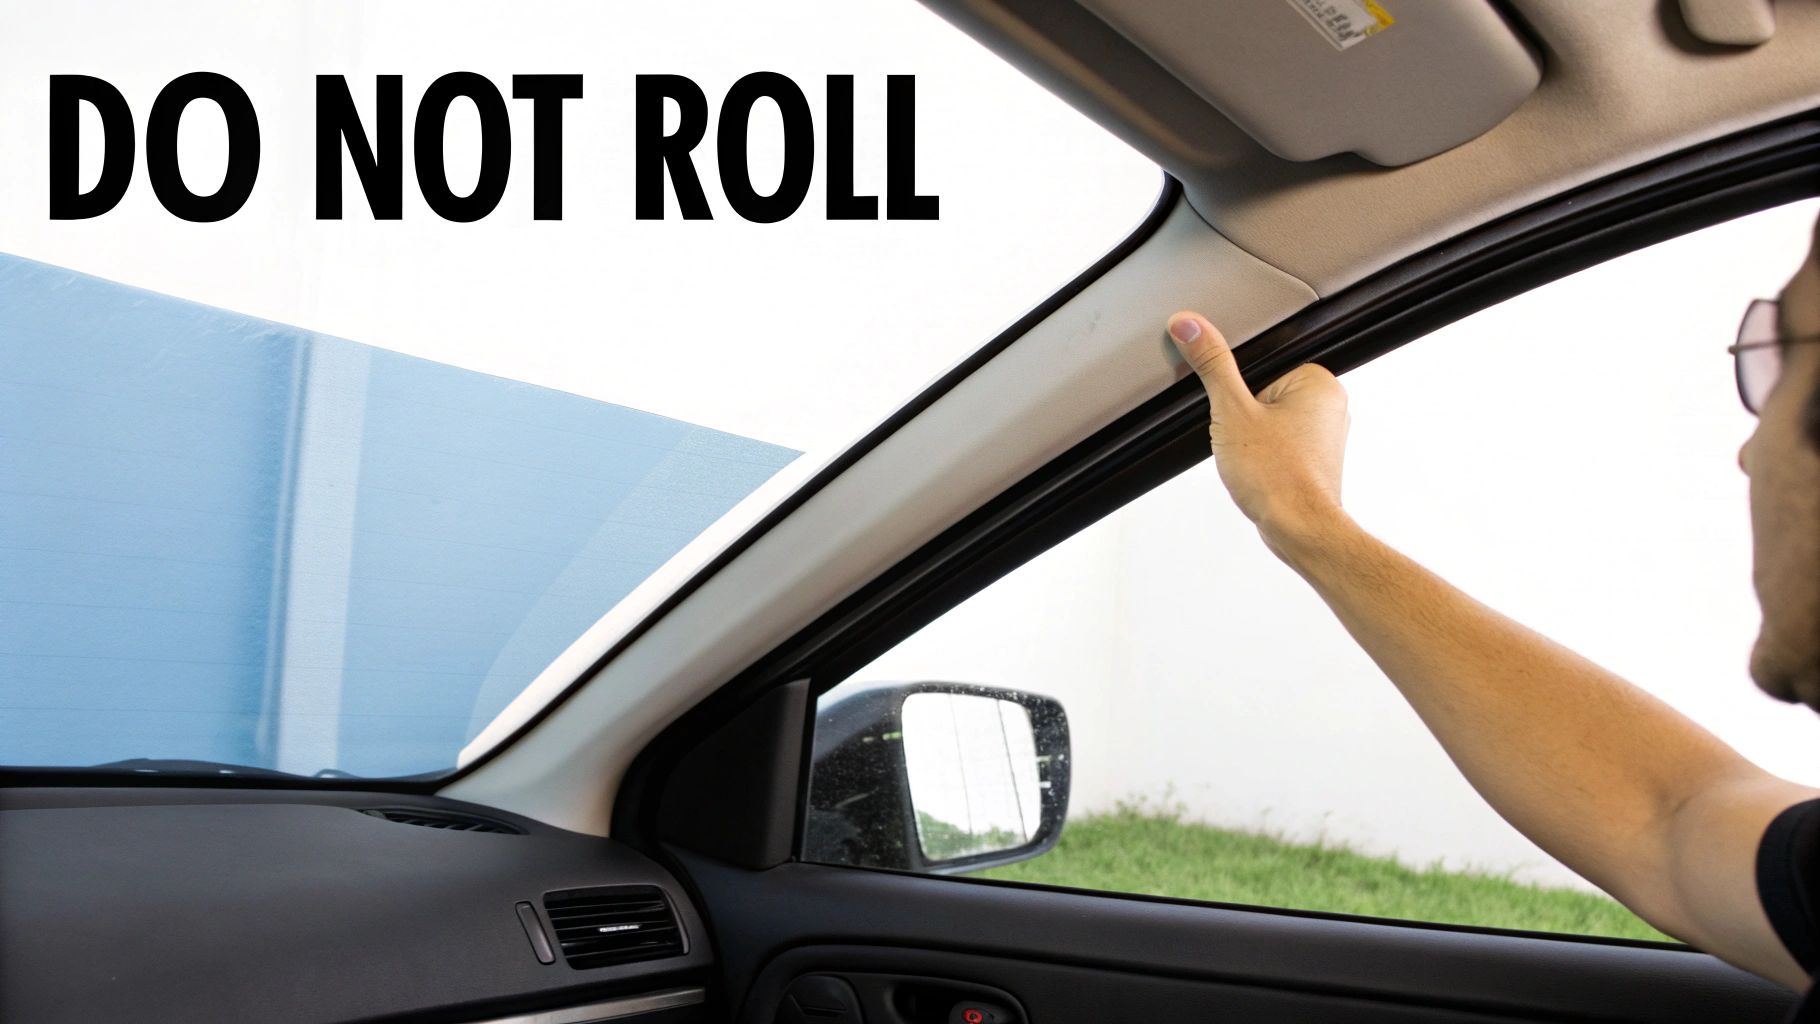
The cardinal rule is simple: Do not roll down your windows. This is, without a doubt, the most common and costly mistake we see. Rolling a window down even once can catch the soft, uncured edge of the film, causing it to peel and instantly ruining a perfect installation.
This initial 24-72 hours is the most critical no-roll-down window. Sticking to this prevents the vast majority of edge-peeling issues. In fact, many professional detailers agree that a huge percentage of tint failures come from people getting impatient and rolling down the windows too soon. You can read more installer insights about this critical waiting period on sundownwindowtint.com.
Here are the other vital rules to live by for the first week or so:
Avoid All Cleaning: Don't wash or even wipe the inside of your tinted windows for at least a week. The film is still pliable, and any pressure can cause it to shift or lift.
Say No to Ammonia: When it’s finally time to clean, never use ammonia-based cleaners like Windex. Ammonia will eat away at the tint's adhesive and can cause ugly discoloration over time. A simple mix of mild soap and water with a soft microfiber cloth is all you need.
Skip the Automatic Car Wash: Those high-pressure water jets are a nightmare for new tint. They can easily blast the edges of the film, forcing water underneath and causing it to peel. Hand wash your car for the first week and tell the washer to be careful around the windows.
Remove Suction Cups: That phone mount, GPS holder, or dash cam you love? Keep it off the tinted glass for now. The suction can pull the film away from the glass, creating permanent air bubbles that you can't get rid of.
If you have any questions about caring for your new tint or want to explore your options, our team is always ready to help. You can easily get a quote for professional mobile window tinting services right here. Follow these simple guidelines, and you'll ensure your tint cures perfectly, protecting your car and your investment for the long haul.
How to Know When Your Window Tint Is Fully Cured
So, you’ve patiently waited, but how can you be sure the tint has finally finished curing? The great news is you don’t need any special equipment to figure it out. A quick visual inspection is all it takes to see if the adhesive has made a permanent bond with the glass.
Knowing what a professionally finished job is supposed to look like is key. It lets you confidently assess the final quality and make sure you got the fantastic results you paid for.
The Three Signs of a Perfect Cure
After the recommended curing period is over, your tint should have a few distinct qualities. Think of these as the green light, signaling that all the application moisture has evaporated and the bond is set for good.
Here’s what you should see:
Perfect Optical Clarity: The slight haze or fogginess that was there initially should be completely gone. When you look through the glass, your view should be crisp and crystal-clear, with no lingering cloudiness.
No More Water Pockets: Remember those tiny moisture bubbles from the first few days? They should have vanished without a trace, leaving the film perfectly flat and seamless against the window.
A Smooth, Uniform Finish: Gently run your fingers over the inside of the glass. The tint should feel totally smooth and bonded, with no bumps, texture, or imperfections.
Your tint is fully cured when it looks like it came from the factory—perfectly clear, completely smooth, and seamlessly bonded to the glass from edge to edge.
When to Contact Your Installer
It's really important to know the difference between normal curing quirks and genuine installation flaws. A little bit of haziness and a few small water pockets are temporary and expected to disappear. However, some problems are not part of the curing process and won’t go away on their own.
If you spot any of the following issues after the curing window has passed, it’s time to give your installer a call:
Large, persistent air bubbles that haven't shrunk
Noticeable creases or wrinkles in the film
Any peeling or lifting along the window edges
Visible contaminants like dust or hair trapped underneath the film
A quality installer will always stand behind their work. These are signs of a flawed application, not an incomplete cure, and they should be addressed so you can get the flawless finish you were promised.
Your Top Window Tint Curing Questions Answered
We get these questions all the time, and they're great ones to ask. After we've finished a mobile tint installation, you're left to watch the final curing stage happen. Here’s a quick rundown of what to expect and what to do.
Why Does My New Tint Look Hazy or Have Bubbles?
Seeing a bit of haziness or some small water pockets right after an install is completely normal, so don't worry! This is just the leftover moisture from the application solution that’s trapped between the film and the glass.
As the tint cures, this moisture will evaporate right through the pores of the film. Once it’s gone, your windows will be crystal clear.
Is It Safe to Wash My Car After Getting It Tinted?
You can wash the outside of your car anytime, but it’s smart to wait 3-5 days before washing the inside of the windows. When you do clean them, just use a soft microfiber cloth and an ammonia-free cleaner.
If you're taking it to a car wash, it's best to wait a few days. Ask them to be gentle and avoid blasting the edges of the windows with a high-pressure sprayer, which could lift the film before it's fully bonded.
What if I Accidentally Roll My Window Down Too Soon?
It happens. The best thing to do is roll it back up slowly and carefully right away.
Take a close look at the top edge of the tint. If you see any signs that it has peeled, creased, or lifted, give your installer a call. It's often a simple fix if caught early.
Pro Tip: The best thing you can do to help your tint cure faster is to park your car in the sun. The solar heat warms up the glass, which speeds up evaporation and helps the adhesive set firmly. Think of it as a natural, high-powered blow dryer.
For more deep dives into tinting and vehicle care, check out the expert articles on the Auto Renu Auto Glass LLC official blog.