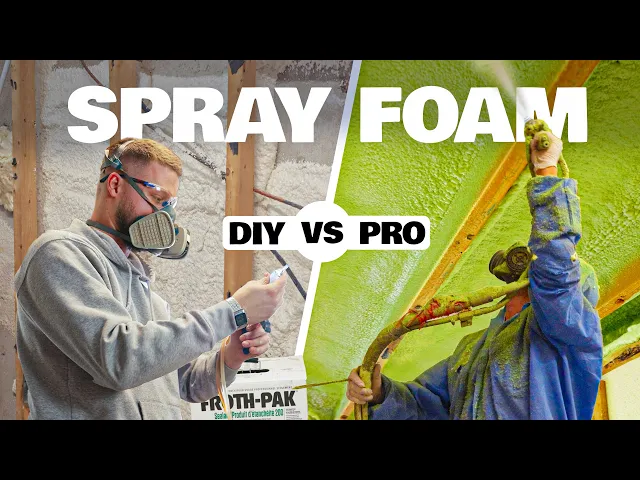
Your Guide to At Home Windshield Repair Done Right
Considering an at home windshield repair? This guide shows you how to assess damage, use a kit correctly, avoid common mistakes, and know when to call a pro.
Dec 19, 2025
generated
at home windshield repair, diy windshield repair, windshield chip repair, auto glass repair, car maintenance

We’ve all been there. You’re driving down the highway, minding your own business, and then BAM—a rock flies up and leaves its mark on your windshield. It’s a gut-wrenching sound.
The good news? For a lot of those smaller chips and dings, an at-home windshield repair is a surprisingly solid fix. It can save you a trip to the shop and a decent chunk of change, but it all starts with knowing what you’re looking at.
Can You Really Fix a Windshield Yourself?
When you spot that new, gleaming chip in your glass, the first question is always, "Can I fix this myself?" The short answer is yes, absolutely—but with some important caveats. A DIY repair kit can work wonders on minor damage, stopping a tiny problem from growing into a massive crack that screams "full replacement."
The trick is learning to read the damage. Not every chip is a candidate for a DIY job, and trying to fix the wrong kind of break can actually make things worse. A botched repair can fail later and often can't be redone by a professional, leaving you with no choice but a costly replacement.
Assessing the Damage for a DIY Repair
Before you run out and grab a repair kit, take a minute to play detective. You need to figure out if that chip is something you can realistically handle.
Here’s what to look for:
Size and Type: The best candidates for DIY are small, simple breaks. Think classic bullseyes (little circular dings) or star breaks (tiny cracks fanning out from one spot). A good rule of thumb is if you can cover the entire damaged area with a quarter, you're probably in the clear.
Location: This is a big one. If the chip is smack in the driver's line of sight, don't touch it. Even a perfect repair can leave a slight distortion, and you can't have anything messing with your view. Chips right at the edge of the windshield are also bad news for DIY, as they're under more stress and love to spread.
Depth: Run your finger over the chip on the inside of the windshield. If you can feel anything—any roughness or crack at all—the damage has gone through more than just the outer layer of glass. That’s too deep for a DIY kit and needs a pro, pronto.
Takeaway: Your success with an at-home windshield repair really comes down to this first step. Be honest with yourself. If the chip is too big, in a bad spot, or too complex, your smartest and safest move is to call a professional.
Alright, you've looked at the chip, and it seems like a good candidate for a DIY fix. It's time to get down to business. Let's be clear: a successful at home windshield repair is all about patience and being meticulous. If you rush this, you'll end up with a cloudy mess that doesn't hold, so make sure you've got a bit of time set aside to do it right.
The most important part of this whole process happens before you even touch the resin. The chip and the area around it have to be perfectly clean and bone dry. Any bit of dirt, dust, or moisture left behind will sabotage the repair, preventing the resin from making a solid bond with the glass. The result? A weak fix that sticks out like a sore thumb.
This flow chart gives you a quick visual on the decision-making process.
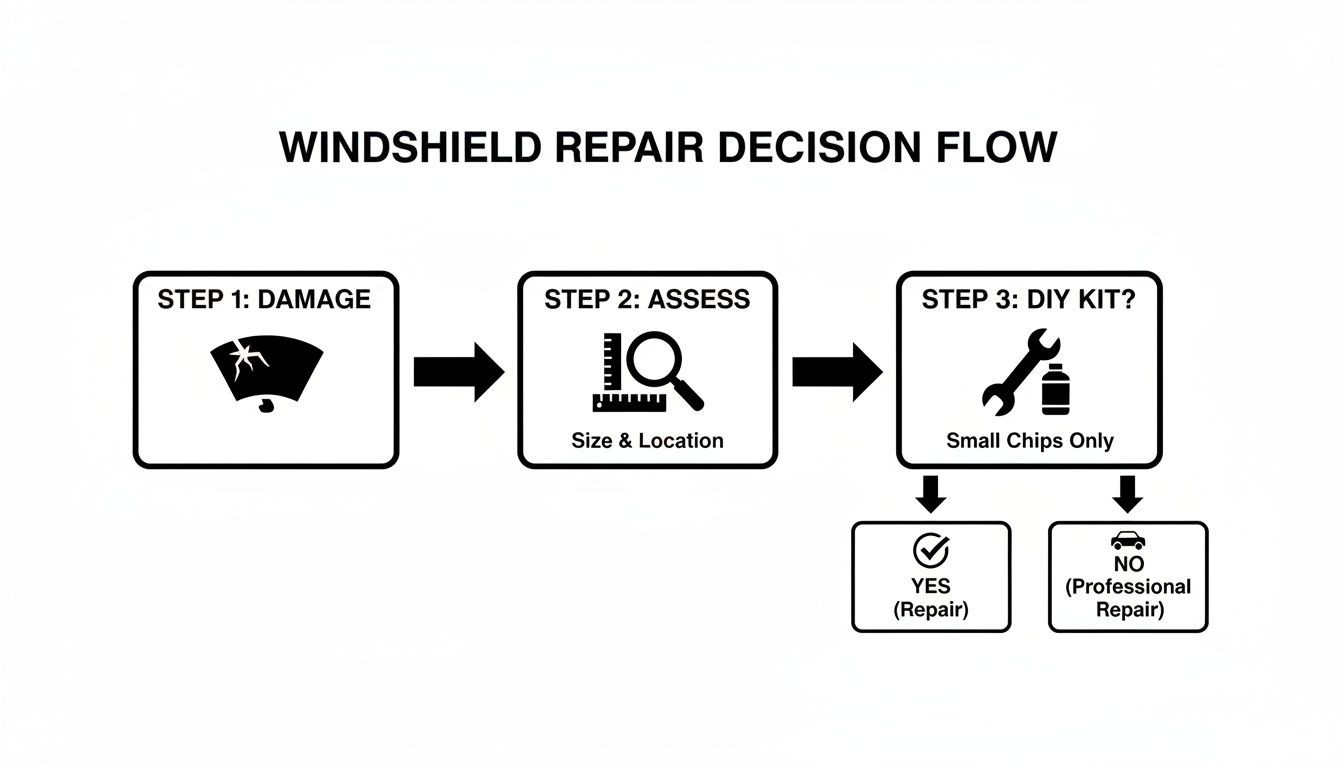
As you can see, everything starts with a good assessment. That first look tells you whether a DIY kit is even the right tool for the job.
Getting the Damaged Area Prepped
First things first, grab the pushpin that comes in most kits. Use it to gently—and I mean gently—pick out any little loose shards of glass from the point of impact. You’re not trying to dig a new hole, just cleaning out the debris. After that, take a clean cloth with a little rubbing alcohol and wipe down the surface to get rid of any road grime, wax, or oily residue.
Now, let it air dry completely. If you’re worried about moisture hiding deep in the crack (a common issue in humid weather), you can use a hairdryer on a low setting for a minute or so. You want that chip absolutely moisture-free.
Pro Tip: Try to avoid doing this in direct, blazing sunlight. The UV rays will make the resin cure way too fast, before it has a chance to seep into all the nooks and crannies of the chip. A cloudy day or a spot in the shade or garage is perfect.
Applying the Repair Resin
With a clean, dry surface, you're ready to set up the applicator. Most kits have a pedestal with suction cups that you'll center right over the chip. Make sure you press it down firmly to get a good, tight seal against the glass. This creates the vacuum you need.
Next, screw the resin chamber onto the pedestal and squeeze in the right amount of resin—the instructions will tell you how many drops, but it's usually between three and six. Then, you'll screw in the plunger. As you twist it, it forces the resin down into the chip under pressure, pushing out any trapped air.
Here’s a little trick I’ve learned that makes a big difference.
The Mirror Trick: Stick a small mirror on your dashboard, right under the chip. This lets you see the repair from the inside. You can actually watch the dark spots of the chip disappear as the clear resin fills every tiny crack. It's the best way to know it's working.
Once the resin is in, just let it sit. The kit will specify the time, but it’s usually around 5-10 minutes. This gives the resin enough time to work its way into the very deepest parts of the damage.
Curing the Resin for a Solid Bond
After the resin has had time to do its job, you can remove the whole applicator assembly. Don't wait around—immediately take one of the clear curing strips from the kit and place it flat over the fresh resin. Use the razor blade (also from the kit) to gently smooth it out and squeegee out any air bubbles.
Now it's time for the magic ingredient: ultraviolet (UV) light. If it's a sunny day, move the car out into the sun. If not, a UV flashlight will work just as well. This curing stage takes about 15 to 30 minutes in the sun. Don't cut this short. An under-cured repair is a weak repair, and it's bound to fail down the road.
Once it's fully hardened, take the razor blade and hold it at a steep angle to the glass. Carefully scrape away the excess resin and the curing strip. A few gentle passes should do the trick, leaving the surface totally smooth. And that's it—your at home windshield repair is done.
Common DIY Mistakes That Can Ruin Your Windshield
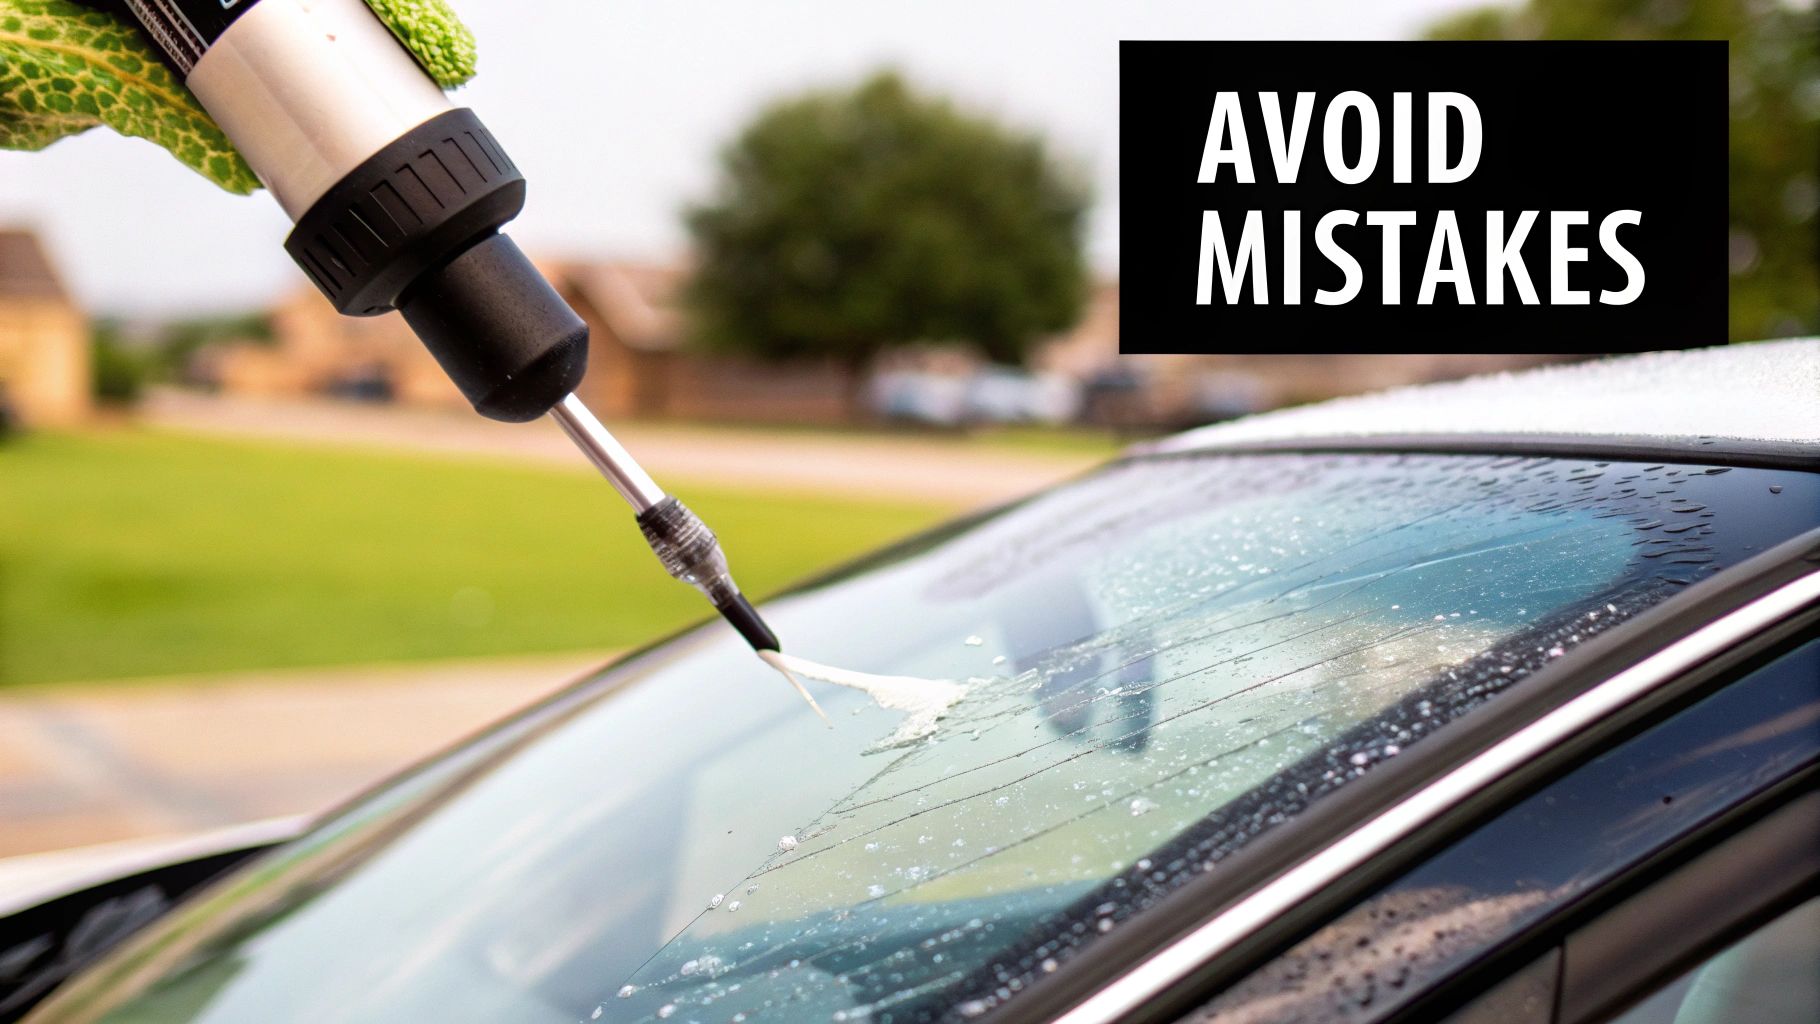
Even with the best DIY kit on the market, a simple at-home windshield repair can go sideways fast. I've seen it countless times—a small misstep turns a tiny chip into a permanent, ugly blemish or, even worse, a crack that spiders across the glass. Knowing what not to do is just as critical as following the instructions.
The number one mistake, hands down, is improper preparation. If you start with a chip that's even a little dirty, waxy, or damp, you're setting yourself up for failure. That repair resin needs to bond directly with clean, dry glass. Any contamination acts as a barrier, leading to a weak fix that will almost certainly give out when the temperature fluctuates.
Failing to Control Pressure and Temperature
Another pitfall is getting the pressure wrong when injecting the resin. It’s a delicate balance. If you don't apply enough pressure, you'll trap tiny air pockets inside the chip, leaving gaps and a weak spot. But if you go too far and apply too much pressure, you can actually stress the damaged glass and force the small cracks to spread. Just like that, your quick fix has become a major problem.
The weather is also a huge factor. Trying to do a repair in direct, hot sunlight is a bad idea; the resin can cure way too quickly, before it even has a chance to seep into all the nooks and crannies of the damage. On the flip side, working in cold or humid conditions can seriously slow down the curing process and trap moisture inside the repair, which compromises the final bond.
A good DIY repair is like a science experiment where you have to control all the variables. Rushing it or working in the wrong conditions almost guarantees a bad outcome, often leaving a hazy spot that you can't fix later.
Rushing the Final Curing Stage
Patience really is a virtue, especially when it comes to the final step. One of the most common blunders is not letting the resin cure completely. After you place the curing strip over the resin, it needs enough time with UV light—either from the sun or a special lamp—to harden into a strong, permanent repair.
Here’s where things can go wrong:
Incomplete Curing: If you peel off that strip too soon, you're left with a soft, tacky mess that will just wash away or collect dirt, creating a cloudy blemish.
Not Enough UV: On an overcast day, the sun might not be strong enough. You’ll likely need to leave the curing strip on for much longer than the box says to get a full cure.
Scraping Too Early: If you try to scrape off the excess resin before it's rock-hard, you can literally pull the uncured resin right back out of the chip, undoing all your work.
Think of it this way: the liquid resin fills the void, but it’s the UV light that triggers the chemical reaction to turn that filler into something as solid as glass. If you rush that process, you end up with a failed repair that can't be redone. These common mistakes are precisely why so many people end up calling a professional who has the right tools and experience to guarantee a flawless, lasting result every single time.
Knowing When to Skip the DIY Windshield Repair
A good DIY windshield repair kit can feel like a magic bullet for small chips, and often it is. It's a fantastic, cost-effective fix. But the real expertise isn't in applying the resin; it's in knowing when to put the kit down and call a pro.
Pushing a home repair beyond its limits is a recipe for disaster. Not only will the fix likely fail, but you can also make the damage worse, turning a simple repair job into a mandatory and much more expensive replacement. Recognizing these boundaries from the get-go is the most critical part of the whole process.
Size and Location: The Dealbreakers
So, what are the hard-and-fast rules? It really comes down to two things: size and location.
First, grab a quarter. If the chip or bullseye is bigger than that coin, a DIY kit just isn't up to the task. The resin won't be able to properly penetrate and bond such a large area, leaving the windshield's structural integrity compromised. The same goes for cracks—if you're looking at a crack longer than 3 inches, it's out of DIY territory.
Second, consider where the damage is. Any chip or crack, no matter how small, that sits directly in the driver's line of sight is a job for a professional. Period. Even a perfectly executed home repair can leave a slight distortion or "water spot" effect. You absolutely cannot afford any visual obstruction that might interfere with your ability to see the road safely.
The ADAS Complication in Modern Cars
Cars today are packed with incredible technology, and a surprising amount of it lives right in your windshield. We're talking about Advanced Driver-Assistance Systems (ADAS). These are the brains behind features like lane-keeping assist, adaptive cruise control, and automatic emergency braking.
Those systems rely on cameras and sensors that are often mounted right behind the rearview mirror, looking through the glass. This is where a simple chip repair gets tricky.
Attempting to fix damage near these sophisticated components is a huge risk. If the resin alters the glass clarity or the repair process nudges a sensor even a fraction of a millimeter, it can throw the entire system out of whack. Critical safety features could fail to engage when you need them most.
Key Takeaway: If your car has ADAS features and the chip is anywhere near that central camera or sensor cluster, don't even think about a DIY repair. A professional is required to ensure these life-saving systems are working and properly recalibrated after the fact.
When a Full Replacement is the Only Answer
Sometimes, the damage is just too far gone for any kind of repair, DIY or professional. The windshield is a lost cause, and you're looking at a full replacement.
Here are the tell-tale signs:
Multiple Chips: A cluster of chips in one area has already weakened the glass significantly.
Deep Damage: The impact has gone through both layers of the laminated glass.
Edge Cracks: Any damage that starts at or reaches the edge of the windshield compromises its entire structure.
Trying to patch up this level of damage is a waste of time and money, and it gives you a false sense of security behind the wheel. When you see these signs, your next move should be to look into a professional windshield replacement. A compromised windshield just isn't worth the risk.
What to Expect From a Professional Mobile Repair
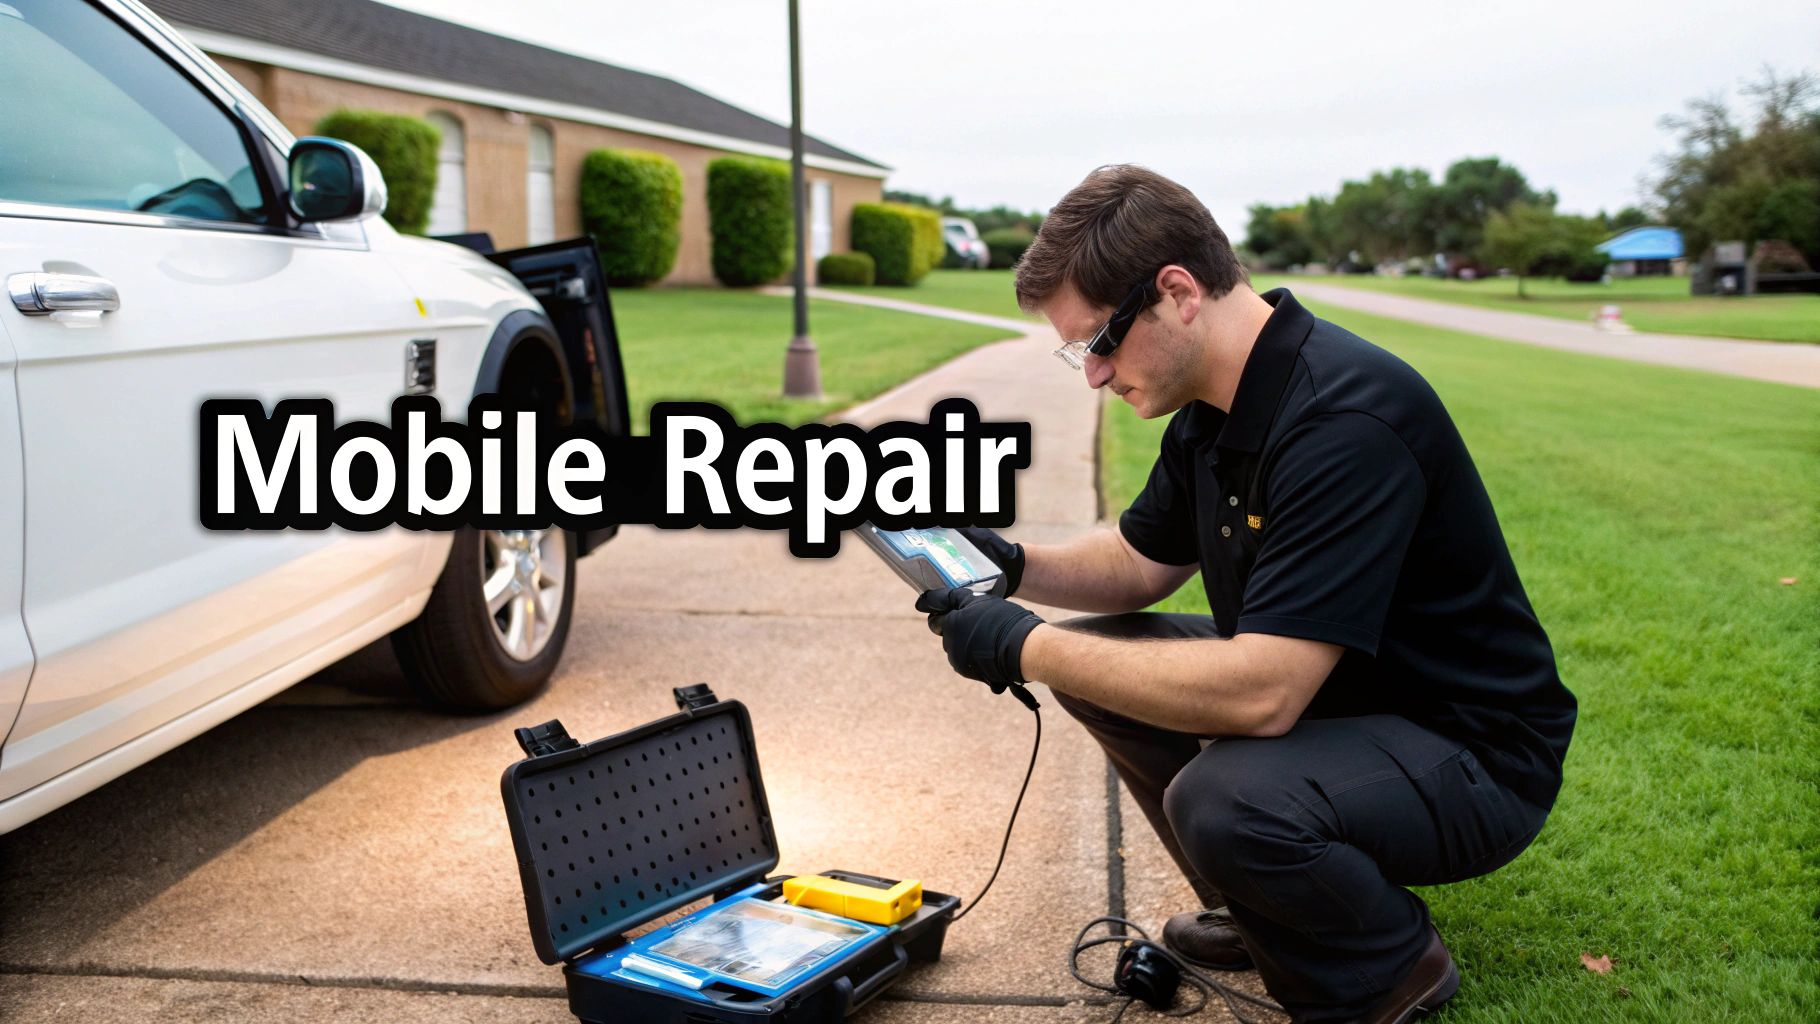
So, you’ve looked at the damage and decided it’s a job for the pros. That’s a smart call. Choosing a professional over a risky at-home windshield repair is the surest way to get a safe, long-lasting fix. But what actually happens when you make that call?
Bringing in a mobile service like Auto Renu Auto Glass LLC couldn't be easier. It’s a process designed to get you back on the road with as little fuss as possible.
Unlike a DIY project, a mobile pro brings the entire workshop right to your driveway or office parking lot. From the second you book the appointment, you’re plugging into a system built for convenience and precision. The technician shows up with everything needed to get the job done right.
Professional-Grade Equipment and Materials
The biggest gap between a DIY kit and a professional service comes down to the tools and resin. It’s a night-and-day difference. Those kits from the auto parts store offer a basic patch, but a professional uses advanced injection equipment.
This gear creates a powerful vacuum over the chip, sucking out every last bit of air and moisture. This step is critical because it allows the repair resin to flow deep into every nook and cranny of the crack, leaving no weak spots behind.
The resin itself is a different beast altogether. Professional-grade resins are engineered for incredible strength, optical clarity, and the durability to withstand years of temperature swings and road vibrations. The bond it creates restores your windshield’s structural integrity far more effectively than anything you can buy off the shelf.
Key Difference: A professional repair isn’t just about filling a hole. It's about restoring the windshield's strength, which is a key safety component of your vehicle. The equipment and resins are designed for a permanent, structurally sound solution.
The Technician and Warranty Advantage
When a certified technician arrives, you're getting more than just a pair of hands—you're getting their expertise. They have the experience to assess the damage accurately, make sure the repair happens under the right conditions, and handle any curveballs that might pop up.
Plus, a reputable company like ours delivers two massive benefits you just don't get with a DIY kit:
Insurance Handling: We can work directly with your insurance provider. This takes the headache out of the claims process and often means little to no out-of-pocket cost for you.
Lifetime Warranty: A professional repair should always come with a warranty. We guarantee that the repaired spot won't crack or spread for the life of the windshield, giving you total peace of mind.
This professional touch is absolutely essential for modern cars loaded with safety features. If a chip is anywhere near a camera or sensor, a pro knows exactly how to perform the repair without messing with your car's advanced technology. To learn more, check out our guide on the importance of ADAS windshield calibration here: https://www.autorenu911.com/blog/adas-windshield-calibration.
The market for DIY kits is definitely growing—it's projected to expand from USD 1.5 billion in 2024 toward USD 2.5 billion by 2034. This shows there’s a real demand for cheap fixes for tiny dings. But it also highlights just how important it is to know when that’s not enough.
When looking for a pro, you'll find that many reputable providers, including other professional glass company services, have a strong online presence to make booking and communication seamless. At the end of the day, choosing a professional service is an investment in a guaranteed, high-quality result that protects your vehicle and, more importantly, your safety.
Your Top DIY Windshield Repair Questions Answered
Even with the steps laid out, you probably still have a few questions rolling around in your head before you commit to a DIY windshield repair. That's completely normal. Getting these things sorted out is the best way to feel confident you're making the right call.
Let's dive into some of the most common questions I hear from people just like you.
How Long Does a DIY Windshield Repair Actually Last?
This is the big one, isn't it? The honest answer is that when you do it right, a DIY repair can absolutely last for the rest of your windshield's life. I've seen them hold up for years against brutal summer heat and jarring winter potholes.
The real difference-maker is the prep work. If you meticulously clean the chip, use a decent quality kit, and let that resin cure fully, you’re creating a permanent bond. Cut corners, though—like trying to fix a dirty chip or rushing the curing process—and that repair might fail in a few months, letting the crack start to spread all over again.
Can I Really Fix a Long Crack with One of These Kits?
Straight talk: No. Those kits you find at the auto parts store are designed for small stuff—bullseyes, star breaks, and combo chips that are no bigger than a quarter. They simply don't have the power or the right kind of resin to handle a long crack.
A crack longer than a few inches isn't just a cosmetic problem; it's a serious structural failure. Your windshield is a key safety component, helping to support the roof if you're ever in a rollover. Trying to patch a long crack with a DIY kit is a risky gamble that just isn't worth it. Damage like that needs a professional, period. You can see more about the types of damage we handle by checking out our windshield repair services.
A key thing to remember is that any repair is about restoring strength first and improving looks second. A solid repair will make the damage far less noticeable, but it’s not magic. Expect an 80-95% improvement in clarity, which is the industry standard for both DIY and pro repairs.
Will the Chip Completely Disappear After I Fix It?
It's super important to have the right expectations here. The main goal of filling a chip is to inject a strong resin that stops it from spreading and makes your windshield safe again.
While the repair will make the blemish way less obvious, it probably won't disappear completely. You'll likely still be able to see a faint spot or a slight outline where the resin filled the break, especially if you look for it. That's true even for professional repairs. The goal is a safe, structurally sound windshield, not a brand-new, off-the-factory-line piece of glass.