How to Remove Window Tint Without Damaging Your Glass
Learn how to remove window tint using proven DIY methods. Our guide covers heat guns, steamers, and other safe techniques to remove old film and sticky residue.
Jan 18, 2026
generated
how to remove window tint, diy tint removal, remove tint adhesive, car window tint, auto tint removal

So, you need to get that old window tint off your car. The basic idea is simple: peel off the film and then get rid of the sticky glue left behind. You can use heat, steam, or a few other tricks to get the job done.
Which method works best really depends on how old the tint is and what kind of shape it's in. But no matter which route you take, the real secret to a clean removal is patience and having the right tools on hand.
Why and When to Remove Old Window Tint
Before you jump in, it helps to understand why that old tint has to go. It's not just about looks; failing window film can turn into a real safety problem. Knowing what to look for will help you decide when it's time to tackle the job yourself or call in a pro.
Telltale Signs of Failing Tint
Sooner or later, your car's window film will start showing its age. Here are the classic signs that it's time for the tint to come off:
Bubbling and Blistering: This is the big one. Over time, heat and sunlight break down the adhesive, creating ugly air pockets between the film and the glass. Not only do these bubbles look awful, but they also block your view.
Peeling and Curling: You’ll see the edges of the tint starting to lift or curl up. This looks sloppy and lets dirt and moisture sneak underneath, making the problem even worse.
Color Fading and Turning Purple: Ever see a car with purple windows? That's a classic sign of cheap, dyed tint failing. As the dyes break down, the film loses its ability to block heat and UV rays, which was the whole point of having it in the first place.
Reduced Visibility: Old tint can get cloudy or hazy. This makes it tough to see clearly, especially at night or when it's raining, turning it into a serious safety issue that needs to be addressed right away.
Legal and Safety Considerations
Besides just looking bad, there are other important reasons to strip old tint. Tint laws are no joke, and they vary from state to state. If you bought a used car or moved, the tint on it might not be legal where you live, and that could lead to some hefty fines.
It’s always a good idea to know the rules. For a deep dive, you can check out our guide on car window tinting laws in California.
Given the risks of scratching the glass, it's no surprise that many people just hire a professional. In fact, the global window tint removal service market is expected to hit $2.72 billion by 2030. That tells you a lot of car owners would rather pay for an expert's touch. You can read more about these insights on the tint removal industry to see the trend for yourself.
Your Essential Toolkit For a Clean Removal
Trying to pull off window tint without the right gear is a recipe for a sticky, frustrating mess. I've seen it countless times—it's how a straightforward job turns into a weekend-long headache. The real secret to getting that film off without damaging your glass isn't about how hard you pull; it’s all about being prepared.
Gathering everything you need before you start is the most important step. It keeps you from scrambling for a tool midway through, which is when mistakes happen. Think of it as setting up your battle station for a clean, successful removal.
Protect Your Car’s Interior (And Yourself)
First things first, let's protect your car. The last thing you want is to trade tinted windows for a water-damaged door panel or a shorted-out speaker.
Cover Everything: Drape plastic sheeting or old drop cloths over your door panels, dashboard, and seats. Use painter's tape to hold them securely in place.
Absorb Spills: Have a good stack of old towels ready. I like to roll one up and tuck it tightly against the bottom of the window seal to create a dam that catches any runoff.
Safety First: Don't skip the personal safety gear. A simple pair of gloves will save your hands from getting caked in adhesive. And if you’re using the ammonia method, safety glasses and a respirator are an absolute must—that stuff is potent.
The Right Tools for the Job
Your specific tool list will change a bit depending on which removal method you choose, but a few items are non-negotiable for doing this right. Having these on hand means you’re ready whether the tint peels off like a dream or puts up a serious fight.
My Two Cents: Always start with a fresh pack of plastic razor blades. A dull blade just shreds the film and smears the glue around. A sharp one lifts the gunk off cleanly with less pressure, which is exactly what you want to avoid scratching the glass.
Here’s a look at the gear I make sure to have before starting any tint removal job.
Essential Toolkit for DIY Window Tint Removal
This table breaks down everything you'll need to be fully prepared. Having the right tool for each step makes all the difference between a professional-looking result and a DIY disaster.
Tool/Material | Purpose | Recommended For |
|---|---|---|
Heat Gun/Steamer | Heats and loosens the tint adhesive, letting the film peel off cleanly without tearing. | Heat and Steam methods |
Plastic Razor Blades | Safely scrapes away leftover adhesive from the glass without scratching it. | All methods |
Spray Bottle | Used to apply a soap and water solution, which acts as a lubricant and cleaning agent. | All methods |
Ammonia Cleaner | A strong chemical that breaks down old, stubborn adhesive, especially with heat from the sun. | Ammonia/Solar method |
Microfiber Towels | Perfect for cleaning the glass after removal for a crystal-clear, streak-free finish. | All methods |
#0000 Steel Wool | A last resort for the toughest adhesive spots. Use with extreme caution and lots of soapy water. | Final adhesive cleanup |
With all the gear laid out, you're set up for a much smoother process. This preparation is what separates a clean, satisfying peel from a sticky, frustrating battle.
After the film and glue are gone, the final touch is a meticulous cleaning. You didn't do all that work just to have a smudgy, hazy view. For pro-level tips on getting that perfectly clear finish, take a look at our guide on how to clean a windshield without streaks. It'll leave your glass looking like it just rolled off the factory line.
Using a Heat Gun for Quick Tint Removal
The heat-and-peel method is a classic for a reason—it's often the fastest way to get old, ugly window tint off your car. With a good heat gun (or even a powerful hairdryer in a pinch), you can soften the adhesive just enough to pull the film away from the glass. When you get it right, the entire sheet of tint comes off in one piece, taking most of that stubborn glue with it.
The secret sauce here is consistent, controlled heat. You aren't trying to cook the window, just warm it enough to make the adhesive let go. This technique works great on side windows, but you have to be extra careful on the rear windshield to avoid frying the delicate defroster lines.
Preparing for the Heat Method
Before you even think about plugging in your heat gun, a little prep work goes a long way. First, roll the window down about half an inch. This exposes the top edge of the tint and gives you a perfect place to start peeling once things get warm.
Next, protect your interior. Throw some old towels or a tarp over the door panel, seat, and console. Trust me on this one—as you peel, little bits of sticky adhesive can fall, and you don't want that gunk all over your upholstery.
Mastering the Heat Gun Technique
The goal is to apply heat evenly across the entire surface. Set your heat gun to a low or medium setting; you almost never need to crank it to high. Hold the gun about six to eight inches away from the glass and keep it moving in a smooth, sweeping motion, almost like you're spray painting.
Whatever you do, don't let the heat gun linger on one spot. Concentrated heat can melt the tint into a gooey mess or, in a worst-case scenario, create a thermal shock that cracks the glass. Keep it moving, focusing on one corner until you see the film just start to lift.
Pro Tip: Patience is your best friend here. It can take a minute or two of steady heating for the adhesive to release its death grip. If you rush it, the tint will tear, and you'll be left with a much bigger cleanup job.
The Art of the Perfect Peel
Once a corner starts to come up, use a plastic razor blade to gently pry the edge just enough to get a good grip with your fingers. Now for the most critical part of the whole process.
Pull the film slowly and steadily, keeping it at a low angle to the glass. As you pull, keep applying heat just ahead of where you're peeling. This creates a continuous "wave" of softened glue, which is the key to getting the film off in a single sheet. If you feel it start to fight you, stop pulling and give that spot a little more heat.
If the tint tears, don't panic. It happens all the time, especially with older, brittle film. Just go back to the torn edge, hit it with more heat, and use your plastic blade to get a new corner started.
The basic workflow for most tint removal methods is pretty similar. You have to protect your car, apply something to soften the adhesive, and then scrape away what's left.
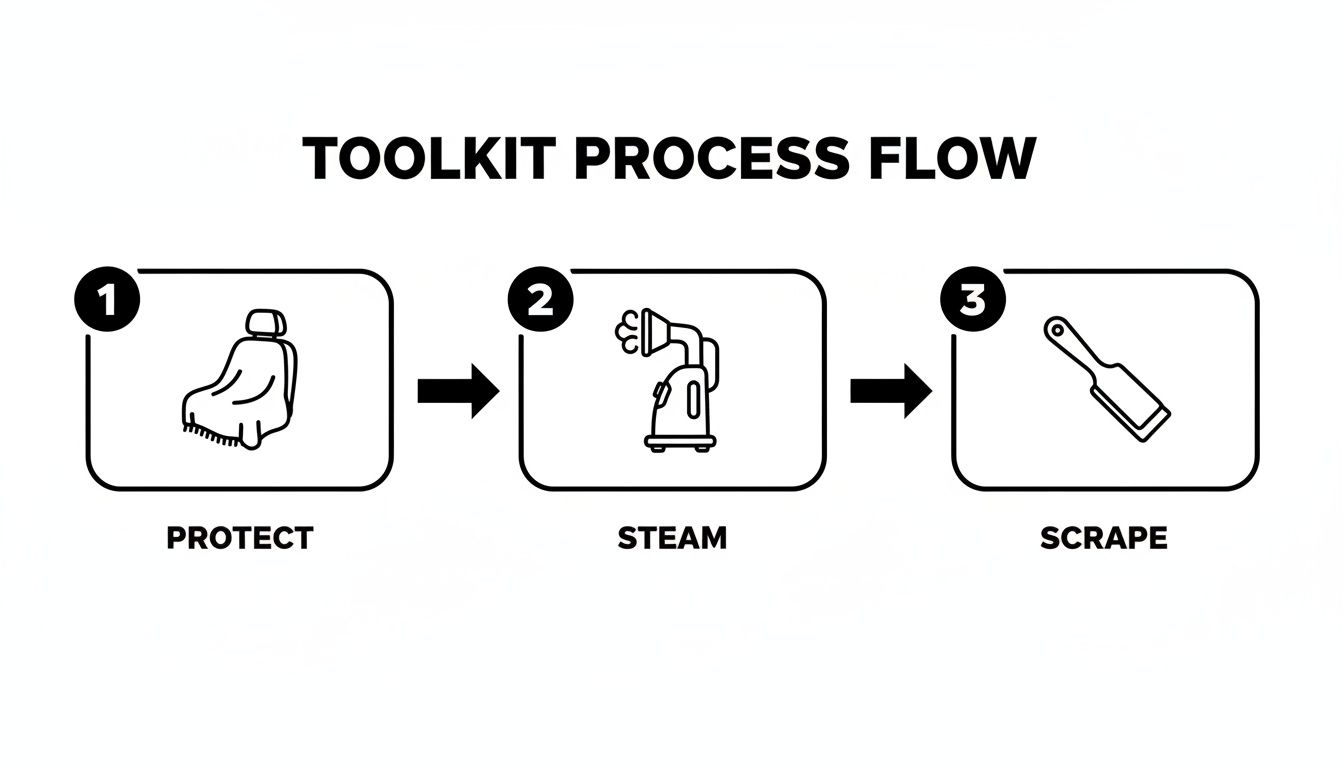
This image nails the core steps: protect your workspace, apply your removal agent (heat, in this case), and then carefully scrape away the remnants for a clean finish.
Cleaning Up the Leftover Adhesive
Even after a perfect peel, you’ll probably have some sticky residue left on the glass. This is totally normal. How much glue is left behind usually depends on the age and quality of the tint you just removed.
To tackle the cleanup, douse the window with a solution of soapy water. Grab a new, sharp plastic razor blade, hold it at a 45-degree angle, and start scraping. After every few passes, wipe the gunk off the blade with a paper towel to keep from smearing it around.
Once the worst of the glue is gone, follow these steps for a crystal-clear finish:
Spray the window down with an ammonia-free glass cleaner.
Use a non-abrasive scrubbing pad or a microfiber cloth to work on any stubborn sticky spots.
For really tough patches, a little bit of #0000 steel wool and soapy water can work wonders. Just be sure to test it on a small, hidden corner of the glass first to make sure it doesn't scratch.
Finally, give the window one last, thorough cleaning inside and out with your glass cleaner and a fresh microfiber towel. This final wipe-down gets rid of any smudges and ensures you have a perfectly clear view.
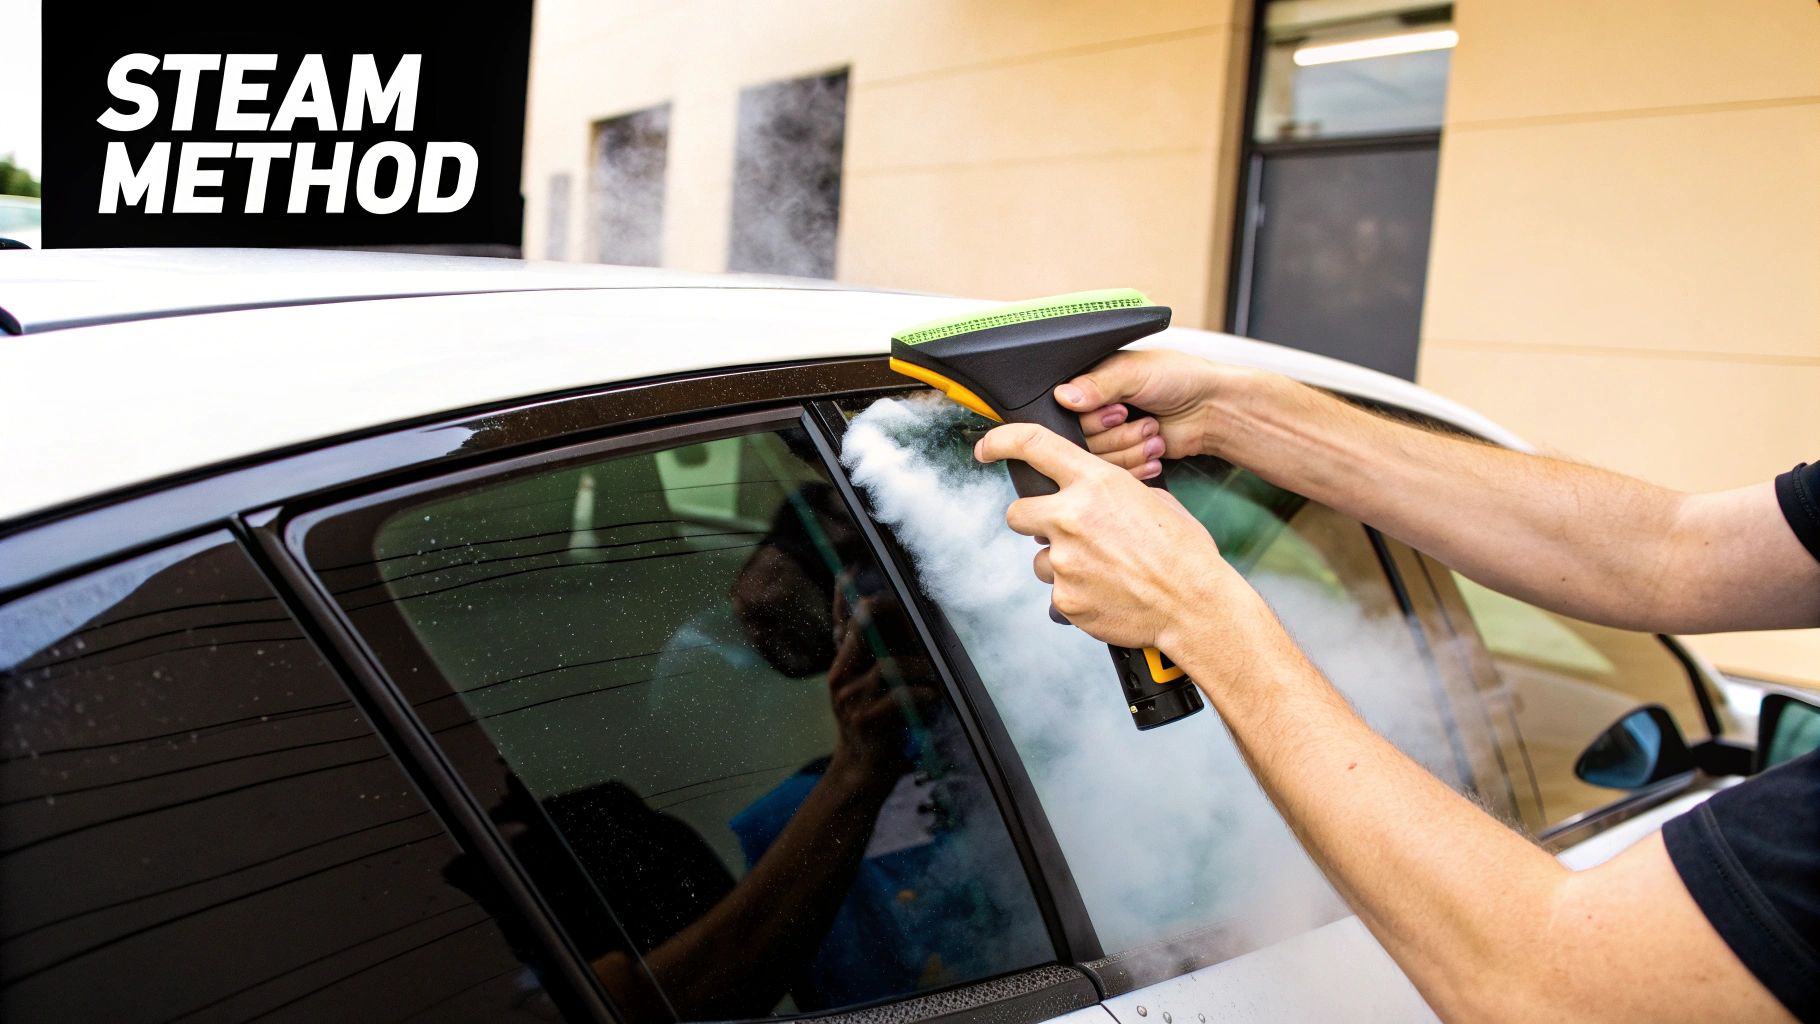
The Steamer Method for Delicate Windows
When you’re staring down a rear window with those fragile defroster lines, grabbing a high-powered heat gun can feel like a huge gamble. One slip-up, one second too long in one spot, and you could fry the grid. That turns a simple tint removal job into a costly replacement. This is exactly where a steamer comes in to save the day. Think of it as the gentler, more forgiving cousin to the heat gun.
A fabric steamer provides a soft, diffused heat that works wonders on old, stubborn adhesive without creating intense hot spots that can damage glass or those delicate lines. The warm moisture gets deep into the film, slowly breaking down the glue's bond. It’s a method that rewards patience and finesse over brute force, making it the go-to choice for preserving those crucial defroster lines and avoiding a DIY disaster.
Setting Up for a Steam-Powered Removal
Before you even think about plugging in that steamer, you need to prep your car. Steam means moisture, and the last thing you want is water seeping into your door panels or soaking your seats.
Protect Your Interior: Just like you would for any other method, get comprehensive with your coverage. Use plastic sheeting and painter's tape to completely seal off door panels, speakers, and anything else below the window.
Create a Water Barrier: This is a simple but effective trick. Roll up an old towel and stuff it firmly into the crevice at the bottom of the window gasket. It'll act as a mini dam, catching all the water that runs down.
Prep the Steamer: Fill your steamer, using distilled water if you have it. It helps prevent mineral buildup in the machine and on your glass. Let it get fully heated and ready to produce a steady stream of steam before you start.
Applying Steam for a Flawless Peel
With your interior protected and the steamer hissing, it's time to get to work. Hold the steamer nozzle about one to two inches from the glass, blanketing the surface in a consistent cloud of hot steam.
Don't try to tackle the whole window at once. Work in small, manageable sections, moving the steamer slowly and methodically. You’ll see condensation building up—that’s a good sign. It means the heat and moisture are doing their job on the adhesive. I always like to focus on one corner first, giving it a bit of extra steam until I see the film start to lift on its own.
Expert Insight: The real difference between a heat gun and a steamer is control. Steam heats a wider area more gently, which dramatically cuts down the risk of thermal shock that can crack glass. Yes, it takes more time, but that's a small price to pay for a much higher degree of safety, especially if you're new to this.
The Gentle Art of the Steam Peel
Once you've got a corner loose, you can gently get a plastic razor blade under it to lift an edge you can grab. This is where the beauty of the steamer method really shines.
Start peeling the tint back, but do it slowly. As you pull, keep applying steam right at the peel line—the spot where the film is separating from the glass. This continuous blast of warm moisture keeps the adhesive soft and gummy, encouraging the tint to come off in one clean sheet. If you hit a stubborn spot, don't just yank on it. Pause, hit that specific area with more steam for 10-15 seconds, and then try peeling again.
Handling Rear Window Defroster Lines
The rear window is where this method really proves its worth. Those orange or brown lines are incredibly fragile and can be scraped off or broken with very little effort. When you're working on the back glass, these two rules are non-negotiable:
Always Peel Vertically: Pull the film straight down or straight up, perfectly parallel with the defroster lines. Never pull sideways. That sideways motion puts a ton of stress on the lines and is the number one way people break them.
Avoid Scraping at All Costs: Seriously. Let the steam do the heavy lifting. If you absolutely must use a scraper to get some leftover glue, only use a plastic one and move it gently in the same direction as the lines—never across them.
Final Cleanup After Steaming
Even with a perfect peel, you'll probably have some sticky residue left behind. The good news is the steam has already softened it up for you, so the final cleanup is much easier.
Give the window a good spray with some soapy water. Then, take a fresh plastic razor blade and gently scrape away what's left. On the rear window, remember the golden rule: only scrape parallel to the defroster lines.
Finish the job with a quality ammonia-free glass cleaner and a clean microfiber towel. This last wipe-down will remove any smudges and leave you with a crystal-clear, damage-free window that looks like it just came from the factory.
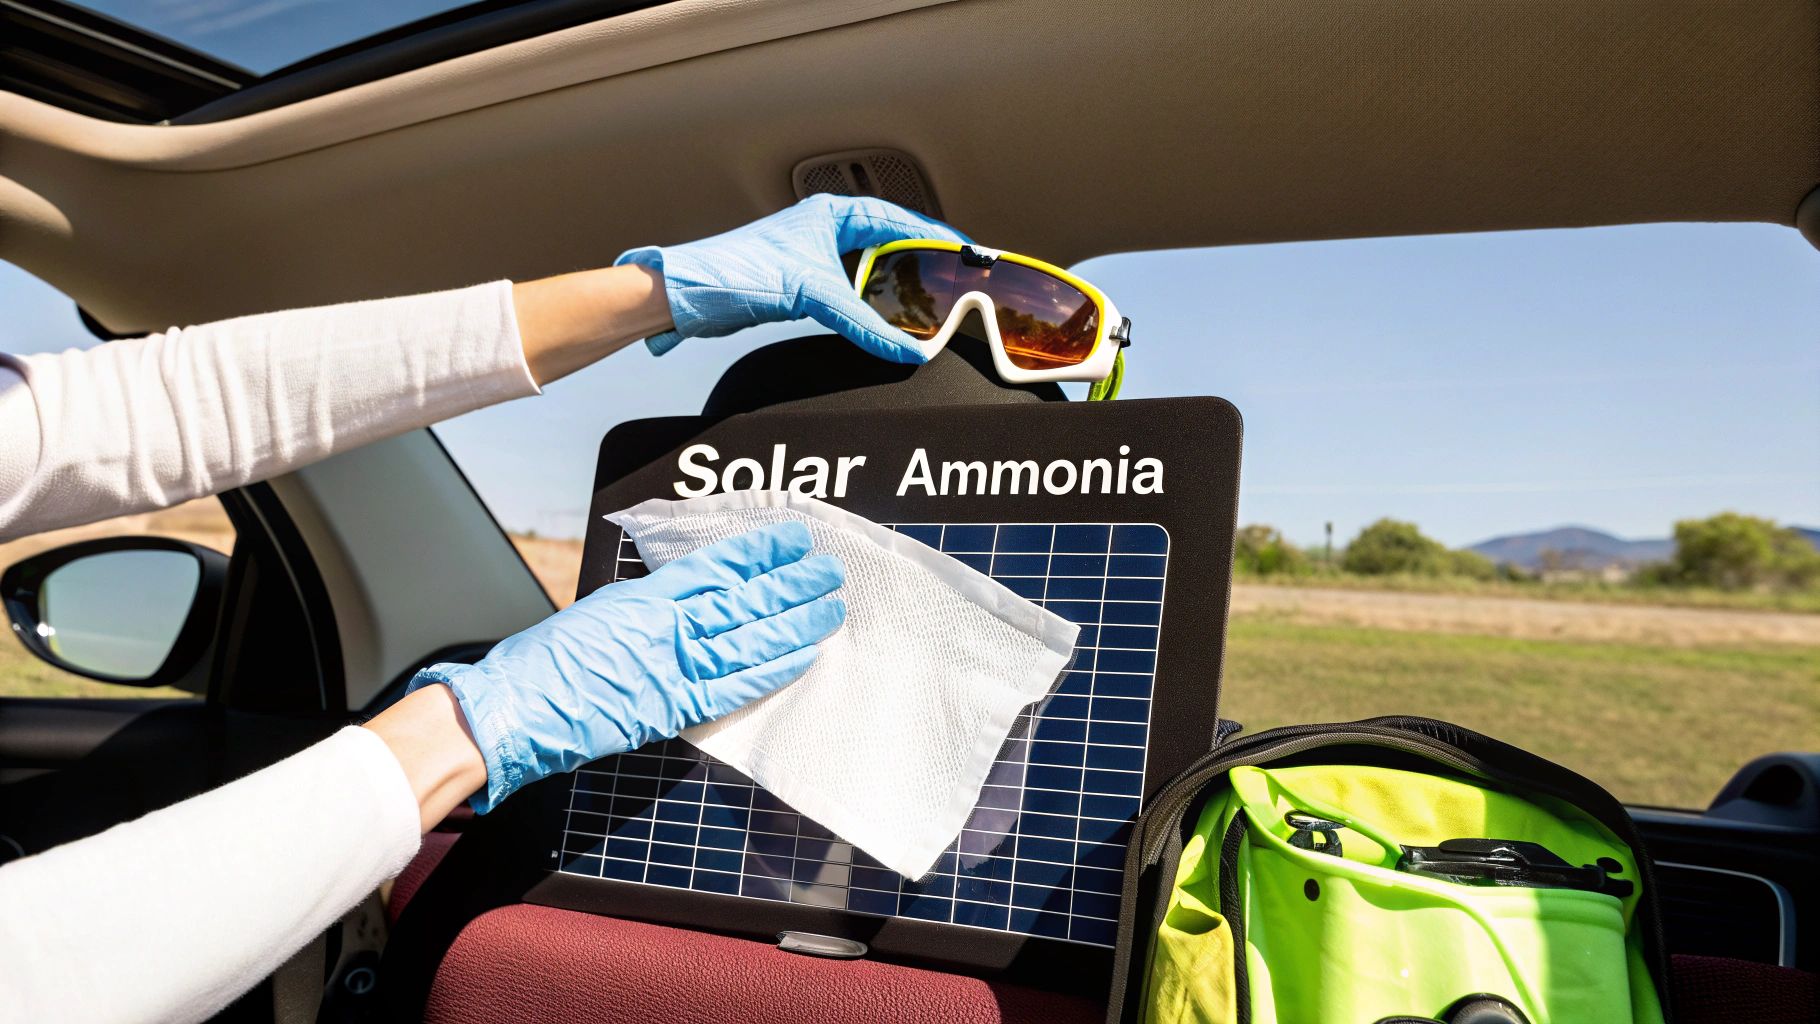
When the Tint Won't Budge: The Ammonia and Solar Heat Trick
Sometimes, a heat gun or steamer just isn't enough for that old, baked-on tint that's been fused to the glass for a decade. When you're dealing with a truly stubborn film, it's time to bring out the big guns: the ammonia and solar bag method.
This is a powerful technique that uses a chemical reaction, supercharged by the sun, to break down the most resilient adhesives. It’s incredibly effective, but I'll be blunt: this one comes with a serious warning label. You're working with potent chemicals, so safety is absolutely non-negotiable. This is a job for a confident DIYer who takes safety protocols seriously. If you're hesitant, it's better to call a pro.
Why This Method Is a Game-Changer
What makes this trick work so well is simple chemistry. Ammonia is a potent solvent that aggressively dissolves the polymers in old tint adhesive. When you add heat to the equation, that chemical reaction goes into overdrive.
By taping a black trash bag to the window, you essentially create a small greenhouse. The black plastic absorbs the sun's rays, trapping heat and ammonia fumes right against the glass. This hot, humid environment forces the ammonia to seep into the film and completely liquefy the glue's bond, often turning it into a gooey, gel-like mess that’s surprisingly easy to clean up.
Safety First: Your Non-Negotiable Checklist
Ammonia fumes are no joke—they're caustic and dangerous to inhale. Before you even think about opening the bottle, get your workspace set up for safety.
Fresh Air is a Must: Only do this outside or in a garage with the main door wide open. You need constant airflow to dissipate the fumes.
Gear Up (PPE): This isn't optional. You need chemical-resistant gloves, full-coverage safety goggles, and a respirator rated for ammonia vapors.
Protect Your Interior: Ammonia can easily bleach or ruin upholstery, plastic trim, and vinyl. Be meticulous here—cover every nearby interior surface with thick plastic sheeting and tape it down securely.
Critical Safety Warning: Never, ever mix ammonia with bleach or any cleaner containing chlorine. The combination creates highly toxic chloramine gas, which can be fatal. Stick to using only pure ammonia for this job and a separate soap-and-water solution for cleanup.
How to Pull Off the Solar Bag Technique
Once you're geared up and your car's interior is shielded, you’re ready to go. The best time for this is a warm, sunny day where the sun can do most of the heavy lifting.
Start by cutting a black trash bag to roughly the shape of the window, leaving a few extra inches all around. Spray the outside of the window with soapy water—this just helps the bag cling to the glass. Press your cut bag onto the wet exterior and smooth out any air bubbles. Think of this as your solar oven.
Now, move to the inside of the car. Liberally spray the tinted side of the window with your ammonia solution until it's completely soaked. While it's still dripping wet, press another trash bag against the glass on the inside. This bag's job is to trap the ammonia fumes against the tint.
All that's left is to park the car in direct sunlight and wait. Depending on how hot the sun is and how old the tint is, this can take anywhere from one to two hours.
After letting it bake, open the car doors to air it out before removing the inner trash bag. The tint and adhesive should now be soft and loose. Use a plastic razor blade to carefully lift a corner, and with any luck, the film will peel off in one big sheet. The remaining softened gunk can be scraped away with the plastic blade and cleaned up with some #0000 steel wool and soapy water.
This focus on careful scraping and protecting the glass is similar to methods for safely removing other stubborn coatings like paint from windows, which also prioritize the integrity of the glass above all else.
Knowing When to Throw in the Towel and Call a Pro
There's a great sense of accomplishment in a DIY job done right. But when you’re dealing with window tint removal, the line between a satisfying project and a costly mistake can be razor-thin. Sometimes, the smartest move is knowing when to hang it up and call in someone with experience.
The tint itself can be the first warning sign. If the film is ancient and baked on, it won't peel off in nice, satisfying sheets. Instead, it'll likely splinter into a million tiny, frustrating pieces. A simple peeling job suddenly becomes an hours-long battle of scraping, with each movement risking a permanent scratch on your glass.
The Rear Defroster Minefield
For most people, the real make-or-break moment comes at the rear windshield. Those little orange defroster lines are incredibly delicate. One slip of a razor blade or a little too much focused heat, and you can easily sever a connection. Just like that, your defroster is toast, and the only fix is an expensive new rear windshield.
If you have even a shadow of a doubt about tackling the rear window, stop. The risk of ruining your defroster grid is just too high. Professionals have the right tools and a light touch honed by years of practice to navigate this area safely.
The Upside of Hiring an Expert
Opting for a professional isn't admitting defeat—it's making a smart call to protect your car. The tint removal business is surprisingly specialized, with small, expert shops making up about 75% of the market. These technicians have seen it all and removed it all.
The benefits of going with a pro are pretty clear:
Pro-Grade Gear: They come equipped with commercial steamers and specialized tools that are far more powerful and effective than anything you can buy at the store.
Time Is Money: A removal that might eat up your entire weekend could be done by a professional in just a couple of hours.
Guaranteed Outcome: Reputable installers stand by their work. You get a clean, adhesive-free result without any damage, and they're insured in the rare case something goes wrong.
If the job looks too tough or you simply want the assurance of a perfect finish, checking out mobile window tint services is a great, convenient option. This same logic applies to other complex glass care, and it’s helpful to know when to call a professional window washing company for other big projects.
Got Questions About Window Tint Removal? We've Got Answers.
Even the best-laid plans hit a snag. When you're peeling old, faded tint off your car, questions are bound to come up. Getting the right answers before you start can be the difference between a clean, satisfying job and a complete disaster. Let's dig into the common worries and "what-ifs" I hear all the time.
Knowing what tools to use—and more importantly, what not to use—is half the battle right there. It's tempting to grab whatever is in the garage, but that can be a costly shortcut.
Can I Use a Metal Razor Blade on My Car Windows?
That's a hard no. Avoid metal razor blades at all costs. It's just too easy to slip and gouge the glass, leaving a permanent scratch that will mock you forever. On a tempered side or rear window, a deep scratch creates a stress point, making the glass far more likely to shatter from a sudden temperature change or even just road vibration.
Stick with plastic razor blades. They have enough of an edge to get under that stubborn old adhesive without being hard enough to damage the glass itself. For the really tough, baked-on spots, a fresh plastic blade and a little soapy water for lubrication will work wonders.
How Do I Keep From Wrecking My Rear Defroster Lines?
This is where things get serious. Those little orange lines on your back glass are incredibly fragile, and one wrong move can kill them for good. Your absolute best friend here is the fabric steamer method. It uses gentle, even heat that softens the tint and adhesive without concentrating enough heat in one spot to fry the delicate electrical grid.
When it's time to peel, remember this one critical rule: always pull parallel to the lines. That means pulling straight up or straight down—never sideways. Pulling across them creates a shearing force that can easily snap those thin connections. If you find you have to scrape a bit, only use a plastic blade and, again, only move it in the same direction as the lines.
If you're feeling even the slightest bit nervous about the rear window, this is the one part of the job I'd strongly recommend leaving to a professional. The cost of hiring a pro is a drop in the bucket compared to replacing an entire rear windshield.
What’s the Best Way to Get Rid of All That Leftover Glue?
Ah, the dreaded glue residue. That sticky, gooey mess is the most common headache you'll run into. The secret isn't brute force; it's softening the adhesive before you even think about scraping.
Start by generously spraying the whole area with either soapy water or a good citrus-based adhesive remover. Don't be shy with it. Let that solution sit and soak for a few minutes; you need to give it time to work its magic and break down the glue's bond with the glass. This simple bit of patience makes scraping the gunk off with a new plastic razor blade a hundred times easier.
After you've scraped off the last of the residue, grab a clean microfiber towel and an ammonia-free glass cleaner to get the surface perfectly clear. For that super-baked-on stuff that just won’t quit, you can carefully use a small piece of #0000 steel wool with plenty of soapy water, but make sure you test it on a tiny, hidden corner first to be certain it won't leave any micro-scratches.
Working through these challenges can be tricky, but you don't have to go it alone. If you've hit a wall or just want a perfect, hassle-free finish, Auto Renu Auto Glass LLC is here to help. Our mobile experts come right to you, delivering professional tint removal and installation with the quality you'd expect from a dealership. Learn more about our mobile services today!