Your Guide to Replace a Windshield Safely
Learn how to replace a windshield with our expert guide. We cover damage assessment, insurance claims, ADAS recalibration, and crucial aftercare tips.
Nov 13, 2025
generated
replace a windshield, windshield replacement, auto glass repair, ADAS recalibration, car safety

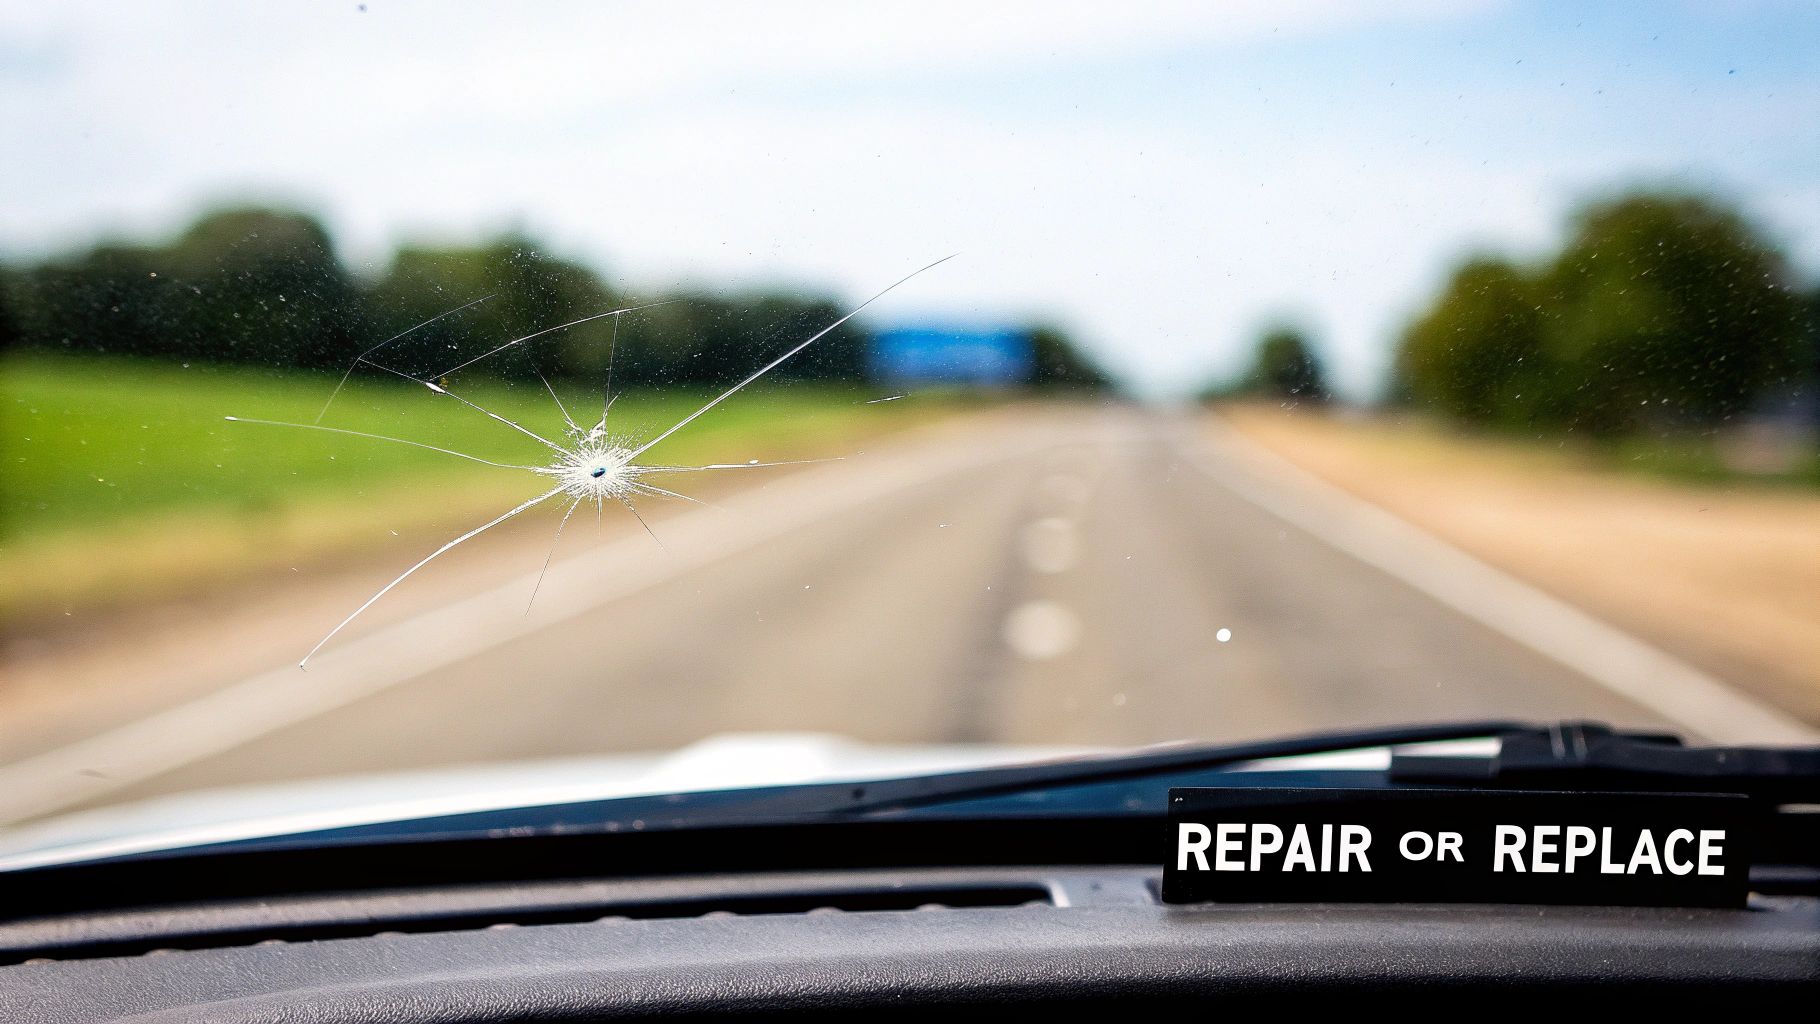
When that rock hits your windshield, it's easy to think, "It's just a small chip, I'll deal with it later." But in my experience, that's often when the real trouble starts. The decision to repair or replace isn't just about looks; it's a critical safety call.
Understanding what you're looking at is the first step. Small chips far from your line of sight are often simple fixes, but once a crack starts to run, or if the damage is right in front of you, a full replacement is almost always the only safe option.
Assessing Windshield Damage for a Replacement
Think of your windshield as more than just a window. It's a key part of your car's safety system. In modern vehicles, the windshield provides up to 60% of the cabin's structural strength in a rollover. Driving around with a compromised windshield is like ignoring a warning light on your dashboard—you're taking a serious risk.
That little chip you're ignoring? It’s a weak spot. Road vibrations, a sudden temperature change from using your defroster, or even hitting a pothole can cause that chip to spread into a massive crack in an instant.
Windshield Damage Assessment Guide
Sometimes, it’s tough to know whether you need a quick fix or a brand-new windshield. This table breaks down the common factors we look at to help you make a quick, informed decision.
Damage Type | Size Guideline | Location Concern | Recommended Action |
|---|---|---|---|
Chip / Bull's-eye | Smaller than a quarter | Outside the driver's direct line of sight | Likely Repairable |
Star Break | Longer than 3 inches | Anywhere on the glass | Replacement Recommended |
Crack | Longer than 6 inches (a dollar bill) | Anywhere on the glass, especially if it starts from an edge | Almost always a Replacement |
Multiple Chips | 3 or more chips | Scattered across the glass | Replacement is often safer and more cost-effective |
Any Damage | Any size | In the driver's direct line of sight or over an ADAS sensor | Immediate Replacement required for safety |
Ultimately, a professional inspection is the only way to be certain. But if your damage falls into the "Replacement" category, it's best to act quickly to keep your vehicle safe.
Damage Size and Location Matter Most
You've probably heard the "dollar bill rule"—if the damage fits under a dollar bill, it can be repaired. It’s a decent starting point, but it's not the whole story. Location is just as, if not more, important.
A tiny chip directly in the driver's line of sight is a guaranteed replacement. Why? Because even the best repair can leave a slight distortion, and that's a dangerous distraction you don't want when you're on the highway. We cover the specifics of what makes for a good repair candidate in our guide on professional windshield repair services.
Identifying Different Crack Types
Knowing the lingo helps you understand what the technician is telling you. Cracks aren't all the same, and their type often dictates the solution.
Star Break: Looks just like it sounds—a central impact point with small cracks radiating outward. These can be tricky.
Combination Break: A mix of a circular bull's-eye with the radiating cracks of a star break. This complex damage is often too unstable to repair reliably.
Edge Cracks: These are the most dangerous. A crack that starts at the edge of the windshield can compromise the entire structure very quickly.
A cracked windshield isn't just a structural problem; it can also cause your airbags to fail. The passenger-side airbag is designed to bounce off the windshield to protect the person in that seat. A damaged or poorly installed windshield can shatter on impact, preventing the airbag from deploying correctly.
The auto glass industry is a massive part of the automotive aftermarket for a reason. In the U.S. alone, windshield repair and replacement is on track to be an USD 8.3 billion market by 2025, according to research from IBISWorld.com. This isn't just about fixing cosmetic flaws—it's about maintaining a critical safety feature of your vehicle.
Navigating Insurance and Choosing Your Installer
So, you've confirmed your windshield is beyond repair. The next step is a two-parter: sorting out the insurance claim and finding a top-notch installer. Messing up either of these can hit you with unexpected costs, a botched job, or worse, a real safety hazard down the line.
Your first move should be to call your insurance company, but not before you've got your policy in front of you. You're hunting for the comprehensive coverage section—that's usually where auto glass damage lives. Some policies even have a specific glass waiver or a much lower deductible just for windshields, so it pays to check the fine print.
Making the Insurance Call Count
Go into that call prepared. Have your policy number ready, along with the date and a simple description of how the damage happened. Keeping it clear and concise will make the whole process smoother.
The absolute most important question to ask is about your deductible. This is what you'll pay out of pocket before your insurance starts footing the bill. Let's say your deductible is $500 and the full replacement cost is $800. You'd pay the $500, and your insurer would cover the other $300. But if your deductible is $1,000, the entire replacement cost is probably coming out of your wallet.
Some states, like Florida, Kentucky, and South Carolina, have what's known as "zero-deductible" or "full glass" coverage. If you've opted for this, your insurance company might cover the entire replacement cost, no questions asked. It’s always worth asking if this is an option on your policy.
How to Vet a Windshield Installer
Your insurance provider will likely have a list of "preferred" shops, but here's a crucial tip: you are not required to use them. In most states, you have the right to choose who works on your car. Since a quality installation is vital for your safety, spending a little time on research is well worth it.
First, look for shops with technicians certified by the Auto Glass Safety Council (AGSC). This certification is a big deal—it means they follow a strict, national standard for safe installations. A reputable shop will be happy to show you their credentials. Reading what past customers have to say can also provide incredible insight; you can check out real-world customer reviews to see what kind of experience others have had.
I've seen it a hundred times: a subpar installer takes a shortcut by not prepping the pinch weld correctly. If they don't scrape off every bit of the old adhesive and properly prime the frame, the new windshield won't bond right. That can lead to annoying wind noise, water leaks, or a complete failure in a crash.
Key Questions to Ask Any Potential Installer
Before you hand over your keys, ask a few direct questions. This is how you separate the pros from the hacks and make sure you're getting a safe, high-quality job.
Do you use OEM or aftermarket glass? OEM (Original Equipment Manufacturer) glass is made by the same supplier your car's manufacturer uses. Aftermarket glass is made by a third party. While there's some excellent aftermarket glass out there, OEM is the only way to guarantee a perfect fit, finish, and optical clarity.
What kind of urethane adhesive do you use? You want to hear them name a reputable brand and, more importantly, tell you its safe drive-away time. This is the time it takes for the adhesive to cure enough to protect you in an accident, and it can range from 30 minutes to several hours.
What kind of warranty do you offer? A solid warranty from a confident installer should cover defects in the glass and any installation issues—like leaks or wind noise—for as long as you own the vehicle.
Finally, weigh the pros and cons of mobile service versus bringing it into the shop. Mobile is incredibly convenient, but a controlled shop environment is often better, especially if the weather is bad. A true professional will help you decide on the best option for a safe installation.
So, you need a new windshield. Ever wondered what actually goes on behind the scenes? It's not just a matter of popping out the old glass and slapping in a new one. A proper windshield replacement is a detailed, technical procedure where every single step is critical for your safety and the car's structural integrity.
Knowing what a quality job looks like helps you spot a rushed one from a mile away. It all kicks off with careful preparation to make sure your vehicle is protected from any potential damage during the repair.
The whole thing really starts before a technician even lays a hand on your car—it begins with you choosing the right shop. This handy visual breaks down those first crucial decisions.
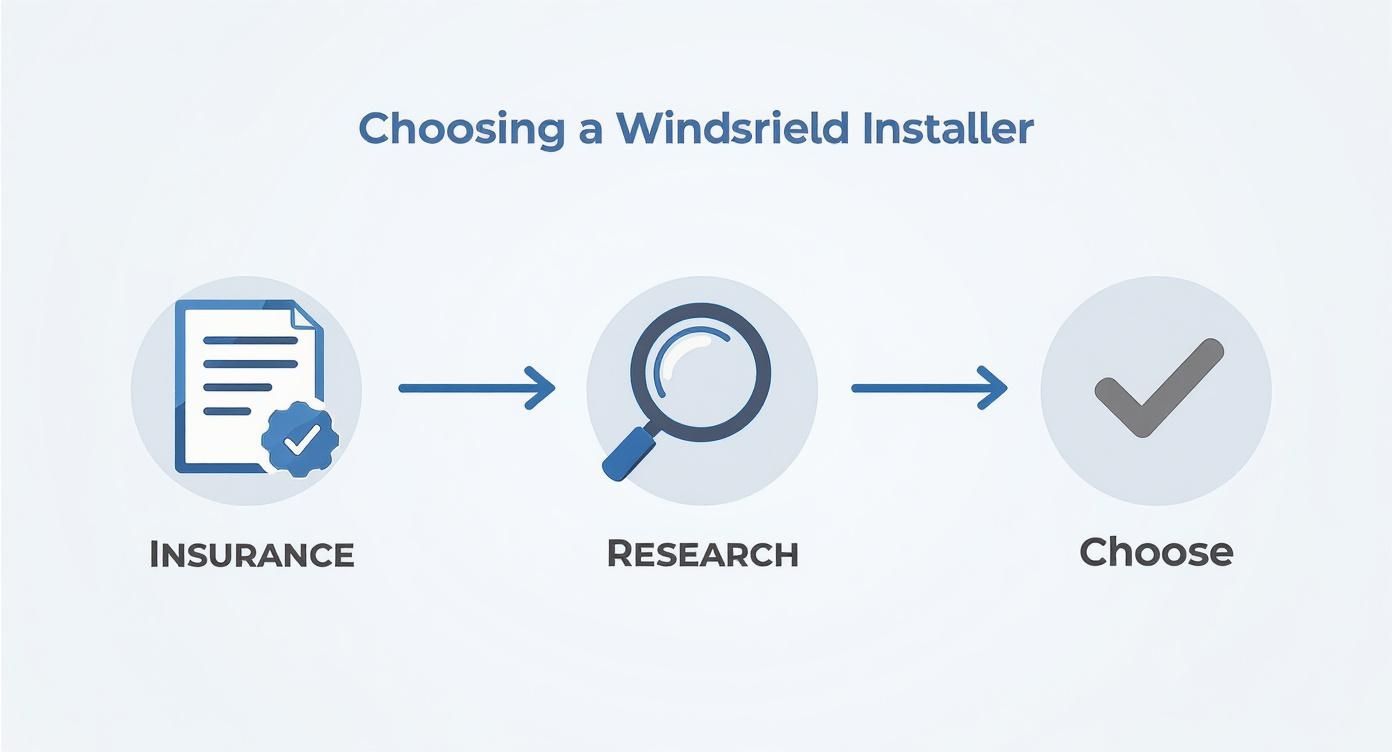
Starting with your insurance, moving on to researching certified pros, and then making your final pick is the tried-and-true path to a safe and hassle-free replacement.
Preparing Your Vehicle for Surgery
The first sign of a true professional is how they treat your car. They’ll start by carefully placing protective covers over your dashboard, hood, and front fenders. This isn't just for looks; it’s to prevent accidental scratches and, more importantly, to keep the powerful urethane adhesive from getting on your interior.
Next, they’ll inspect the trim around the windshield—the A-pillar moldings, wipers, and the cowl panel at the base. A good tech removes these parts carefully, taking their time to avoid breaking the delicate plastic clips that hold them in place. Snapping these clips is a common shortcut you'll see with less experienced installers.
The Art of Removing the Old Windshield
Once everything is protected, it’s time to get the old glass out. This requires specialized tools, not just a pry bar. Technicians use a tool called a "cold knife" or a more advanced wire-out system to slice through the thick, tough bead of urethane holding the windshield to the car’s frame.
This step is absolutely critical. If it’s done carelessly, the tool can easily scratch the pinch weld—the metal channel where the windshield sits. A little scratch might not seem like a big deal, but if it goes through the paint and primer, it exposes bare metal.
A deep scratch in the pinch weld is a ticking time bomb for rust. Over time, that hidden rust can spread and compromise the structural bond of your new windshield, leading to leaks and a dangerous installation.
After the seal is cut, the crew uses heavy-duty suction cups to lift the old windshield out. This is always a two-person job, ensuring the heavy glass is removed without being dropped or damaging your car.
OEM vs. Aftermarket: Which Glass Is Right for You?
One of the first questions you'll face is whether to use an Original Equipment Manufacturer (OEM) windshield or an aftermarket one. OEM glass is identical to what the factory installed, while aftermarket glass is made by other companies to similar, but not always exact, specifications. The choice can impact everything from fit and finish to the performance of your ADAS features.
Here’s a quick breakdown to help you decide.
OEM vs. Aftermarket Windshield Comparison
Feature | OEM Glass | Aftermarket Glass |
|---|---|---|
Manufacturer | Made by the same company that supplied the original factory glass. | Made by a third-party manufacturer. |
Fit & Quality | Guaranteed to match the original in size, shape, thickness, and color. | Can vary in quality and fit; may have slight distortions or size differences. |
Logos & Markings | Includes the vehicle manufacturer's logo (e.g., Ford, Toyota). | Does not have the vehicle manufacturer's logo. |
Cost | Significantly more expensive. | More affordable and budget-friendly. |
ADAS Compatibility | Designed to work perfectly with your car's safety cameras and sensors. | May not have the precise mounting brackets or optical clarity for ADAS, potentially causing calibration issues. |
Availability | Sometimes requires special order from the dealership, which can cause delays. | Widely available from various suppliers. |
Ultimately, while aftermarket glass can save you money, OEM glass provides peace of mind, especially in newer vehicles with advanced safety systems. If your budget allows or if you have a car with ADAS, sticking with OEM is almost always the best bet.
Meticulous Pinch Weld Preparation
This is arguably the most important part of the entire process to replace a windshield correctly. The pinch weld has to be perfectly prepped to guarantee the new adhesive creates an unbreakable, watertight seal.
First, the tech will trim the old urethane bead down to a thin, even layer of about 1-2 millimeters. They don’t scrape it all off—this leftover layer provides a perfect base for the new adhesive to bond to.
Then, the whole area is cleaned thoroughly to get rid of any dust, oil, or debris. Finally, a special primer is applied to the pinch weld. This primer does two crucial things:
It promotes a powerful chemical bond between the urethane and the car's frame.
It acts as a corrosion inhibitor, protecting any exposed metal from rusting.
Skipping or rushing the cleaning and priming stages is a massive red flag. It’s the number one cause of leaks and outright installation failures down the road.
Laying the Perfect Bead of Urethane
With the frame ready, it’s time for the new adhesive. Technicians use a high-viscosity polyurethane (urethane) adhesive, the industry gold standard for its incredible strength and flexibility. The global demand for these advanced materials reflects just how complex modern cars have become.
The automotive windshield market was valued at USD 29.74 billion in 2023 and is projected to skyrocket to USD 59.04 billion by 2032, largely due to these kinds of advancements. You can dig into the market trends in the automotive glass industry if you're curious about the data.
Using a power caulking gun, the technician applies a smooth, consistent, triangular-shaped bead of urethane around the entire pinch weld. The size and shape have to be just right—too thin, and the bond will be weak; too thick, and it will ooze out and make a mess.
Setting the New Windshield with Precision
Now for the main event: placing the new glass. The new windshield, already cleaned and prepped, is fitted with large suction cup handles. The technicians carefully lift it, and with a bit of expert coordination, lower it perfectly into the frame.
Once it's in, they apply firm, even pressure around the edges to make sure the glass sits snugly in the fresh urethane. To finish up, they reinstall the moldings, cowl, and wipers. You’ll often see retention tape applied to the top and sides; this holds the windshield securely in place while the adhesive cures, a final crucial step when you replace a windshield.
Why ADAS Recalibration Is Not an Optional Extra
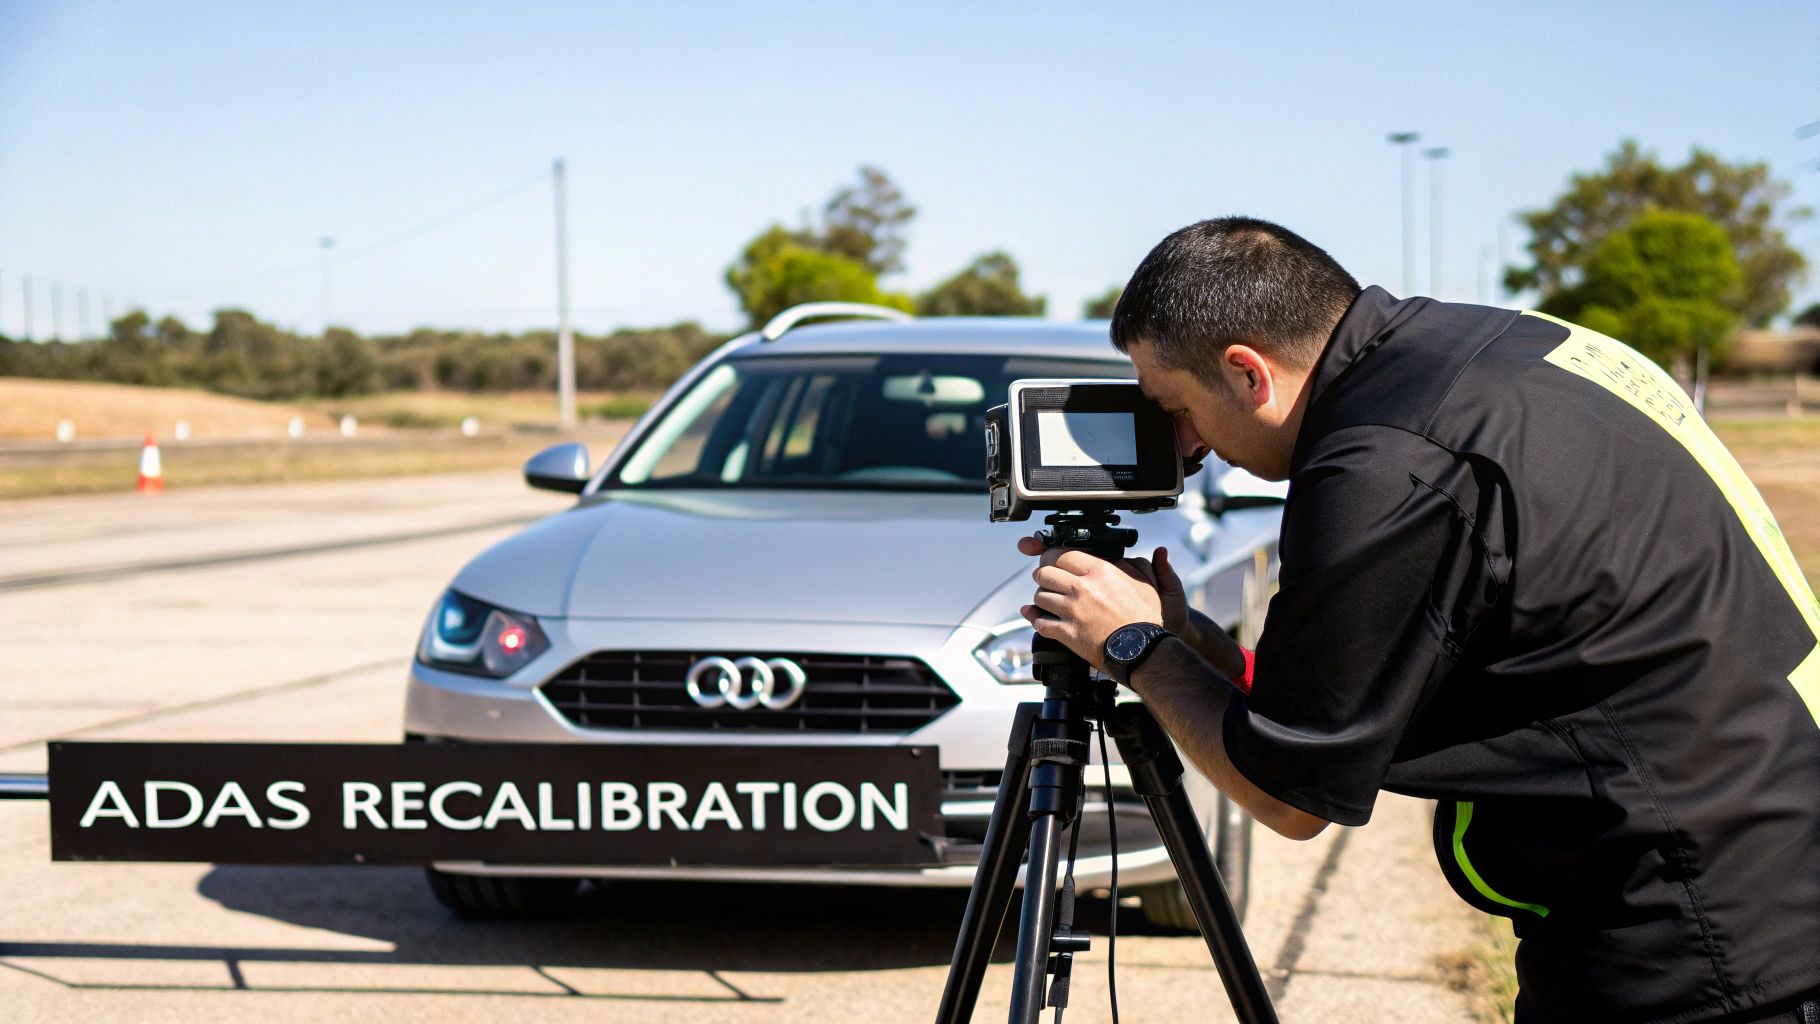
If your car is equipped with lane-keeping assist, adaptive cruise control, or automatic emergency braking, your windshield is doing a lot more than just blocking the wind. It's the central hub for the cameras and sensors that make up your vehicle's Advanced Driver-Assistance Systems (ADAS).
When we replace a windshield, those critical systems get disturbed. The new glass, even a top-of-the-line OEM part, will never sit in the exact same position as the old one. We’re talking about shifts as small as a single millimeter, but to a highly sensitive camera, that’s a massive change in perspective.
This is exactly why ADAS recalibration isn't an upsell; it's a fundamental safety requirement. Skipping it can lead to your car’s safety features malfunctioning in some seriously dangerous ways. They might not see an obstacle, brake suddenly for no reason, or just switch off entirely, leaving you unprotected when you think you're covered.
Static vs. Dynamic: What’s the Difference?
Recalibration isn't a simple plug-and-play affair. The right method depends entirely on what the vehicle manufacturer specifies, and there are two main approaches a certified tech will take.
Static Recalibration: This happens in the controlled environment of a workshop. We park the car on a perfectly level floor in front of a specialized target board. Using a diagnostic tool, we put the ADAS into calibration mode, which lets the camera relearn its exact position by focusing on the patterns of the target.
Dynamic Recalibration: This one happens out on the road. A technician has to drive the vehicle at a certain speed for a set amount of time, usually on a highway with clear lane markings. The system uses these real-world markings to recalibrate itself. Some cars need one or the other, but many newer models require a combination of both to get it right.
A true professional knows how to check the manufacturer’s specs to ensure the job is done correctly, restoring the system to its original factory accuracy.
The Real-World Risks of Skipping Recalibration
Let's put this in perspective. Say your car's emergency braking is designed to react to a pedestrian 50 feet away. If the new windshield shifts the camera’s view by just a fraction of a degree, the system might now think that pedestrian is 60 feet away—or worse, not recognize them clearly at all.
That tiny miscalculation is the difference between a safe stop and a catastrophe. It’s not just about braking, either. A misaligned camera can cause your lane-keeping assist to drift or prevent your adaptive cruise control from correctly gauging the distance to the car ahead.
A study by the American Automobile Association (AAA) revealed that even minor windshield damage can throw ADAS systems off. After a full replacement, the potential for error skyrockets, making recalibration absolutely crucial to get back to factory safety standards.
Forgoing this step means you're driving with safety features you can't trust. You have a new windshield, but your car's protective systems might fail you when you need them most.
If you want to dive deeper into this critical step, you can get more details about comprehensive ADAS windshield calibration and what the process involves. Any reputable technician will insist on this service to complete a windshield replacement safely, ensuring your car’s safety systems are back online and working exactly as intended.
Aftercare and Mistakes That Ruin a New Windshield
https://www.youtube.com/embed/VJ6PndKqgXs
The technician has just driven away, and you’re looking through a pristine, new windshield. You might think the job is over, but this is where you, the owner, play a critical role. The first 24 to 48 hours after a windshield replacement are make-or-break.
This is the crucial window when the high-strength urethane adhesive is curing, forming a rock-solid, structural bond between the glass and your car’s frame. What you do next can mean the difference between a perfect, lifelong seal and a costly do-over.
The Immediate Post-Installation Checklist
After setting the glass, the technician will probably apply some retention tape around the edges. This isn't for decoration—it's acting like a brace, holding the windshield in the exact right spot while the urethane hardens. Resist the temptation to peel it off as soon as you get home.
For the next day or two, here’s what you need to do (and what you absolutely shouldn't):
Leave the Tape Alone: Keep that retention tape on for at least 24 hours. Pulling it off early could let the windshield sag or shift, creating a weak spot in the seal.
No Car Washes: Steer clear of any high-pressure car wash for at least 48-72 hours. The force of those water jets can easily blast through the fresh seal, creating a path for leaks down the road.
Crack a Window: Leave one of the side windows open just an inch. This is a simple but brilliant trick. It prevents a sudden buildup of air pressure inside the cabin when you close a door, which can otherwise pop the fresh seal outward.
Take It Easy: Try to avoid slamming doors and driving over rough, bumpy roads or potholes. Every jolt and vibration can travel through the vehicle's frame and disturb the adhesive while it’s still curing.
I can't tell you how many installation failures I've seen caused by one simple mistake: the owner getting in and slamming the car door shut minutes after I've left. That sudden pressure shift is sometimes all it takes to break the fresh seal, creating a tiny gap that becomes a major leak during the first rainstorm.
Common Mistakes That Compromise Your New Glass
It’s easy to forget you’re dealing with a sensitive component until that urethane has fully set. Even after the first couple of days, a few bad habits can cause long-term headaches.
The sheer number of replacements happening today is staggering. The global automotive windshield market is projected to jump from USD 32.21 billion in 2024 to USD 62.53 billion by 2035. With that volume of work, it's more important than ever for car owners to understand their part in the process. You can dig into the data behind these trends in the automotive windshield market to see just how big this industry is.
To protect your investment, make sure you don't make these common errors:
Dashboard Clutter: Avoid piling things on your dashboard right against the glass. The pressure from a heavy object can interfere with the lower part of the urethane bead as it cures.
Using a Sunshade Right Away: If you have a tight-fitting sunshade, give it a day or two. Forcing it into place can put pressure on the glass or the rearview mirror mount, which is also bonded to the windshield.
Following these simple guidelines ensures your investment to replace a windshield pays off. You’ll be rewarded with a safe, quiet, and leak-free ride for years to come.
Got Questions? We’ve Got Answers.
Even with a full rundown of the process, you probably still have a few questions floating around. That’s perfectly normal. When you’re talking about something as crucial as your windshield, you want to be sure about every little detail. Let’s tackle some of the most common things people ask when they need to replace a windshield.
Getting these details sorted out ahead of time makes the whole experience go a lot smoother.
How Long Does a Windshield Replacement Actually Take?
This is usually the first thing people want to know, and the answer really has two parts. The hands-on work—popping out the old glass and setting the new one—is actually pretty fast. A seasoned technician can get it all done in about 60 to 90 minutes.
But the clock you really need to watch is for the safe drive-away time. This is how long it takes for the powerful urethane adhesive to cure enough to do its job in an accident. This can vary a lot depending on the specific adhesive used, plus the temperature and humidity that day.
Standard Urethane: Might need a few hours to be road-ready.
Fast-Curing Urethane: In the right conditions, this stuff can get you safely on your way in as little as 30 minutes.
Any good installer will be crystal clear about the safe drive-away time for your specific job. They'll tell you exactly when your car is safe to drive again.
Can I Drive My Car Immediately After the Installation?
I’ll make this one easy: absolutely not. Hitting the road right after the glass is set is one of the worst things you can do. That fresh bead of urethane needs time to cure without being disturbed, and driving creates all sorts of vibrations and stresses.
Jumping the gun can lead to some serious problems:
A Ruined Seal: The slightest shift from road vibrations can break that new seal. Next thing you know, you’ve got a mysterious leak or a new wind whistle that will drive you crazy.
A Major Safety Failure: This is the big one. If that adhesive isn't fully cured, the windshield can pop out in a collision. That means your airbags won’t deploy correctly, and the roof could lose its structural support and collapse.
Listen to your technician. Waiting an extra hour is a tiny inconvenience compared to compromising your safety.
It's not just about keeping the rain out. Your windshield provides up to 60% of the cabin's structural strength in a rollover. That life-saving feature only works if the adhesive has fully bonded the glass to the frame.
How Does Weather Affect the Replacement Process?
Weather is a huge factor, and professional installers are always watching the forecast. Rain and extreme cold are the two main culprits that can throw a wrench in the works.
Rain and High Humidity Simply put, moisture and urethane adhesive do not mix. Trying to replace a windshield in the rain is just asking for trouble.
Failed Bond: Any water on the pinch weld (the metal frame where the glass sits) will stop the urethane from sticking properly. You're guaranteed to end up with leaks, and you risk a complete failure of the installation.
Mobile Service Needs Cover: This is why mobile techs absolutely need a garage, carport, or some kind of overhead cover to work if it's raining. If there's no dry spot available, they'll have to reschedule for a better day.
Cold Temperatures Freezing temps can also make things tricky. Urethane needs a certain amount of warmth to cure correctly.
Slower Curing Times: The chemical reaction in the adhesive slows way down in the cold. This can add hours to your safe drive-away time.
Glass Contraction: Cold also makes the glass itself contract a tiny bit, which can impact the overall fit and put stress on the new seal as it cures.
Pros get around this by using special fast-curing urethanes made for colder weather. But if it gets too cold (usually below freezing), the safest bet is to do the job in a heated shop. Your installer will know what to do and will recommend the best plan based on the day's conditions.
For a hassle-free experience with expert technicians who can handle any condition, trust the professionals at Auto Renu Auto Glass LLC. We bring safe, reliable mobile service directly to you. https://www.autorenu911.com