Your Guide to Using a Windshield Long Crack Repair Kit
Thinking of using a windshield long crack repair kit? Learn when to DIY, how to choose the right kit, and follow our guide for a near-invisible fix.
Feb 9, 2026
generated
windshield long crack repair kit, DIY crack repair, auto glass fix, windshield repair, long crack repair

That ugly line spreading across your windshield can be a real headache. A long crack repair kit seems like a perfect, budget-friendly fix, right? And often, it is. These kits are great for stabilizing the glass and making the crack much less noticeable. But—and this is a big but—their success all comes down to whether your specific crack is a good candidate for a DIY job.
Getting this call right from the start is crucial.
Deciding if a DIY Repair Is the Right Move

Before you even think about buying a kit, you need to play detective with your windshield. This isn't just about saving a few bucks; it's about making sure your repair is safe, effective, and won't actually make things worse. A good, honest assessment is the most important part of this whole process.
First, look closely at the type of crack. Is it a single, clean line? Or does it look like a spiderweb, with little "legs" branching off? A simple, linear crack is exactly what these DIY kits are designed for. The more complex the crack, the harder it is to get the resin to flow into every nook and cranny, which often leads to trapped air bubbles and a weak, visible repair.
Assessing the Crack Length and Location
Length is a huge factor. As a rule of thumb, most DIY kits work best on cracks that are under 14 inches long. You might see some kits claiming they can handle more, but for a solid, reliable fix you can do yourself, that 14-inch mark is a great guideline. Push it too far, and you're looking at an incomplete fill that's likely to fail or spread later.
It's a more common problem than you might think. Data shows that in the U.S., about 14% of all windshields have long cracks needing attention. What's interesting is that these long cracks make up over half (51.9%) of all crack repairs, and a whopping 74% of them are 14 inches or less—putting them right in the DIY sweet spot.
Where the crack is located is just as critical as how long it is. If that crack runs all the way to the edge of the windshield, stop right there. The structural integrity is compromised, and that's beyond what a DIY kit can safely handle. The edge of the glass is under constant stress, and any repair you attempt there is just asking to fail.
Key Takeaway: The ideal candidate for a DIY repair is a single-line crack, under 14 inches, that stays away from the windshield's edge. Hitting all three of these points gives you the best shot at a successful, long-lasting fix.
To make it even simpler, here's a quick checklist to help you decide.
Quick DIY Suitability Checklist
Use this quick reference to determine if a windshield long crack repair kit is the right solution for you.
Damage Characteristic | Good Candidate for a DIY Kit | You Should Call a Professional |
|---|---|---|
Crack Length | Under 14 inches | Over 14 inches |
Crack Type | A single, clean line | Complex, with multiple branches or "legs" |
Location | Contained within the glass | Extends to the very edge of the windshield |
Driver's View | Outside the main line of sight | Directly in the driver's primary viewing area |
Damage Depth | Only on the outer layer of glass | Can be felt from inside the car (penetrates both layers) |
If your damage falls into the "Good Candidate" column, you're likely in a great position to tackle this yourself. If anything lands in the "Call a Professional" column, it's best to get an expert opinion.
The Driver's View and Damage Depth
Another deal-breaker is a crack right in the driver's direct line of sight. This area is sometimes called the ADAS (Advanced Driver-Assistance Systems) keep-out zone, and for good reason. Even a perfect DIY repair can leave behind a slight distortion or haze. It might be totally unnoticeable on the passenger's side, but in front of the driver, it can become a dangerous and constant distraction.
Finally, you have to check the depth. Your windshield is a sandwich: two layers of glass with a sheet of vinyl (PVB) in the middle. A DIY kit is only meant for cracks on the outer layer of glass. You can easily check this—from inside the car, gently run your fingernail over the crack. If you can't feel a thing, you're good. But if you can feel the crack on the inside surface, it has gone all the way through and needs a full, professional replacement, not a repair.
To learn more about what kinds of damage can be fixed, take a look at our detailed guide on whether a cracked windshield can be fixed.
How to Choose the Best Windshield Repair Kit
Walking into an auto parts store and staring at that wall of repair kits can be a little intimidating. They all make big promises, but let's be real—not every long crack repair kit is created equal. Picking the right one is the single most important factor in getting a strong, nearly invisible repair versus just wasting a Saturday afternoon.
The biggest decision you'll face comes down to the applicator. You'll generally find two types: the basic syringe and the much more effective bridge-and-injector system.
Syringe vs. Bridge Systems
The cheapest kit on the shelf is almost always a simple syringe-and-plunger setup. You manually push the resin into the crack with it. And while that’s certainly better than ignoring the problem, this method has a major flaw: it's not great at forcing resin deep into the tiny, microscopic fissures of a long crack. You often end up with air pockets, which create weak spots and are visible after curing.
For a long crack, what you really want is a bridge-and-injector system. This little gadget suctions right onto the glass, creating a stable platform directly over the damage. Here’s the key difference: the injector first creates a vacuum to pull all the air out of the crack before it pushes the resin in.
This vacuum step is an absolute game-changer. It ensures the resin can penetrate every last nook and cranny, which is critical for a strong, clear, and durable bond. It’s the closest you can get to what we professionals do in a DIY package.
The secret weapon for any professional repair is the ability to create a perfect vacuum. A bridge-style kit mimics this process, giving you a massive advantage over a simple syringe by ensuring the resin fills every microscopic void.
Spending a few extra bucks on a bridge system dramatically increases your odds of a successful repair. If you're serious about fixing that crack for good, it’s a no-brainer.
Understanding Resin Viscosity
Beyond the applicator, the resin itself is the real star of the show. You’ll see terms like "low viscosity" or "high viscosity" on the packaging. All that means is how thick or thin the resin is, and for a long crack, it matters a lot.
Low-Viscosity Resin: This stuff is thin and watery. It's fantastic for the super-fine, hairline cracks because it flows easily into the tightest spaces.
High-Viscosity Resin: This resin is much thicker, almost like honey. It’s better for filling bigger chips where you need more body to fill the void without it all running out.
For a typical long crack, low-viscosity resin is almost always what you need. The main battle is getting the repair material to "wick" its way to the very ends of the crack. A thinner resin is just much, much better at doing that. Some premium kits might include both, but if you have to choose just one for a long crack, go thin.
Essential Tools for a Clean Finish
Finally, don't overlook the small stuff. A good kit won't skimp on the accessories, because these are the tools that give you a clean, professional-looking finish. Before you head to the checkout, peek inside the box and make sure you see these essentials:
Plenty of Quality Curing Strips: These little clear plastic squares are laid over the wet resin. They block oxygen and allow the UV light from the sun to cure the resin properly. You’ll need to cover the whole crack, so a good kit will give you more than enough.
A Single-Edge Razor Blade: This is non-negotiable. After the resin hardens, you’ll use this to scrape away the excess for a perfectly smooth finish. A sharp, new blade is the only way to do this without scratching your glass.
An Alcohol Prep Pad: A perfectly clean surface is critical for a strong bond. Any kit that includes a prep pad shows an attention to detail that usually means the whole product is higher quality.
By picking up a bridge-style system with a low-viscosity resin and making sure it has these key tools, you're setting yourself up for the best possible result. For more hands-on advice, you might be interested in our general guide on DIY windshield repair.
Your Guide to a Flawless Repair Application
Alright, let's get our hands dirty and bring that windshield back to one piece. Think of this less like a daunting auto repair and more like a craft project where patience and a steady hand really pay off. A truly successful repair hinges on getting every single step right, from the first wipe-down to the final drop of resin.
The biggest mistake I see people make is rushing the prep work. Seriously, don't do it. Any tiny bit of dirt, dust, or moisture you trap inside that crack becomes a permanent part of your windshield. It not only looks bad, creating a cloudy, obvious line, but it also weakens the bond. You’ll completely undo the whole point of using a quality repair kit.
Meticulous Prep: The Foundation of a Great Repair
Your first job is to create a perfectly clean and dry canvas for the resin. Start by taking a small pin or the corner of a razor blade and gently picking out any loose glass shards or dirt from the impact point and along the crack. You're just cleaning here, not excavating.
Next, grab an alcohol prep pad and give the glass surface around the crack a thorough cleaning. This gets rid of road grime, wax, and finger oils that can stop the applicator from getting a good, tight seal. If your kit didn't come with one, a lint-free cloth and some regular isopropyl alcohol work just fine.
Now for the most critical part: making sure the crack is bone dry. Moisture is the absolute enemy of a good resin bond. If you just washed your car or it recently rained, you have to wait. To be 100% sure, you can grab a hairdryer on a low setting, hold it a few inches from the glass, and gently warm the area. This will help evaporate any moisture hiding deep inside the crack.
Pro Tip: If you can, do this repair in a garage or at least in the shade. Direct sunlight contains UV rays that will start curing the resin before it has a chance to seep into every nook and cranny of the crack. You need to be in control of when the curing starts.
Setting Up Your Applicator for a Perfect Fill
With the glass prepped and ready, it's time to set up your bridge-and-injector tool. This little device is what really separates a DIY-looking job from a pro-grade repair. Its whole purpose is to create a vacuum to suck the air out and then apply steady pressure to push the resin in.
Position the bridge so the injector's tip is sitting directly over the start of the crack. Most long cracks spider out from a small chip or impact point, and that's exactly where you want to begin. Press the suction cups down firmly to create a strong seal against the windshield—this is non-negotiable for the vacuum step to work.
Now, thread the injector into the bridge until its rubber tip makes a firm, sealed connection with the glass. Be careful not to overtighten it, as you could stress the glass and make the crack worse. You're just looking for a solid seal that won't let air in or resin out.
This visual guide breaks down what to look for in a good kit, from the applicator to the resin itself.
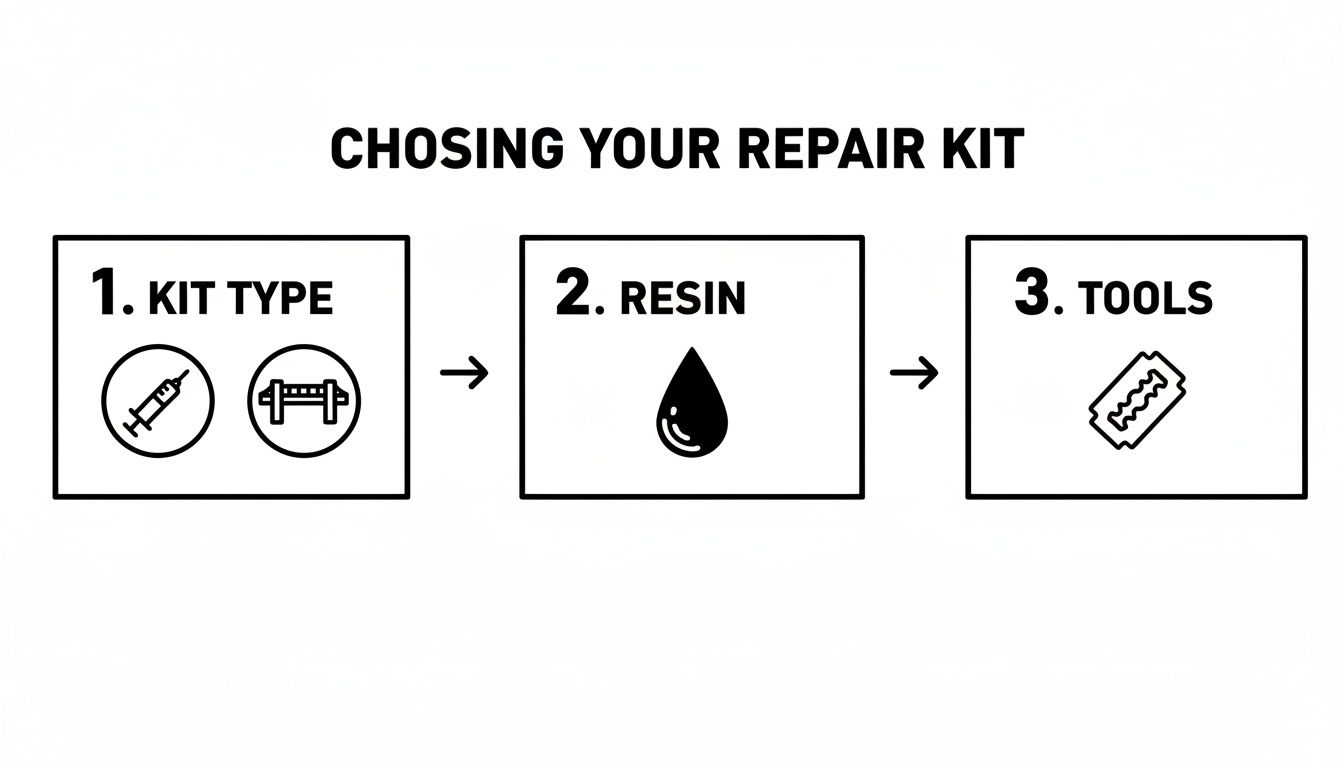
As the graphic shows, a great repair starts with choosing a kit that has a capable applicator, the right resin, and the tools you'll need for a clean finish.
Injecting the Resin: Slow and Steady Wins the Race
Here we go—the main event. Most of these bridge systems use an injector that pulls a vacuum first and then applies pressure. Make sure to follow your specific kit’s instructions, but the process generally looks like this:
Add the Resin: Unscrew the injector and put the recommended number of resin drops (usually 3 to 6) inside the chamber.
Pull the Vacuum: Screw the plunger back in and pull it all the way up to its locked position. This sucks the air out of the crack. You might even see tiny air bubbles rising into the chamber. Let it sit like that for a few minutes to get all the air out.
Apply the Pressure: Release the plunger from the vacuum lock. Now, gently push it down to its second locked position. This pressure phase is what slowly forces the liquid resin deep into the void you just cleared of air.
This pressure stage is where the magic happens. You should actually be able to watch the crack slowly disappear as the clear resin fills it from the inside out. For a deeper dive into these techniques, check out our guide on at-home auto glass repair.
Guiding the Resin Down the Line
With a long crack, you can't just fill it from one spot and call it a day. You'll need to move the whole bridge assembly along the crack, repeating the process every few inches. It’s a methodical approach, but it’s the only way to ensure the entire channel gets filled without any weak spots or air pockets.
Leapfrog Your Way Down: Once you've finished the injection at your starting point, release the suction cups. Move the bridge a few inches farther down the crack, making sure the injector slightly overlaps with the section you just filled.
Rinse and Repeat: Get a new seal and go through the vacuum and pressure cycles again. Keep doing this "leapfrog" motion until you've reached the very end of the crack.
Patience Is Your Best Tool: It's tempting to rush this part, but don't. Giving the resin enough time to flow and penetrate under pressure at each stage is what separates a strong, invisible repair from a shoddy one.
After the entire crack is filled, there's one last step before curing. Put a single drop of resin on top of the crack's surface and lay one of the kit's curing strips over it. Smooth it down gently to squeeze out any air bubbles, and you're all set for a flawless cure.
Finishing Touches and Troubleshooting Common Issues
Getting the resin deep into that crack is a huge win, but the job isn't quite done. Now it’s time for the finishing touches that separate a good repair from a great one. This final stage is all about achieving a smooth, clear surface and tackling any minor imperfections that might have popped up.
The goal here is a seamless finish that's nearly invisible to the touch and restores the glass's optical clarity. With a little patience, you can make your work look incredibly professional.
Creating a Professional, Smooth Finish
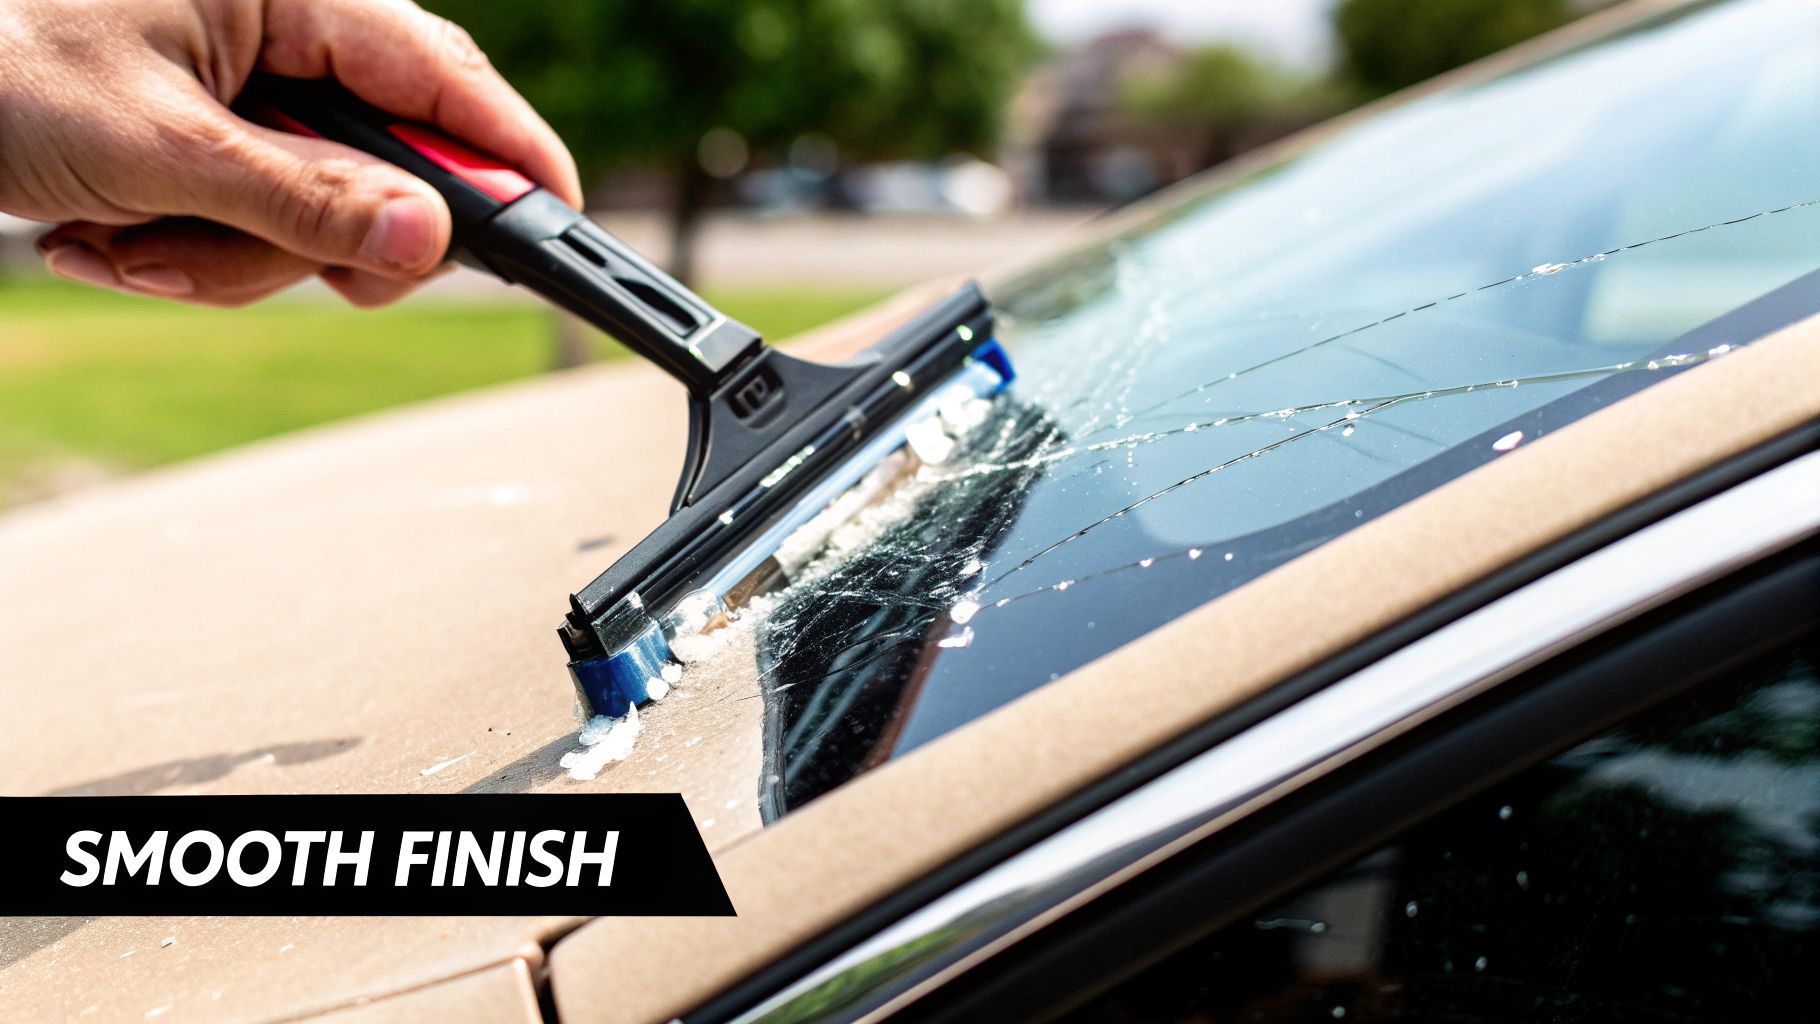
Once the resin has fully cured under the sun, your next task is to scrape off the excess. This is where that single-edge razor blade from your windshield long crack repair kit comes in handy. It's a simple step, but your technique here is what prevents you from scratching the glass.
Hold the razor blade at a shallow, 45-degree angle to the windshield. Using smooth, even strokes, gently scrape away the hardened resin and the curing strip. You don't need to press down hard; let the sharpness of the blade do the work. The cured resin should flake right off, leaving a surface that’s flush with the surrounding glass.
For the best results, change the direction of your scraping motion a few times. This helps catch any small ridges you might have missed and ensures a perfectly level finish. After you're done, give the area a quick wipe with a clean, lint-free cloth to clear away any residue.
Expert Insight: A flawless DIY repair aims to restore 80-95% of the original clarity and strength. A completely invisible fix is rare even for pros, so focus on creating a strong, stable, and smooth result you can be proud of.
Tackling Common Repair Problems
So, what happens if you step back to admire your work and spot a small air pocket or a spot that didn't quite fill? Don't panic. This is a common hiccup and is often correctable without having to start all over again.
Sometimes, a tiny bubble of air gets trapped deep inside the crack. Other times, a small section just might not have received enough resin. The key is to spot-treat these specific areas rather than redoing the whole thing. This targeted approach saves you a lot of time and resin.
Let's walk through how to handle these common issues.
Simple Tricks for Spot-Treating Imperfections
If you find a persistent air bubble or an unfilled spot, you can usually perform a mini-repair on just that area. The process is really just a scaled-down version of what you’ve already done.
For a tiny air pocket: Grab a pin and carefully prick the surface of the cured resin right over the bubble. This creates a tiny channel for new resin to get in.
Apply a single drop: Place one small drop of repair resin directly onto the pinhole you just made. Don't overdo it—you only need enough to fill that small void.
Cover and cure again: Pop a small piece of a curing strip over the fresh resin, smooth it out, and let it cure in the sunlight one more time.
After it's fully cured, just scrape the excess resin away like you did before. This spot-treatment method is incredibly effective for perfecting the final look. It’s that extra bit of detail work that can make a DIY job look like it was done by an expert.
What You Need to Know About Safety and ADAS
Fixing that long crack in your windshield is about a lot more than just getting your clear view back. That piece of glass is one of the most important safety features on your entire vehicle. Many people are surprised to learn that it provides up to 60% of your car's structural strength in a rollover, literally stopping the roof from crushing in on you.
When you use a windshield long crack repair kit, the goal is to do more than just make the crack disappear. A good repair restores that lost strength. As the resin cures, it bonds the glass back together, making the windshield a solid, single unit again. It's also the backstop for your passenger-side airbag, making sure it deploys toward the passenger, not uselessly up and out of the car.
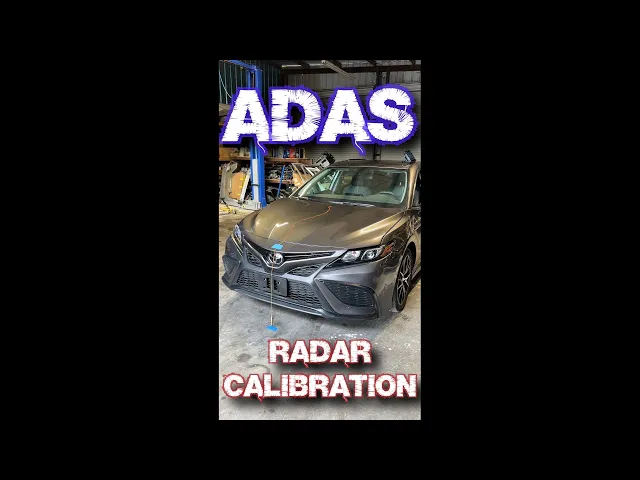
Modern Cars Bring a New Wrinkle: ADAS
If your car is only a few years old, the situation gets even more complicated. See that black box behind your rearview mirror? That’s the eye for your car’s Advanced Driver-Assistance Systems (ADAS). It’s a highly sensitive camera that runs critical safety functions you rely on, like:
Lane-Keep Assist: Watches the road lines to keep you from drifting.
Automatic Emergency Braking: Scans for obstacles and can slam on the brakes to prevent a crash.
Adaptive Cruise Control: Keeps a safe, consistent distance from the car in front of you.
Here's the problem: that camera needs a perfectly clear view to work right. Even a tiny distortion or a bit of haze from a DIY repair can throw the whole system off. It might misread a shadow on the road as a car, or it could completely miss the lane markings in the glare of the sun.
A repair that looks pretty good to you might be a massive obstruction to a precision ADAS camera. The camera's perspective is exact and unforgiving, and even slight optical changes can cause the system to malfunction when you need it most.
Why You Can't Skip ADAS Recalibration
This is where calling a professional becomes the only smart move. Any time the windshield on an ADAS-equipped car is worked on—whether it's a replacement or a major repair—the system requires ADAS recalibration. This is a detailed process where a technician uses special tools to make sure the camera is seeing the road exactly as it was designed to.
Skipping this step is a huge gamble. An uncalibrated system could fail to brake in an emergency or might steer you erratically. It’s also important to follow all critical mobile safety steps for drivers to ensure you're approaching your vehicle's safety with the seriousness it deserves.
So, what does this mean for your DIY repair? If the crack is small and far away from the camera’s line of sight, you might be okay. But if that damage is anywhere near the central ADAS unit, you're not just fixing glass—you're messing with your car's brain. Put the kit down and call a pro who can handle both the glass and the recalibration. It's the only way to be certain your car is truly safe to drive.
When to Skip the DIY Kit and Call a Pro
A high-quality windshield long crack repair kit can be a real lifesaver, but it’s no miracle worker. Honestly, knowing when to put the kit down and call in a professional is just as important as knowing how to use it. Trying to tackle a crack that’s too far gone is a recipe for a failed repair, wasted money, and a serious safety hazard.
This isn't about giving up; it’s about being smart and protecting your vehicle's integrity. Some cracks look deceptively simple but are far too complex for the resins and tools you'll find in a DIY kit. Let's walk through the red flags that tell you it's time to call in the cavalry.
Cracks That Demand Professional Attention
If your windshield crack looks like any of these, your next move should be dialing a pro, not opening a kit. These are the hard-and-fast rules where professional equipment and expertise are absolutely necessary.
It's Just Too Long: Some kits boast they can fix cracks up to two feet long. From my experience, that's a stretch. Once a crack extends beyond 14 to 18 inches, getting a clean, bubble-free fill with a DIY syringe is next to impossible.
It's Branching Out: Do you see little "legs" shooting off from the main crack, almost like a spiderweb? That complex damage needs a pro's touch. Their equipment uses powerful vacuum and pressure cycles to force resin into every nook and cranny—something a simple hand-plunger can't do.
The Damage Goes Deep: From inside your car, gently run your fingernail across the crack. If you can feel a divot or catch, the damage has penetrated deep into the glass, possibly hitting the inner laminate layer. That's a structural problem, and a surface-level DIY repair won't cut it.
Critical Safety Alert: Any crack that lands squarely in the driver's line of sight is a job for a professional, period. Even a fantastic DIY repair can leave behind a slight optical distortion, creating a dangerous and persistent distraction on the road.
The Professional Advantage in Tools and Technique
So, what makes a professional repair so different? It comes down to better gear, better materials, and years of hands-on experience. A technician isn't just using a souped-up version of your kit; they're operating an entirely different class of equipment.
For instance, their professional-grade injectors create a powerful vacuum that sucks every bit of air and moisture out of the crack before the resin goes in. This single step is the key to a strong, clear, and long-lasting bond. It’s a level of precision a hand-operated DIY tool simply can’t match.
Commercial-Grade Resins and Guaranteed Results
The resin itself is a huge part of the equation. Pros have access to a whole arsenal of commercial-grade resins with different viscosities, each one matched to a specific type of crack and even the current weather conditions. These formulas cure harder, last longer, and offer far better optical clarity than the one-size-fits-all resin in a store-bought kit.
And maybe the best part? A professional repair almost always comes with a warranty. If it fails or the crack spreads, a reputable shop will stand behind their work. With a DIY attempt, if it doesn't hold, you're out the money and you might have made the damage impossible for a pro to fix later. When you consider the risks, especially with tricky cracks or vehicles with ADAS cameras, calling an expert is easily the safest and most reliable bet.
When the damage is too severe for a windshield long crack repair kit, don't risk your safety. The mobile experts at Auto Renu Auto Glass LLC come directly to you with professional tools, commercial-grade materials, and the expertise to handle any repair or replacement. Schedule your mobile service today and get it done right the first time.