Auto Glass Repair at Home Made Simple
Discover how to master auto glass repair at home with our guide. Get practical tips to fix chips and cracks, saving you time and money on your windshield.
Oct 4, 2025
generated
auto glass repair at home, DIY windshield repair, windshield chip fix, car glass repair, automotive glass

So, can you really fix that annoying rock chip in your windshield yourself? For most small dings—think anything smaller than a quarter—the answer is a definite yes. Thanks to modern DIY kits, tackling this kind of repair at home is not only possible but also surprisingly straightforward and easy on the wallet.
Should You Really Repair Auto Glass Yourself?
The thought of working on your own car's glass can feel a bit daunting, but it's more manageable than you might think. The trick is to know your limits and have realistic expectations right from the get-go. A home repair is perfect for minor damage like small bullseyes, star-shaped chips, or combination breaks that haven't started to spread across the glass.
This isn't about trying to become a professional auto glass technician overnight. It's about empowering you to handle a common, frustrating problem quickly and affordably. When you successfully repair a chip, you stop it from turning into a massive crack that forces a full, expensive windshield replacement. Look at it as a bit of preventative maintenance that can save you a ton of money down the line.
Understanding The DIY Advantage
The biggest win with a DIY approach is obviously the cost. A professional will likely charge you over a hundred bucks for a simple chip repair, whereas a good-quality kit from the auto parts store is usually less than $20. But it's not just about the money; convenience is a huge plus. You get to fix the damage in your own driveway, on your own time, without having to book an appointment and wait around.
This shift toward at-home fixes is a real trend. The global market for car windshield repair kits was valued at around USD 1.2 billion in 2024 and is expected to more than double by 2033. This boom is all thanks to drivers like you looking for practical, budget-friendly repair solutions. You can dig deeper into the market growth for these repair kits in this detailed report.
The goal of a home repair isn't absolute perfection; it's about restoring the windshield. A successful DIY job brings back the structural integrity of the glass and makes the damage almost disappear, all while stopping that pesky chip from spreading.
When To Choose DIY And When To Call A Pro
Making the call between a DIY fix and hiring a professional really boils down to three things: the size, location, and complexity of the damage. If you're looking at a crack longer than a dollar bill, a chip right in the driver's line of sight, or damage with multiple deep impact points, it’s time to pick up the phone and call an expert.
To make that choice a little clearer, let's compare the two options side-by-side.
DIY Repair vs Professional Service: A Quick Comparison
Here’s a straightforward breakdown to help you decide which path is right for your situation.
Factor | DIY At-Home Repair | Professional Service |
|---|---|---|
Cost | Typically $15-$30 for a kit | Often $100-$150+ per repair |
Time | About 30-60 minutes, on your schedule | Requires scheduling and travel or wait time |
Complexity | Low, suitable for beginners | Requires certified technicians and specialized tools |
Ideal Damage | Small chips and cracks (under 1-inch) | Long cracks, complex damage, or in the driver's line of sight |
Result | Restores strength, 80-95% invisible | Near-perfect optical clarity, usually with a guarantee |
Ultimately, for a small, simple chip outside of your direct view, a DIY kit is a fantastic, cost-effective solution. For anything more serious, a professional service is the safest and most reliable bet.
Choosing Your Repair Kit and Essential Tools
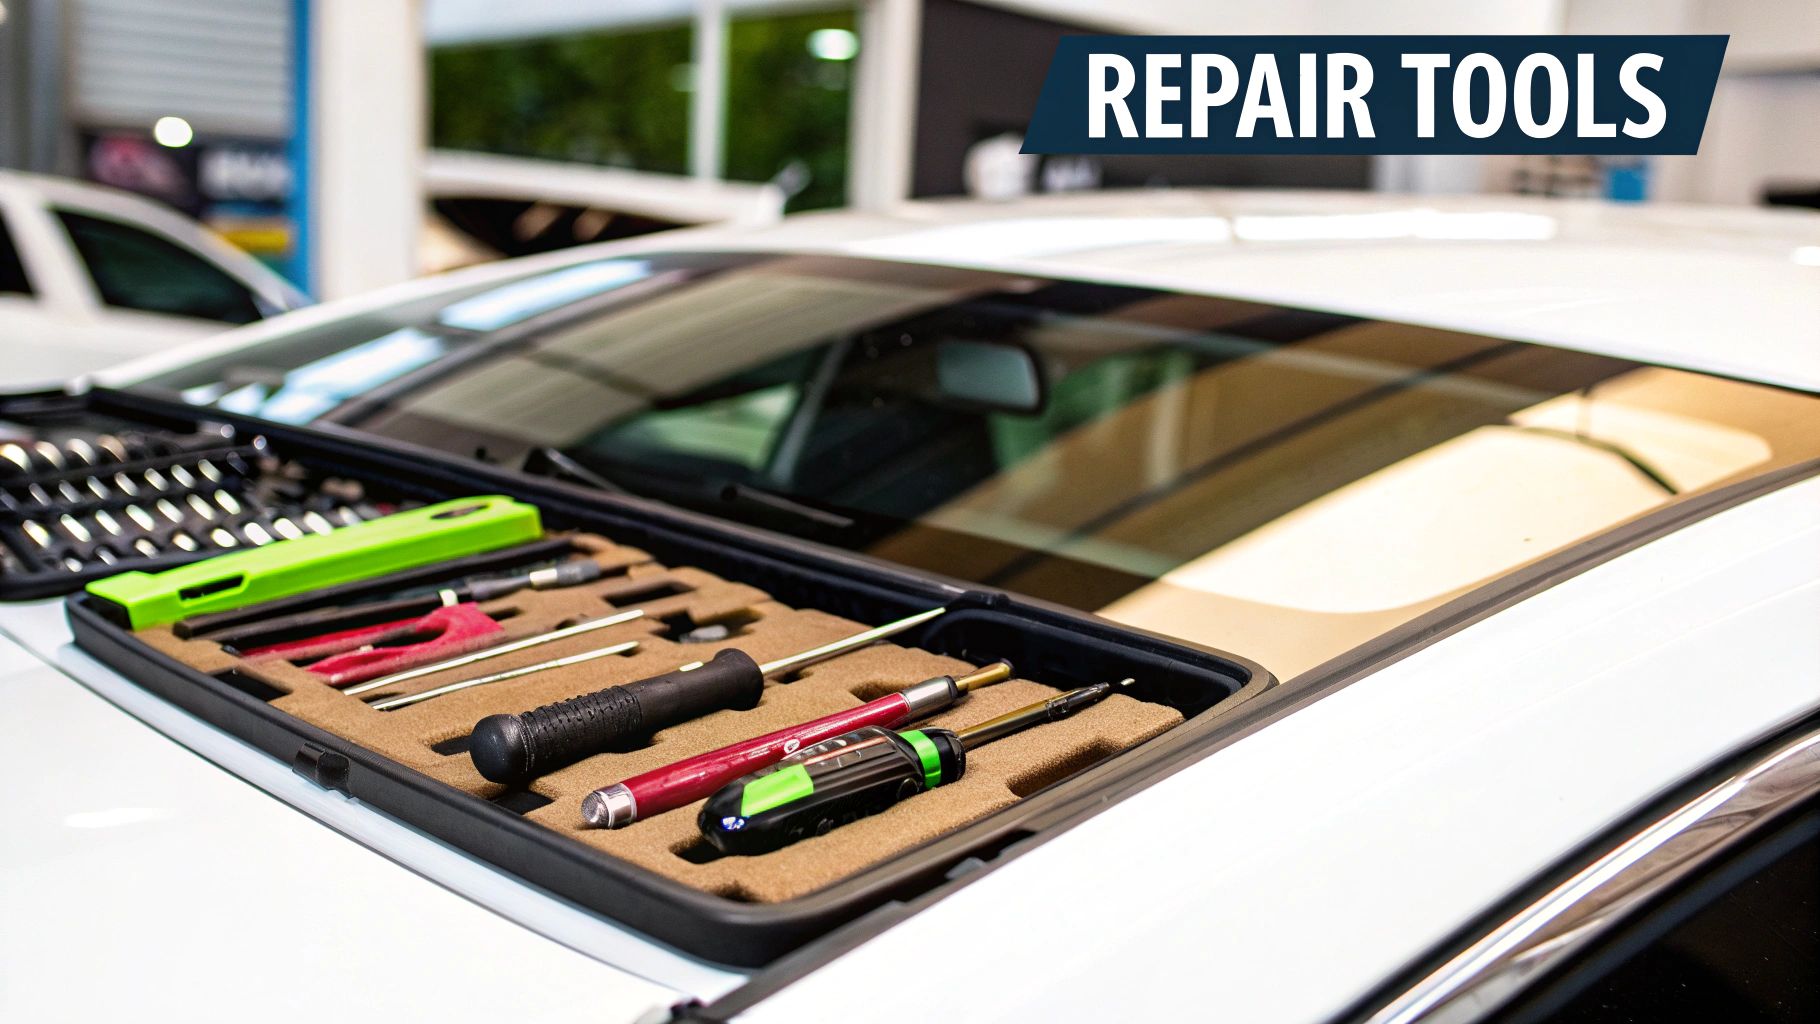
Alright, the first step in any successful auto glass repair at home is getting your hands on the right gear. When you walk into an auto parts store, it's easy to get overwhelmed by a wall of similar-looking kits. But trust me, they aren't all the same, and what you choose now will make or break your repair later.
The most critical part of any kit is the resin. This is the clear liquid that’s going to fill that ugly chip and bring back your windshield's strength. You'll want to find a kit that specifically mentions a high-viscosity, acrylic resin. Why? Because a thicker formula does a much better job of seeping into all the tiny fractures and curing into a rock-solid bond that stops the damage dead in its tracks.
Next up is the applicator system. This is where the real magic happens. The best kits use either a bridge-and-injector or a suction-cup-and-pedestal design. These contraptions are engineered to create a strong vacuum over the chip, which is absolutely essential for pulling air out and pushing the resin deep into every nook and cranny. I’d steer clear of those super-basic, syringe-only kits; they just can't generate the pressure needed for a proper, professional-looking fill.
Matching The Kit To The Damage
Not all windshield damage is created equal, and the type of chip you have will dictate the kind of kit you need. A simple, clean "bullseye" is the easiest to tackle, and most standard kits will do the trick just fine. But if you're dealing with something more complex, you've got to be a bit more strategic.
Starburst Cracks: You know the type—they have little legs spreading out from the middle. These require a resin that flows smoothly and an applicator capable of applying steady, consistent pressure to fill each one of those tiny offshoots.
Combination Breaks: This is the worst of both worlds, a bullseye with starburst cracks radiating from it. These are definitely trickier and demand a high-quality kit with a robust vacuum applicator to make sure the resin gets into both the center impact point and all the surrounding cracks.
It can be tempting to grab the cheapest kit on the shelf to save a few bucks, but that's often a recipe for disaster. A poor repair can fail down the road or leave a cloudy, distracting blemish. Investing a little more in a reputable kit is your best bet for a fix that’s nearly invisible and, more importantly, structurally sound.
Beyond The Box Unsung Heroes Of Repair
The kit itself has the main components, but a few simple items you probably already have lying around the house can elevate your repair from "good enough" to "professional." Think of these as your essential support crew.
Before you even think about starting, make sure you have these on hand:
Isopropyl (Rubbing) Alcohol: This is for cleaning the damaged area. A perfectly clean surface is non-negotiable if you want the resin to bond properly.
Microfiber Cloths: Grab two. Use one for the initial cleaning and a fresh one to wipe away excess resin at the end. Unlike paper towels, they won't leave annoying lint behind.
A Single-Edge Razor Blade: Most kits come with one, but it never hurts to have a spare. You'll need it to carefully scrape off the cured resin for that perfectly smooth, flush finish.
A Thumbtack or Push Pin: This little tool is a lifesaver. Use it to gently pick out any loose slivers of glass from the impact point before you even think about applying the resin.
This level of preparation is more critical than you might think. The global automotive glass market was valued at around USD 26.07 billion in 2024, and a big reason for that is how complex modern windshields have become, often embedding sensors for driver-assist systems. You can read more about the complexities of the modern auto glass market. Having every tool ready to go ensures you can perform a clean repair that keeps your vehicle’s advanced systems and structural integrity intact.
The Windshield Repair Process From Start to Finish
Alright, you've got your tools laid out, so let's get down to the actual auto glass repair at home. I like to think of this as a three-act play: preparation, application, and curing. Nailing each part is the secret to a repair that’s not just strong but also nearly invisible. Getting this right stops that tiny chip from turning into a massive crack.
First things first, let's talk location. You absolutely need to work on a cool windshield in a shaded spot, like a garage or carport. If you try this in direct sunlight, the resin will start to cure way too fast—long before it has a chance to work its way into all the microscopic fractures. A hot windshield is just as bad. If you've just been driving, give the glass at least an hour to cool down to the ambient temperature.
Preparing The Damaged Area
The first real step is to clean out the impact point. This is where your thumbtack and rubbing alcohol earn their keep.
Gently use the very tip of the thumbtack to pick out any tiny, loose shards of glass right from the center of the chip. You’d be surprised what can get stuck in there, and any little bit of debris will stop the resin from filling the void completely.
Once the loose bits are gone, dab a little rubbing alcohol on a microfiber cloth and give the chip and the area around it a thorough cleaning. You need a pristine, oil-free surface so the applicator's suction cups can get a death grip on the glass. That seal is critical for the next stage. Just give it a minute to fully evaporate before you proceed.
And before you jump in, a quick word on safety. This infographic lays out the essentials.
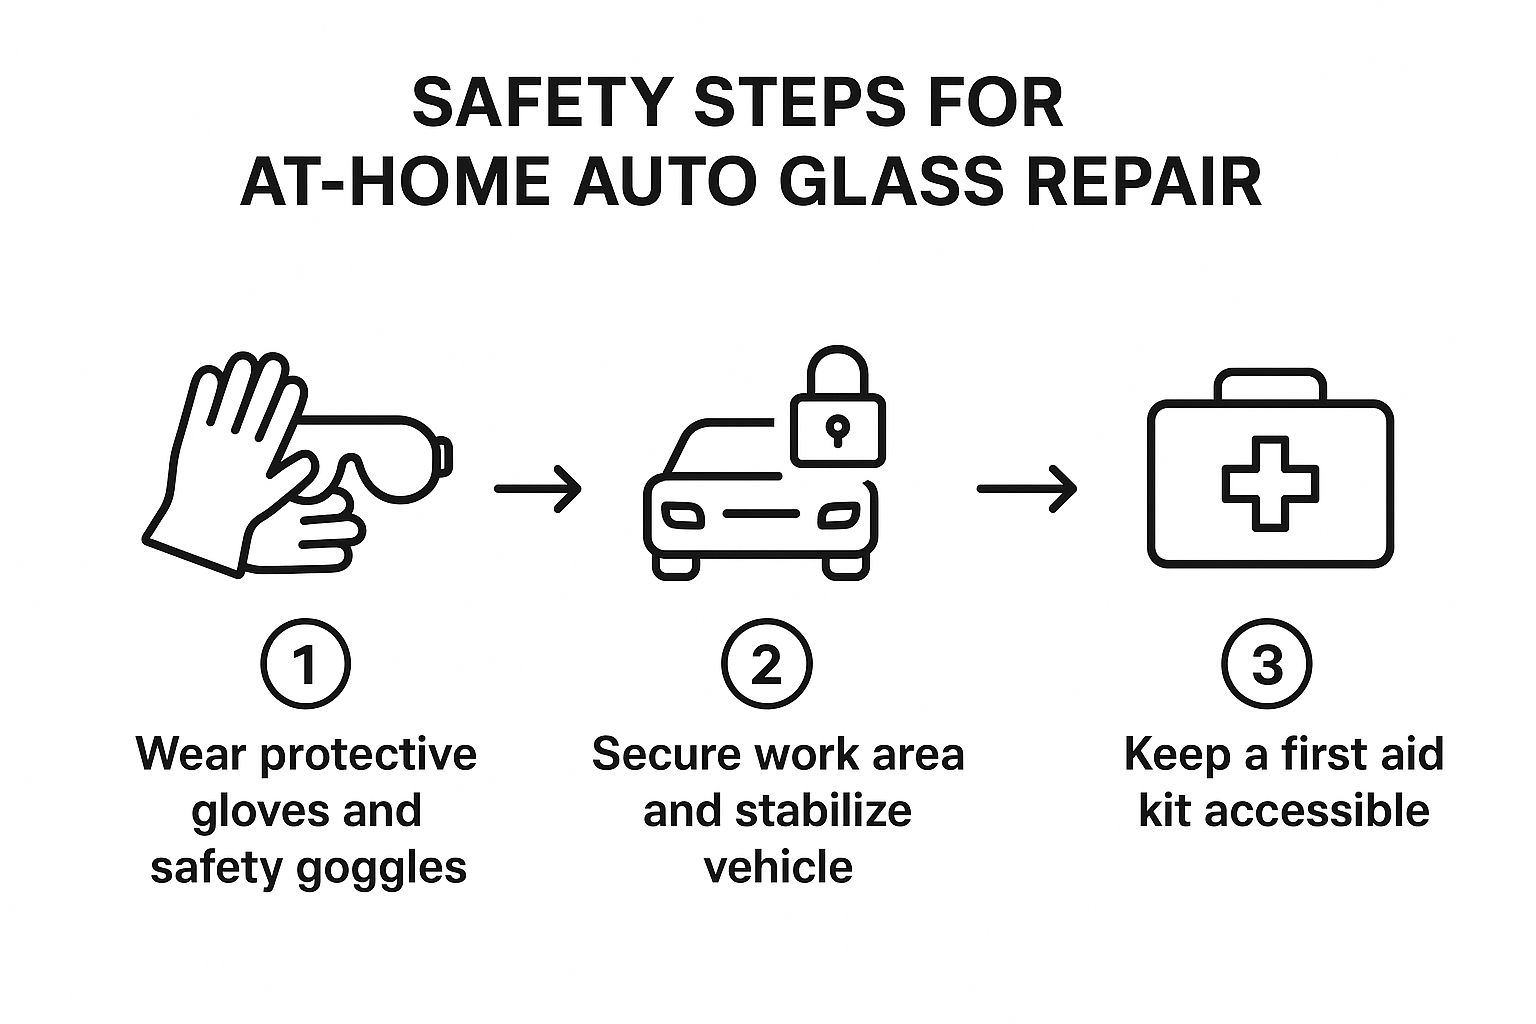
It’s a simple reminder: wear your protective gear, make sure your work area is secure, and know where your first-aid kit is. These are the fundamentals of a safe repair.
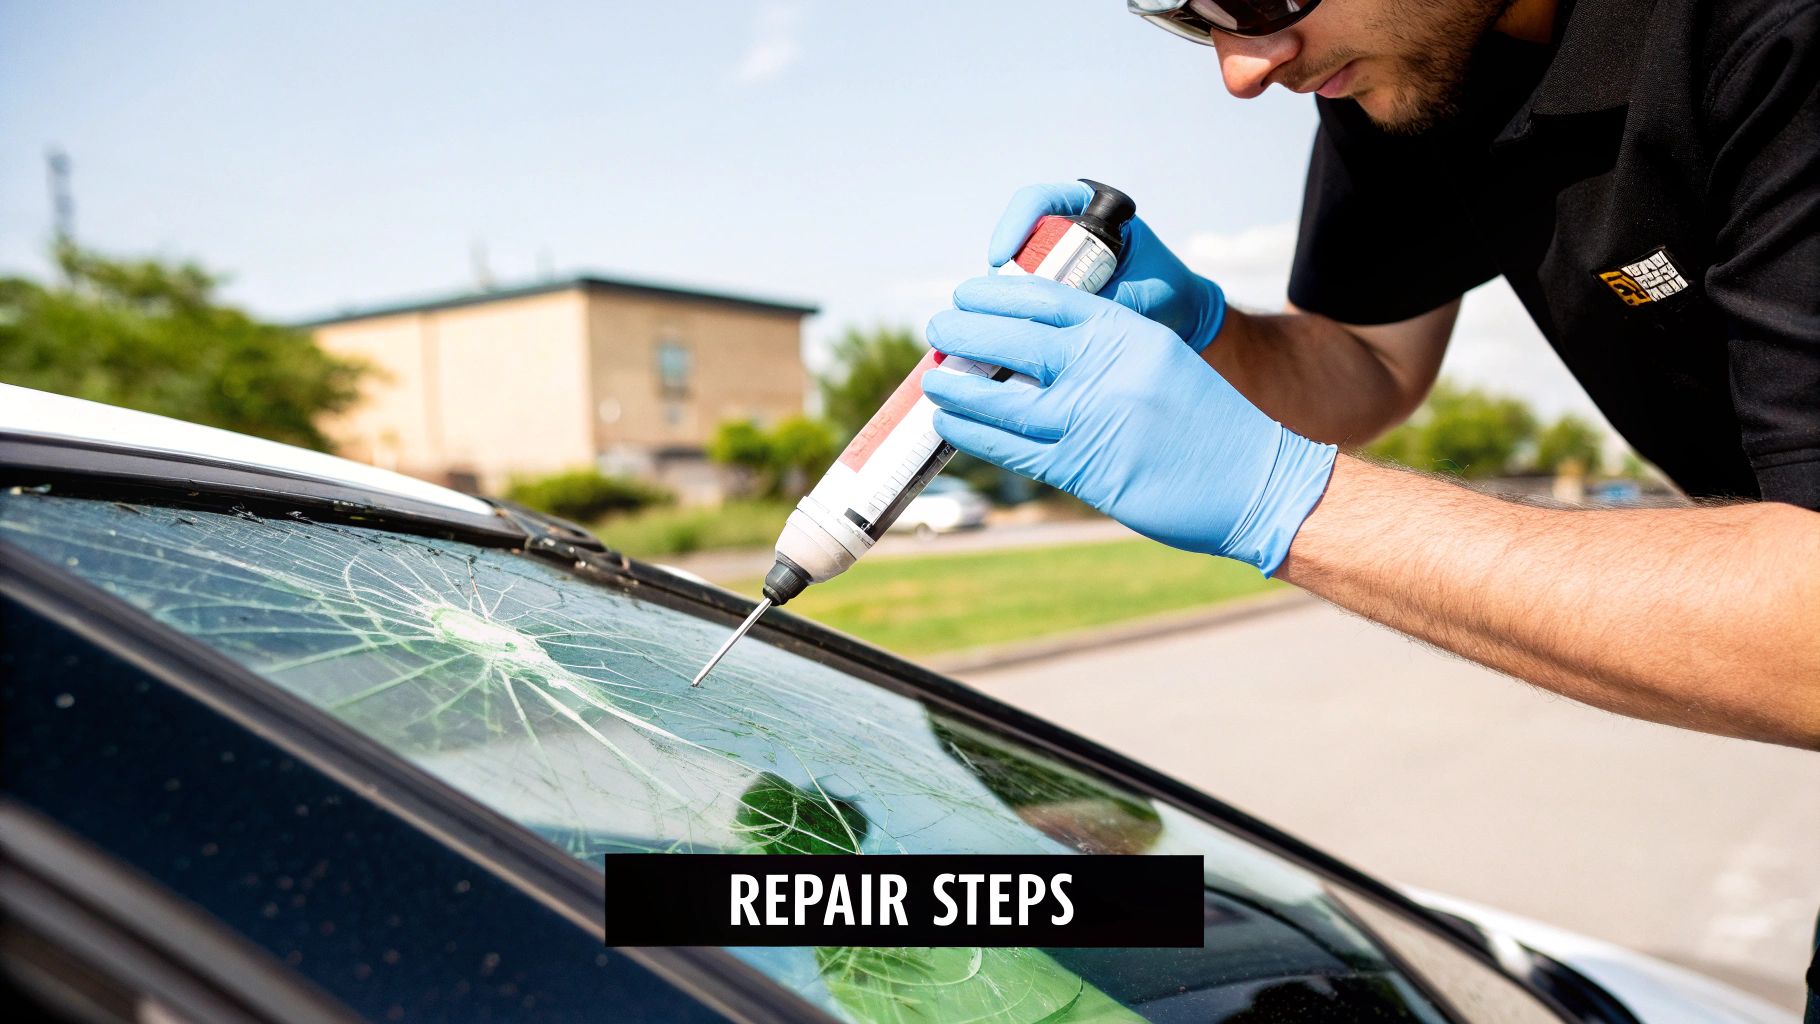
Applying The Repair Resin
With your prep work done, it's time to set up the application tool. Most DIY kits come with a little bridge or pedestal that has suction cups.
Position the device so it's centered directly over the chip, making sure the tip of the resin chamber lines up perfectly with the hole. Now, press down firmly to stick the suction cups to the glass. You're aiming for a really tight seal.
Next, carefully squeeze the recommended number of resin drops into the chamber. Most kits call for 3 to 6 drops, but always double-check the instructions. A common mistake is adding too much, which just creates a mess. Screw the injector into the chamber; this is what forces the resin down into the damage. Keep tightening until you feel some solid resistance—that pressure is what pushes the resin deep into every nook and cranny.
Now for the easy part: wait. Let the injector sit for about 5-10 minutes. This gives the resin plenty of time to seep into the entire chip. As it fills the air gaps, you might even see the damage start to fade. Patience here really does pay off.
Curing For A Lasting Bond
Once the resin has worked its magic, go ahead and unscrew the injector and remove the whole applicator. Don't sweat it if there's a small puddle of resin left on the surface.
Immediately grab one of the clear curing strips from your kit and lay it flat over the repair. Gently press it down to smooth out any air bubbles trapped underneath. This little piece of plastic is more important than it looks; it holds the resin in place and protects it from dust and air while it hardens.
For the grand finale, move your car into direct sunlight. The UV rays from the sun are what activate the resin, curing it into a hard, permanent bond. On a decent sunny day, this should take about 15 to 20 minutes.
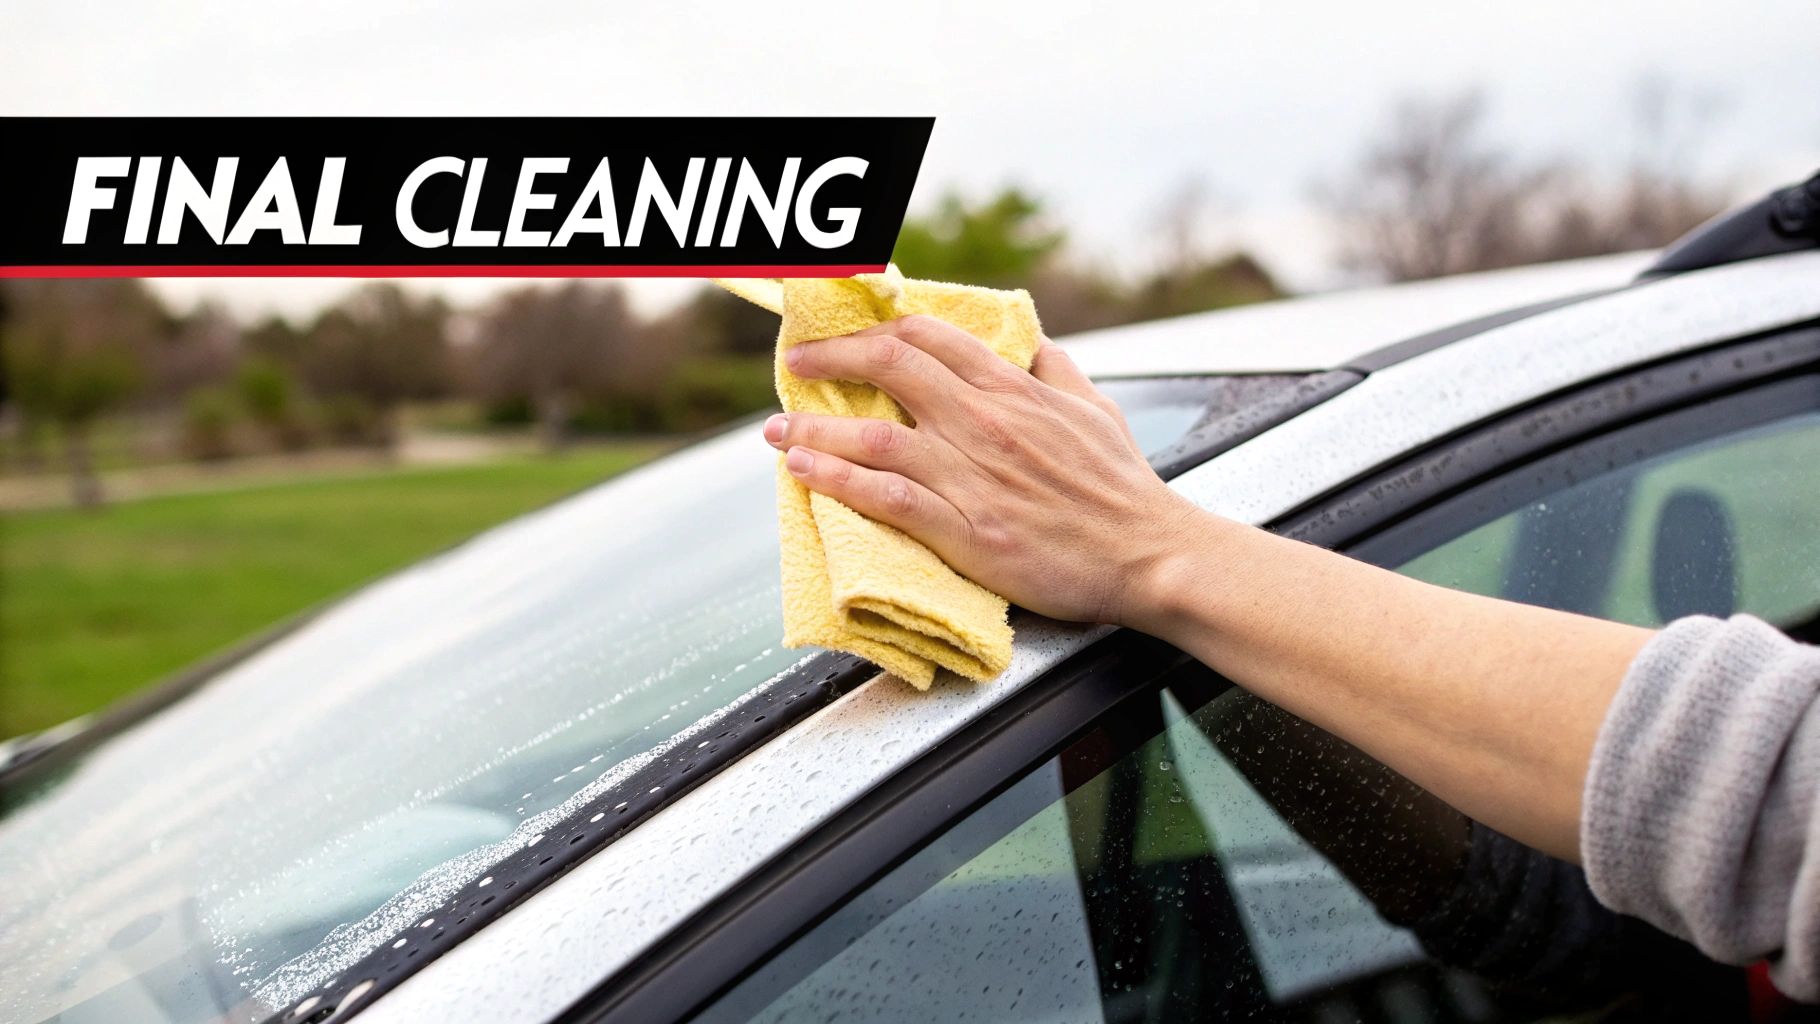
After the time is up, use the razor blade to scrape away the curing strip and any excess resin. Hold the blade at a 45-degree angle and use smooth, even strokes until the surface feels completely flush with the rest of the glass. One last wipe with a clean microfiber cloth, and you're all set!
For a closer look at different repair scenarios, you might find our professional windshield repair guide useful.
Pro Tips and Common Mistakes to Avoid
Getting through the basic steps of an auto glass repair at home is one thing, but making that repair nearly invisible is another. I've seen it all over the years, and a few insider tricks can make all the difference. Just as important is knowing the common traps that can turn a simple fix into a permanent eyesore.
Temperature is your biggest enemy or your best friend here. The resin is finicky; on a cold day, it gets thick like molasses and won't flow into those hairline fractures. If it’s too hot, the resin can start to cure before it has even had a chance to fill the chip properly. The sweet spot is working in moderate temperatures, somewhere between 50°F and 75°F.
Here's a little trick I've used countless times for stubborn starburst cracks. If the resin just won't seep into the legs of the crack, have a friend sit inside the car. Ask them to gently press on the glass from the inside with their thumb, right behind the damage. That tiny amount of flex is often all it takes to open up the crack and let the resin work its magic.
The Pitfalls That Ruin Repairs
I can’t tell you how many DIY repairs I've seen that went wrong because of a simple, avoidable mistake. It's frustrating to put in the effort only to end up with a cloudy mess or a weak bond.
Here are the top three mistakes I see people make all the time:
Working in Direct Sunlight: This is the absolute number one rookie error. The UV rays from the sun are what cure the resin. If you're working outside on a sunny day, the resin will start hardening the second it leaves the bottle, long before it fills the damage. Always, always work in a garage or at least in the shade.
Using Too Much Resin: It's tempting to think more is better, but it's not. Overfilling the injector just creates a huge, sticky mess when you apply pressure. The excess resin oozes out, is a pain to clean up, and does absolutely nothing to make the repair stronger.
Skipping the Vacuum Cycle: The injector’s first job is to pull air out of the chip to create a vacuum. If you rush this and just start pushing resin in, you're trapping tiny air bubbles inside the damage. The result is a weak, cloudy repair that sticks out like a sore thumb.
A failed repair isn't just a cosmetic issue—it means the windshield is still structurally compromised. The most common culprit is trapped air, which stops the resin from creating a solid, complete bond with the glass. Take your time on the vacuum step. It's truly what separates a quick patch from a permanent, professional-quality fix.
More and more people are tackling these kinds of projects themselves. The market for automotive glass repair services is expanding, and a lot of that growth is driven by DIYers who prefer the convenience of home kits and online guides. In fact, you can read more about the growth of the glass repair services market and see how technology is making these repairs more accessible. By steering clear of these common mistakes, you’re ensuring your DIY job meets the same standards as a professional one.
Knowing When to Call a Professional
Part of any successful DIY job is knowing your own limits. When it comes to auto glass repair at home, recognizing when to put the kit down and pick up the phone is the smartest thing you can do for your car and your safety.
Those DIY kits are lifesavers for small rock chips and tiny blemishes, but they aren't magic. Some damage is just too severe for a resin-based fix. Trying to tackle a major crack yourself can waste your time and money, and even make the problem worse. If you spot any of the red flags below, it's time to call in the pros.
Damage Size and Location Rules
First, let's talk about size. A good rule of thumb is the "dollar bill test." If you have a crack that's longer than a dollar bill, a home repair kit simply won't have the strength to properly seal it and prevent it from spreading. For chips, anything bigger than a quarter is out of the DIY league.
Location is just as important, if not more so. Any damage—no matter how small—that sits directly in your line of sight as the driver is an absolute no-go.
Even a perfect DIY repair can leave behind a tiny distortion or blur. It’s usually unnoticeable on the passenger side, but right in your field of view? That small imperfection can become a massive, dangerous distraction, especially when driving at night or in the rain.
Modern Cars and ADAS Considerations
If you drive a newer car, there’s another layer to this: your Advanced Driver-Assistance Systems (ADAS). These are the brains behind features like automatic braking and lane-keeping assist, and they rely on cameras and sensors mounted right on your windshield.
A botched repair could block a sensor, but the bigger issue is that significant damage usually means the whole windshield needs replacing. After a new windshield goes in, the ADAS must be professionally recalibrated. This isn't optional. Trying to DIY a repair on a windshield tied into these complex safety systems is a huge risk you don't want to take.
When the damage is beyond a simple home fix, getting it handled by a professional is non-negotiable. To understand what that involves, you can learn more about the process in our guide to professional https://www.autorenu911.com/windshield-replacement, which walks you through everything from the initial assessment to the critical ADAS recalibration.
Got Questions About DIY Auto Glass Repair? You're Not Alone.
Even with the best instructions, it's natural to have a few lingering questions before you dive into your first auto glass repair at home. Let’s clear up some of the most common ones I hear from people all the time.
A big one is always, "How long is this fix actually going to last?" The great news is that when you do it right, the repair is permanent. That special resin isn't just a temporary patch; it actually forms a chemical bond with the glass itself. This restores the windshield’s strength and permanently stops that chip or crack from spreading.
What If the Weather Isn't Perfect?
People often worry about the weather. Can you really do this if it's cold or drizzling outside? The answer is yes, but you have to be smart about it. The trick is to find a dry, covered spot, like your garage or even a carport.
If it's chilly, you'll need to gently warm the glass first. I usually recommend using a hairdryer on its lowest setting, keeping it a good few inches away from the windshield. You're just trying to get the glass to a workable temperature, somewhere in that 50-75°F sweet spot. This allows the resin to flow smoothly into every tiny crevice. Whatever you do, don't blast it with high heat—that’s a surefire way to make the crack spread right before your eyes.
So, will the crack completely disappear? Let's be realistic here. The main goal of a DIY repair is to restore your windshield's structural integrity and make the damage about 80-95% less noticeable. A really good repair on a fresh chip can be almost invisible, but you're filling the damage, not making it vanish.
Knowing What to Expect From the Finished Repair
The final look really comes down to two things: the type of damage and how fast you got to it. A clean, new bullseye chip that hasn't had time to get dirt packed into it will almost always look better than a crack that's been sitting there for a few weeks. Remember, safety is the number one priority; the cosmetic result is a close second.
A solid repair brings back the windshield's strength, which is absolutely critical. In modern cars, the windshield is a structural part of the vehicle's frame and is tied into advanced safety systems. If you're interested in the tech, you can learn more about the importance of ADAS windshield calibration in our detailed article. A proper repair ensures these vital systems can do their job correctly.
When a chip is just too big or complicated for a home kit, that's when you call in the pros. At Auto Renu Auto Glass LLC, we bring professional-grade tools and expertise right to you. You can get a free, no-hassle quote from us today at https://www.autorenu911.com.