Windshield Repair
Learn how to master DIY windshield repair with our expert guide. Fix chips and cracks like a pro and know when it's best to call for help.
Sep 24, 2025
generated
diy windshield repair, windshield chip repair, auto glass, car maintenance

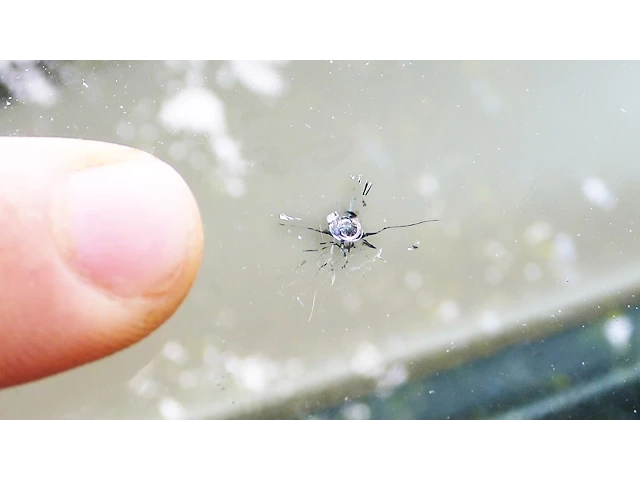
That little star on your windshield from a flying rock is more than just an annoyance—it's a ticking clock. So, is a DIY windshield repair kit the smart play? For a small, dime-sized chip, it can be a fantastic way to save both time and money. But the most important part of any repair is knowing when to do it yourself and when to pick up the phone and call a pro.
When to Tackle a DIY Windshield Repair
Making the call on a DIY fix all comes down to a quick, honest look at the damage. Not all chips are the same, and trying to fix something beyond a kit's capabilities can actually make things worse. A good DIY repair should stop the chip from spreading, restore the glass's strength, and make the blemish nearly invisible.
It’s no surprise that DIY kits have become so popular. That tiny chip can spiderweb across your windshield with the next temperature swing, forcing a full replacement. For under $20, these kits offer a solid, fast fix, which is a whole lot better than the couple hundred bucks you might spend on a professional service call.
Assessing the Damage
Before you even head to the auto parts store, get up close and personal with that chip. What you're looking for boils down to two things: size and location.
Size Matters: Most over-the-counter kits are made for damage no bigger than a quarter. They work great on common "bull's-eyes" (those little circular dings), "star breaks" with short legs, and small combination breaks. If you're looking at something larger than an inch across, it’s professional territory.
Location is Crucial: A chip right in the driver's line of sight is a definite no-go for a DIY job. Even a perfect repair can leave a tiny bit of distortion, and you don't want that where you're looking to drive. Also, any damage too close to the edge of the windshield can weaken the entire structure, which is another time to let an expert handle it.
Key Takeaway: The sweet spot for a DIY repair is a chip about the size of a dime or quarter, well outside your direct line of sight, and at least two inches away from the edge of the windshield.
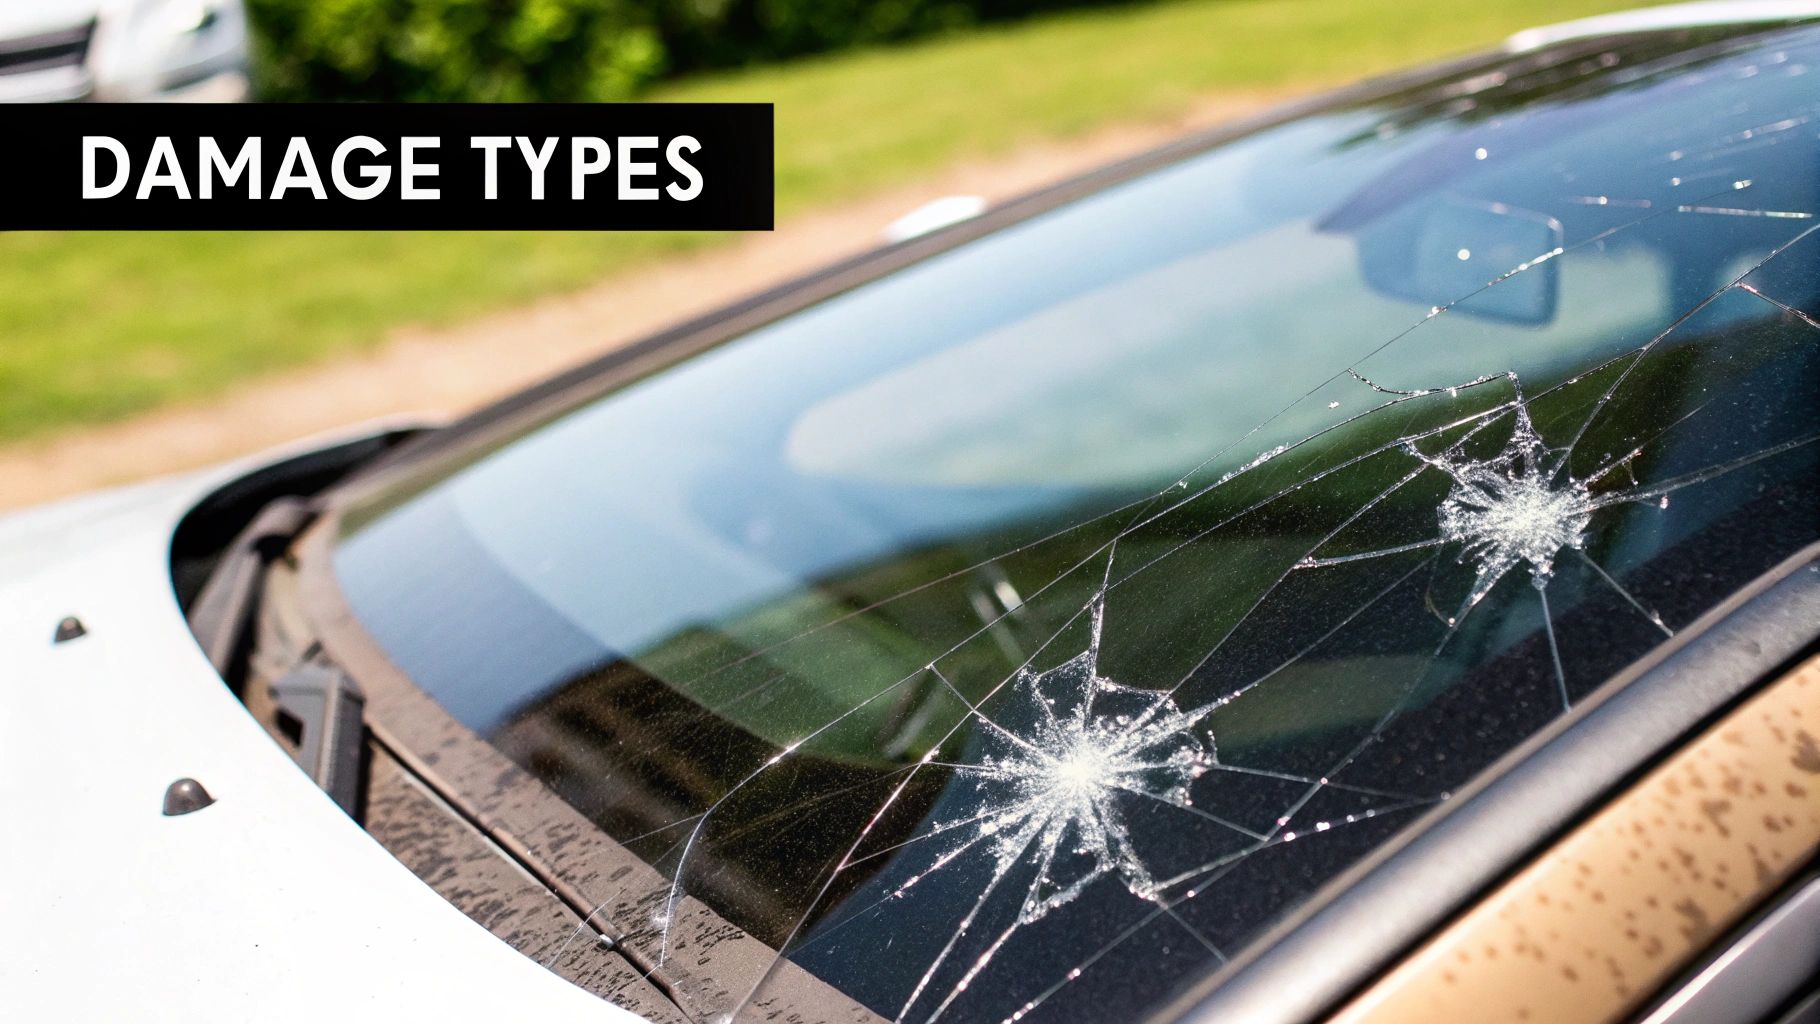
When to Call a Professional
Sometimes, the damage makes the decision for you. If you see a crack that's longer than a dollar bill, don't even think about a DIY kit. It simply won't work. Likewise, if you have several chips all clustered together, the glass is too weak in that area for a simple resin fix.
Deep damage is another red flag. If the impact went through both layers of glass, a DIY kit won't cut it. A quick way to check is to run your fingernail over the spot from inside the car. If you feel a dip or an indent, the damage is too deep.
In these more serious cases, you might be looking at a full windshield replacement. Knowing when to make that call is crucial to avoiding bigger problems down the road. If your damage fits any of these descriptions, your best bet is to get professional advice.
DIY vs. Pro Repair: When to Make the Call
Still on the fence? This table should help you quickly size up your situation and decide whether to grab a kit or call a technician.
Damage Type | Recommended Action | Key Considerations |
|---|---|---|
Small Chip (dime-sized) | DIY Kit | Perfect for DIY. Quick, easy, and prevents spreading. Ensure it's not in the driver's line of sight. |
Star Break (under 1 inch) | DIY Kit | Most kits handle these well. Work the resin into all the small cracks for a solid repair. |
Long Crack (over 6 inches) | Call a Pro | A DIY kit cannot properly fill or stabilize a long crack. This almost always requires professional attention. |
Chip in Driver's View | Call a Pro | Safety first. Even minor optical distortion can be dangerous, so let an expert handle this. |
Damage at Windshield Edge | Call a Pro | The edges are critical for structural integrity. A DIY repair can compromise the glass's stability. |
Deep Impact (both layers) | Call a Pro | If the damage goes through the first layer of glass, it's too severe for a DIY fix. You likely need a professional windshield replacement. |
Making the right choice from the start ensures your repair is safe, effective, and lasts for the long haul. When in doubt, a quick consultation with a professional is always a smart move.
Setting Up for a Flawless Repair
Honestly, a successful DIY windshield repair is won or lost before you even open the resin. Getting your prep work right is the one thing that separates a nearly invisible fix from a botched job that you’ll have to look at every single day. Think of it as your mission-critical pre-flight check.
First things first, where you do the work matters. A lot. You need to be in a shady, dry spot, like your garage or under a carport. Direct sunlight is your enemy here. The resin in these kits is designed to cure with UV light, and if you're working out in the sun, it will start to harden long before it has a chance to seep into every tiny crack.
Temperature plays a big part, too. You’re looking for a sweet spot between 50°F and 75°F (10°C to 24°C). If the glass is scorching hot, the resin cures way too fast. If it’s freezing cold, the resin will be thick as molasses and won't flow properly.
Getting Your Gear in Order
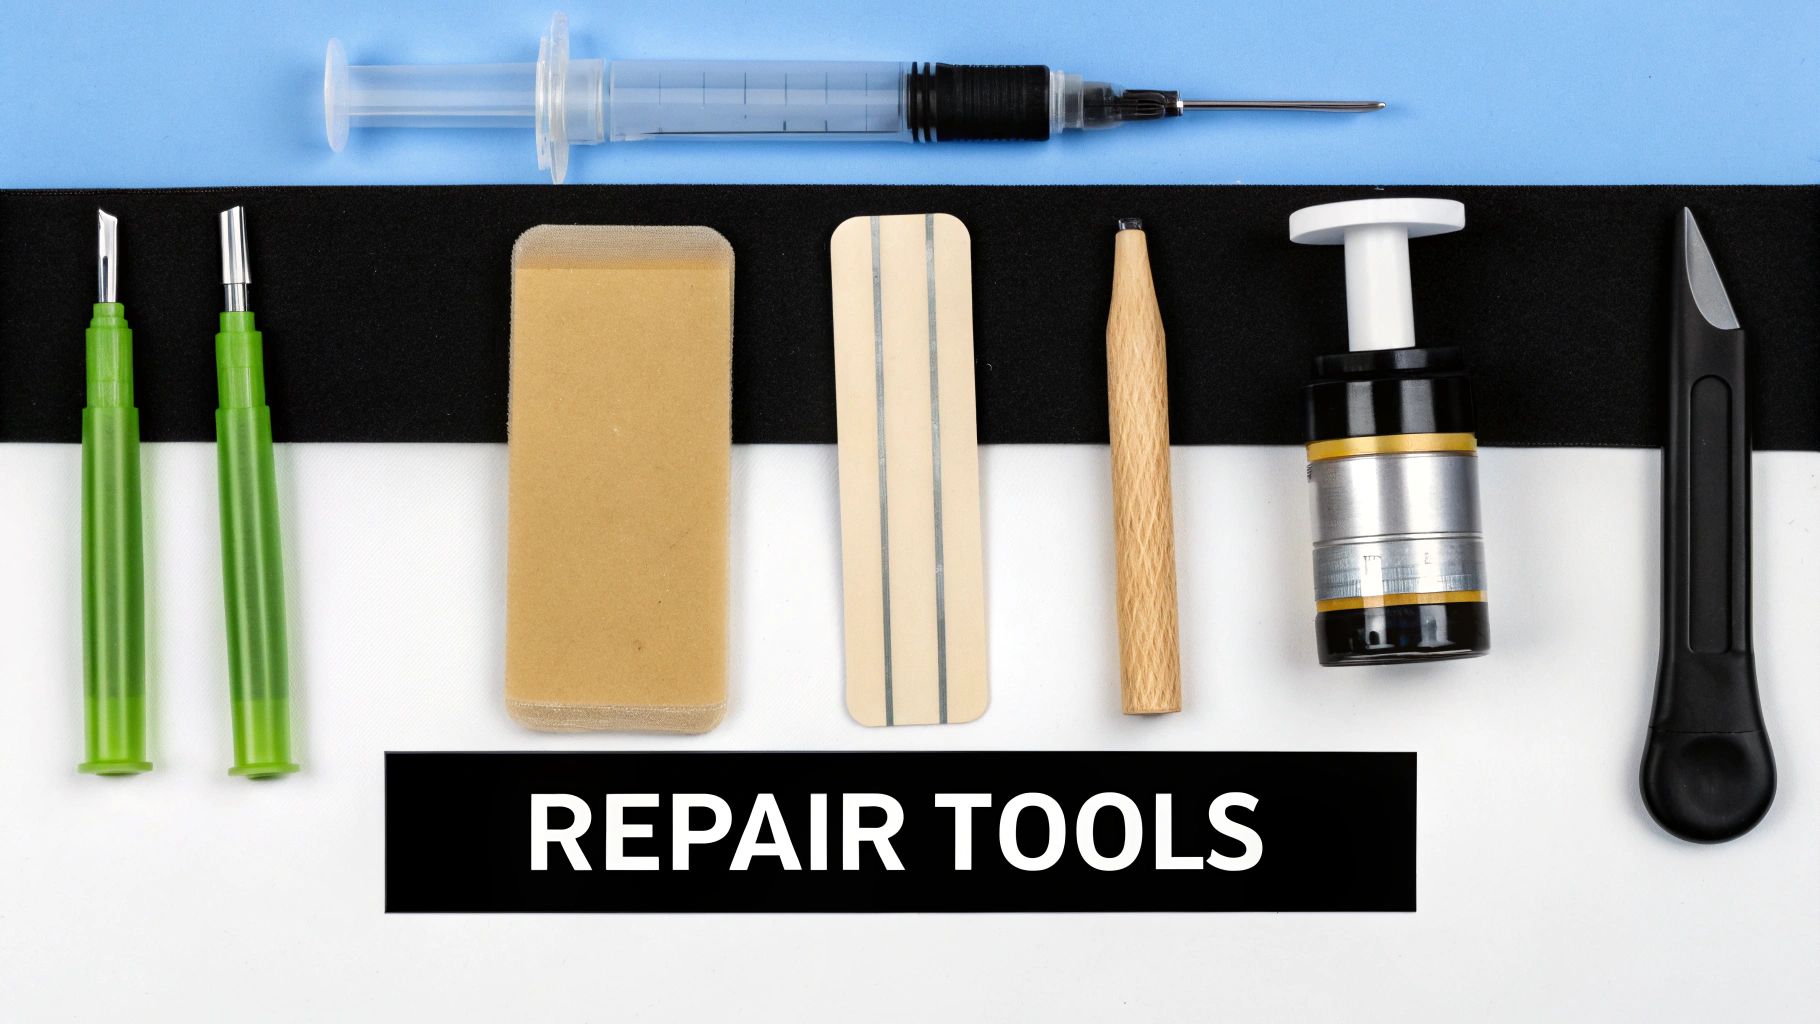
Before you dive in, lay everything out. Your kit has the main stuff, but trust me, a few extra things from around the house will make your life a whole lot easier.
Here's your go-to checklist:
The Windshield Repair Kit: It'll have the resin, the applicator or pedestal, and those little curing strips.
Rubbing Alcohol: This is for cleaning the glass without leaving a film.
A Clean Microfiber Cloth: For wiping everything down.
A Pushpin or Thumbtack: You'll need this to carefully pick out any loose bits of glass from the impact point.
Safety Glasses: Don't even think about skipping these. You don't want glass dust or resin in your eyes.
Having it all within arm's reach means you won’t be scrambling mid-repair, which is usually when things go sideways. A little organization now pays off big time in the final result.
Pro Tip: Whatever you do, don't grab the Windex or any other household glass cleaner to prep the area. Most contain ammonia or soaps that leave behind a residue. That invisible film is just enough to stop the resin from creating a permanent bond with the glass.
Prepping the Damage Zone
Okay, with your workspace ready, it's time for the first real step: cleaning that chip like it's going into surgery. This is non-negotiable. Any speck of dirt, drop of moisture, or bit of glass dust you leave behind will get sealed into the repair forever, making it weak and obvious.
Start by putting a little rubbing alcohol on your microfiber cloth and giving the area around the chip a good, thorough wipe.
Next, take that pushpin and gently—I mean gently—pick out any loose, flaky shards of glass right at the point of impact. You’re just trying to clear the runway so the resin can flow deep into the damage.
After you've cleared the debris, wipe the spot one last time with alcohol and let it air dry completely. The chip needs to be 100% dry before you move on. Trapped moisture is the silent killer of a good repair; it will turn to vapor and can cause the fix to fail down the road. Once it's bone-dry, you're finally ready to set up the repair device.
Mastering the Windshield Repair Process
Alright, you've done the prep work. Now for the part that actually fixes the problem. This is where we take that ugly, distracting chip and turn it into a nearly invisible spot that's strong and stable. I know those tiny instruction sheets in the kit can be a bit confusing, so let's walk through it together, focusing on the techniques that really work for a solid DIY windshield repair.
The whole idea here is to get a special resin deep into the damaged glass. This isn't just about squirting some glue in and calling it a day. The process involves creating a vacuum to pull all the air out of the chip, then using pressure to force the liquid resin into every last microscopic fracture. Trust me, patience is your best friend here.
Applying the Repair Pedestal
First things first, you need to set up the applicator. Your kit will have a plastic pedestal with an adhesive ring. The name of the game is centering this thing perfectly over the chip.
Start by peeling the backing off one side of the adhesive seal. Press it down firmly onto the glass, making sure the hole is dead center over the impact point.
Now, peel off the top backing and stick the plastic pedestal onto the seal. The tube should be pointing straight up, ready for the next step.
Give it a good press to make sure it's completely airtight. A bad seal is the number one reason these repairs fail, as it kills your ability to create a proper vacuum.
This simple breakdown gives you a good visual of the stages you're about to tackle.
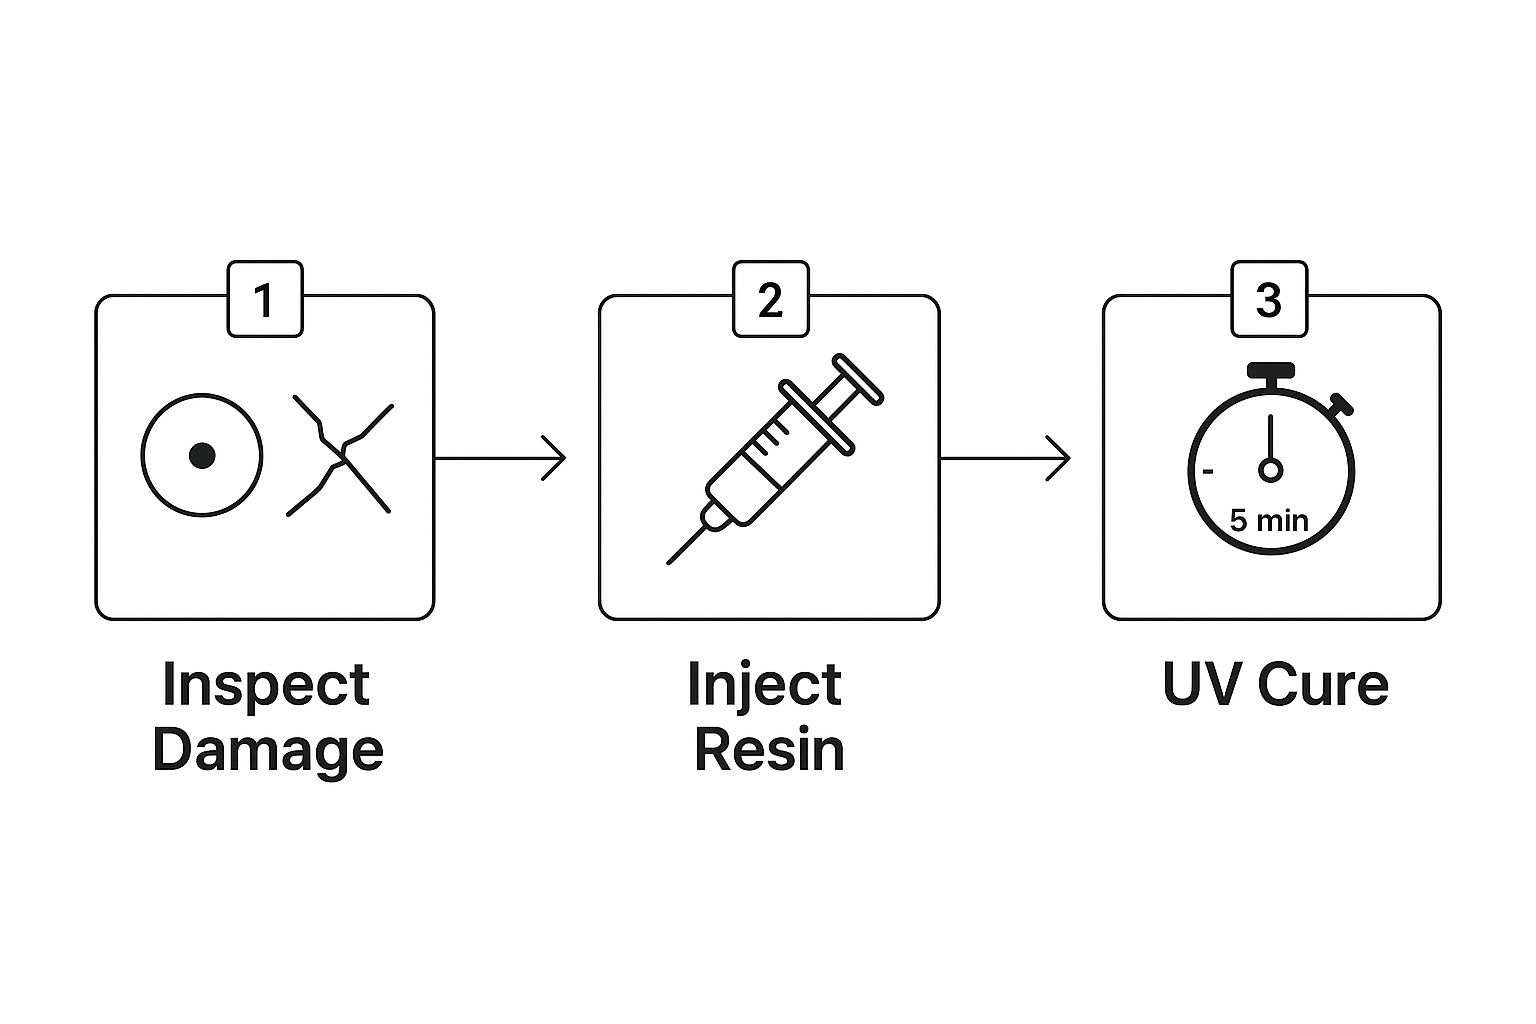
As you can see, it's a logical flow from setting up the injector to letting the sun do the final work. Each step is critical, so don't rush.
Injecting the Resin Correctly
Here we go—the main event. Snip the tip off your resin tube and carefully squeeze the right number of drops into the pedestal. The instructions usually call for three to five. Don't go overboard; extra resin just creates a bigger mess to clean up later.
Next, insert the syringe or plunger that came with your kit into the top of the pedestal. This is where the magic happens. Slowly pull the plunger up to create a vacuum. Look closely—you should see tiny air bubbles working their way out of the chip and floating up through the resin. This is a great sign! It means air is being pulled from the damage, clearing the way for the resin to get in.
Lock the plunger into that vacuum position and just walk away for about 10 minutes. Let it do its thing.
My Go-To Trick: While the vacuum is working, I like to go inside the car and gently tap the glass around the repair area with my knuckle. Those little vibrations can help shake loose any stubborn air bubbles that are hiding deep in the legs of the crack.
After about ten minutes, release the vacuum by removing and reinserting the plunger. Now, gently press the plunger down. This switches from vacuum to pressure, forcing the resin into all those empty crevices. Secure the plunger in this pressurized position and give it another 20 minutes to sit.
DIY kits have gotten surprisingly good over the years. The resins are way more advanced than they used to be, getting deeper into chips and making the glass stronger than ever. If you're curious about the tech, you can discover more insights about windshield repair technology and see how much things have changed.
Curing for a Permanent Bond
Once the resin has had plenty of time to work its way into the damage, you're on the home stretch. Carefully remove the entire apparatus—the pedestal, the seal, all of it. You'll be left with a small, wet dot of resin right over the chip.
Grab your resin bottle one last time and put a single, small drop right on top of the repair. Immediately cover it with one of the clear curing strips from the kit. Use the razor blade they gave you to gently smooth the strip flat against the glass, pushing out any tiny air bubbles.
Now, all you have to do is move your car into direct sunlight. The UV rays are what actually cure the resin, hardening it into a permanent, transparent bond that restores the integrity of the glass. This usually takes about 5 to 15 minutes on a sunny day. Once it's hard, your repair is officially done.
Achieving a Professional-Looking Finish

The sun has worked its magic and the resin is now rock-hard. You’ve done the heavy lifting for your DIY windshield repair, but this next part is what truly makes the difference between an obvious patch-up and a repair that practically disappears. It’s all about the finesse.
Start by peeling off that little plastic curing strip. Most of the time it comes right off, but if it puts up a fight, just use the corner of the razor blade to get it started. What you’ll find underneath is a small, hard bump of cured resin—this is perfect! That excess resin is exactly what we'll work with to get a seamless, factory-like finish.
Scraping for a Flawless Surface
Now, grab the single-edge razor blade that came in your kit. The mission here is simple: carefully shave down that bump of excess resin until the repaired spot is perfectly level with the surrounding glass. The technique is everything, as you want to avoid leaving any new scratches behind.
Hold the blade at a sharp 45-degree angle to the windshield. You're not trying to gouge the resin out; you're just gently slicing the excess off the surface. Use smooth, even strokes, letting the blade’s sharpness do the work for you. Little shavings of resin should start flaking off.
Keep scraping from a few different directions until you can’t feel the bump anymore. Run your finger over it—it should feel as smooth as the rest of the glass. Don’t rush this part. A little patience now pays off big time in the final appearance.
Expert Tip: For that extra-smooth, professional feel, try this trick. Once you think you're done, spray a tiny bit of glass cleaner on the spot. The liquid acts as a lubricant and lets you give it a final, light scrape. It helps the blade glide over the glass and shear off any last microscopic high spots.
Final Polish and Inspection
With the surface completely flush, it’s time for the final cleanup. Grab a clean microfiber towel and a bit of rubbing alcohol or your favorite glass cleaner. Wipe away all the resin dust, smudges, and fingerprints to reveal your handiwork.
Now, take a step back and look at the repair from different angles, both from inside and outside the car. A good repair won't vanish completely, but it should be reduced to a tiny, clear speck. You've successfully stopped the chip from spreading, restored the glass's integrity, and cleared up that annoying distraction in your line of sight.
Common Mistakes to Sidestep in Your DIY Repair
Taking on a DIY windshield repair feels great when it goes right, but a few simple missteps can turn a quick fix into a permanent eyesore. Knowing what not to do is just as important as following the instructions. Let's walk through the most common blunders I've seen so you can avoid them.
Battling the Elements (and Losing)
The single biggest mistake people make is trying to do the repair in the wrong conditions. That resin in your kit is specifically formulated to cure with UV light. If you're working in direct, blazing sunlight, the resin starts hardening the second it hits the glass. It won't have time to seep into all the microscopic fractures, leaving you with a weak, cloudy mess.
For the best results, always work in a shaded, dry area like a garage or carport. If you have to work outside, do it on an overcast day.
Rushing the Prep and Curing
Another huge pitfall is impatience. It's tempting to jump right in, but if you don't thoroughly clean the chip first, you're just asking for trouble. Any tiny bit of dust, moisture, or glass debris left inside will be entombed in resin forever. This not only looks bad but also compromises the strength of the bond.
The same goes for the curing process. The instructions aren't just a suggestion—that resin needs a specific amount of time to fill the void and then harden properly. If you cut the time short, you're trapping air bubbles and creating a weak spot that could fail down the road.
A successful repair is a patient one. Allowing the resin adequate time to fill every crevice and then properly cure under UV light is the most critical factor for achieving a durable, nearly invisible result.
The DIY repair market is booming for a reason—these kits work. In fact, the global market was valued at around USD 1.2 billion in 2023 and is projected to more than double by 2033, according to research on dataintelo.com. This just shows how many drivers are getting great results by avoiding these common errors.
The Goldilocks Problem: Too Much or Too Little Resin
It’s easy to assume that more resin equals a stronger repair, but that’s not how it works. Using too much just creates a sticky mess that’s a nightmare to clean up later. Worse, the excess can actually prevent the suction cup from creating a proper vacuum, which is essential for pulling air out of the chip.
On the other hand, being too stingy with the resin is just as bad. If you don't use enough to fill the entire chip and all its tiny legs, the repair will be incomplete. The damage will still be visible, and you haven't really restored the structural integrity, meaning it's still at risk of spreading.
The key is to follow the kit's instructions to the letter—usually just a few drops is all you need. For more hands-on advice, you can check out our complete guide to windshield repair.
Answering Your DIY Windshield Repair Questions
Even with a step-by-step guide, it's natural to have a few questions before you get started. Let's tackle some of the most common "what ifs" that pop up when you're doing this for the first time.
How Long Does a DIY Repair Really Last?
This is the big one, and the answer is usually better than people expect. When you do the repair correctly on the right kind of damage (think small chips or star breaks), that fix is permanent.
The resin doesn't just sit on top; it chemically bonds with the glass, restoring the windshield's structural integrity. It's not a temporary patch. Once cured, the resin is incredibly tough and stands up to everything from temperature swings to car washes. Think of it less like glue and more like a liquid weld that becomes a seamless part of the glass.
Can I Fix More Than One Chip?
You bet. The trick is to treat each one as a separate job. Go through the entire process—from cleaning and prepping to injecting the resin and curing it—on one chip before you even think about starting the next. This way, you give each repair the focus it deserves.
Most DIY kits come with enough resin to handle two or three small chips, which is perfect for dealing with minor road debris damage. Just make sure the chips aren't clustered too closely together, as that could signal a bigger structural weak spot that needs a pro's attention.
Expert Tip: The success of a DIY repair hinges entirely on the type of damage you're fixing. A perfectly executed repair on a small bull's-eye chip can be just as strong and lasting as a professional one. But these kits are not meant for long cracks—those require specialized tools to fix properly.
What if the Repair is Still Visible?
It’s important to have realistic expectations here. A DIY repair isn't magic; its main job is to restore the strength of the glass and stop the damage from spreading. The cosmetic improvement is a bonus.
A good repair will make the chip about 85-95% less noticeable. Afterwards, you'll likely see a tiny, clear spot or a faint shadow where the impact was. That’s a total success.
If the spot looks cloudy or you can see tiny air pockets, it usually means some air got trapped when you injected the resin. This can happen if the applicator didn't have a perfect seal or if the vacuum step was rushed. Unfortunately, you can't really "redo" it, but the good news is the chip is still sealed and won't spread.
It's also worth remembering that repairs on modern vehicles can be more complicated. Many cars now have Advanced Driver Assistance Systems (ADAS) with cameras mounted right behind the windshield. A repair in the camera's line of sight could potentially interfere with these safety systems. You can learn more about the importance of proper ADAS windshield calibration in our detailed guide on the topic.
Article created using Outrank