how to remove water spots from windshield: Quick DIY Guide
Learn how to remove water spots from windshield with simple, proven DIY methods and pro tips to restore clarity fast.
Nov 30, 2025
generated
remove water spots, windshield cleaning, car detailing tips, auto glass care, DIY car care
Those frustrating marks on your windshield aren't just dried water. They're actually mineral deposits left behind when the water evaporates, and over time, they can essentially etch themselves right onto the glass. To get rid of them for good, you first need to figure out if you're dealing with fresh spots on the surface or more stubborn, etched-in damage. The right game plan depends entirely on what you're up against.
Why Stubborn Water Spots Won't Just Wipe Away
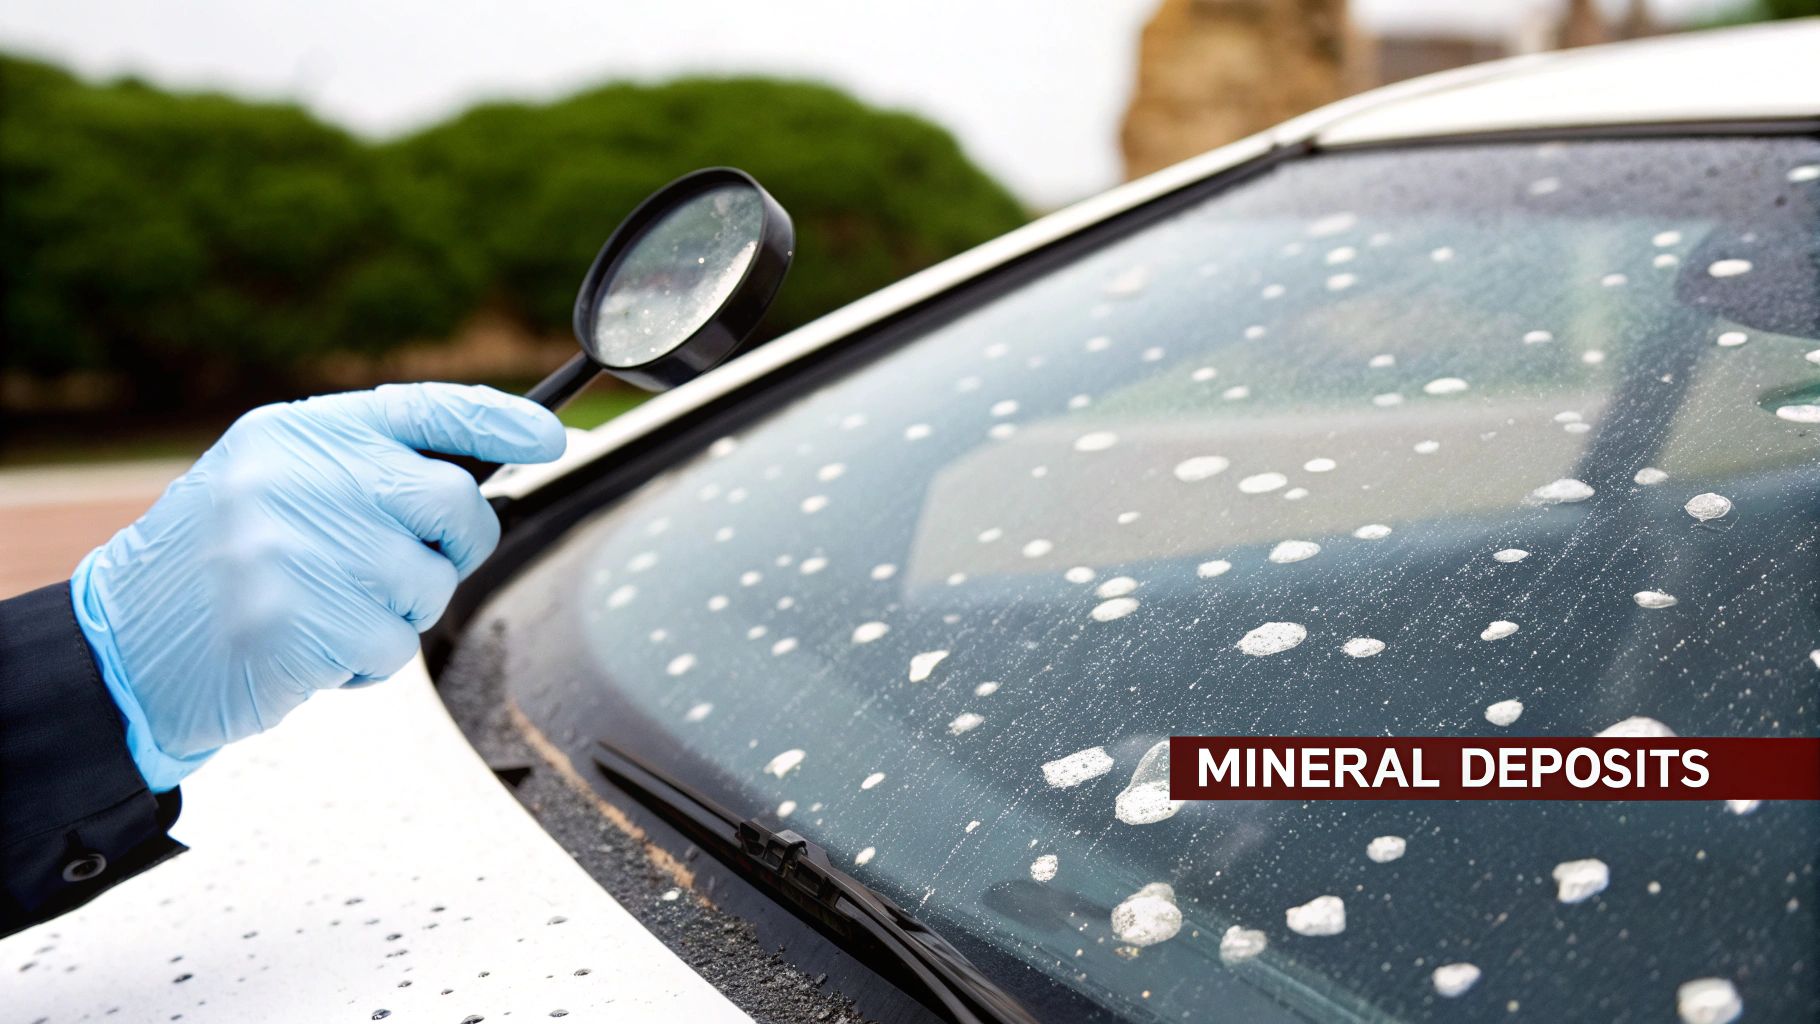
If you've ever tried to scrub water spots off with a regular cloth, you know how maddening it can be. They just don't budge. That's because you're not fighting water residue; you're fighting rock-hard mineral deposits, mostly calcium and magnesium, that were dissolved in the water.
When the pure H₂O evaporates, those minerals cling to your windshield, creating a stubborn blemish. This is a huge problem if your car gets hit by sprinklers (notorious for hard water) or exposed to the contaminants in acid rain. The longer these deposits bake in the sun, the more they can chemically bond with the glass, eventually etching into the surface itself. This process creates two very different kinds of water spots.
Fresh Deposits vs. Etched Glass
Knowing the difference between these two types is the most important part of getting your windshield crystal clear again.
Fresh Water Spots (Type I): These are the new guys. They're just mineral deposits sitting on top of the glass and haven't had a chance to cause real damage. You might even feel a slight texture if you run your fingernail over them.
Etched Water Spots (Type II): This is what happens when those minerals sit for too long. They actually corrode the surface, creating tiny, microscopic pits in the glass. These spots have become a physical part of the windshield and won't come off with simple cleaners.
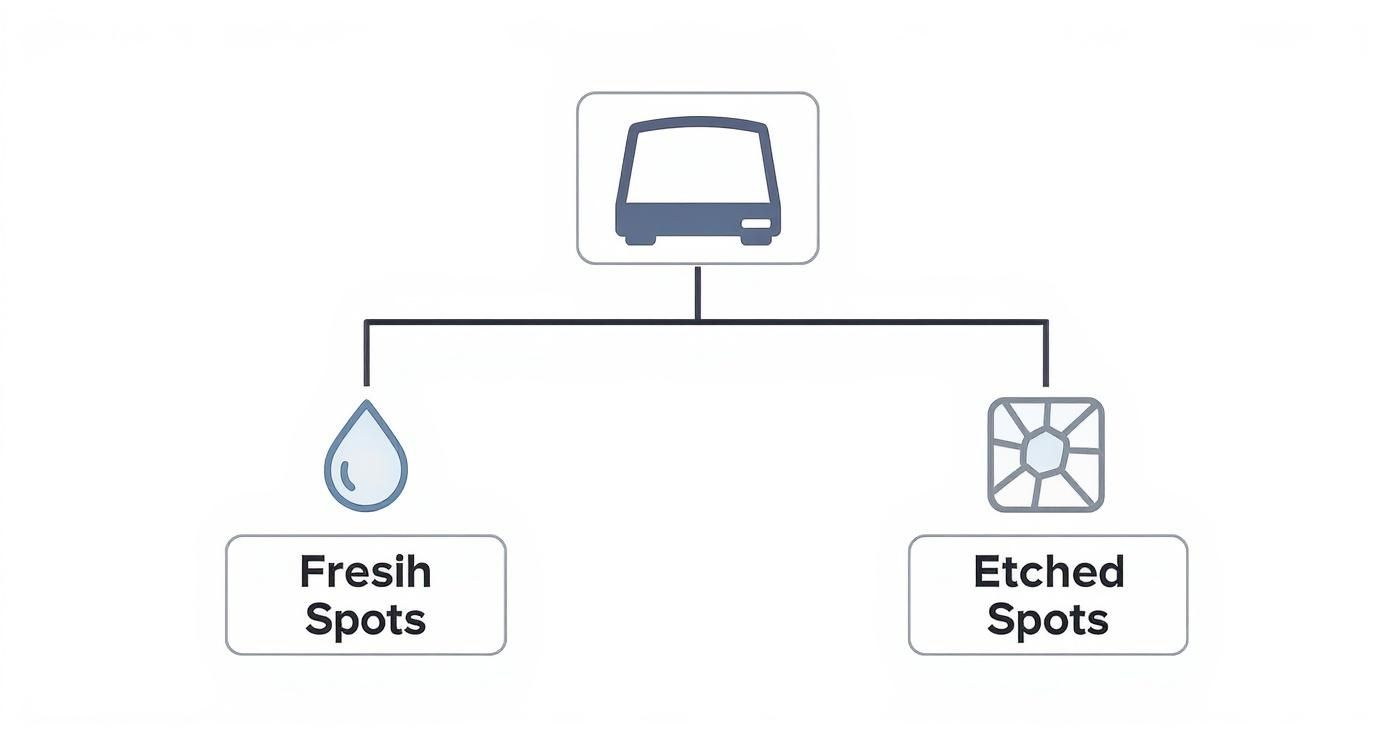
As you can see, figuring out which type of spot you have dictates whether you need a simple cleaning solution or have to break out the big guns with a more advanced polishing technique.
Diagnosing Your Water Spot Problem
Use this quick guide to identify your water spot severity and find the best starting point for removal.
Severity Level | What It Looks Like | Recommended First Approach |
|---|---|---|
Mild (Fresh Deposits) | Faint, whitish rings or spots that are mostly visible in direct sunlight. Feels slightly rough to the touch. | A simple acidic solution, like a 50/50 mix of distilled white vinegar and water. |
Moderate (Stubborn Deposits) | Clearly defined, opaque spots that are visible in most lighting conditions. May resist initial cleaning attempts. | A dedicated, commercial water spot remover product. |
Severe (Etched Spots) | The outline of the spot is still visible even after the mineral deposit is gone. The glass may look hazy or cloudy in that area. | A fine-grade glass polish applied with a machine polisher. |
Once you've diagnosed the problem, you can move on to the right removal method with confidence. This issue is so common that the global market for automotive water spot removers hit an estimated USD 1.27 billion in 2024, which shows just how many drivers are looking for a solution. You can dig into the specifics by checking out various industry market reports that track this trend.
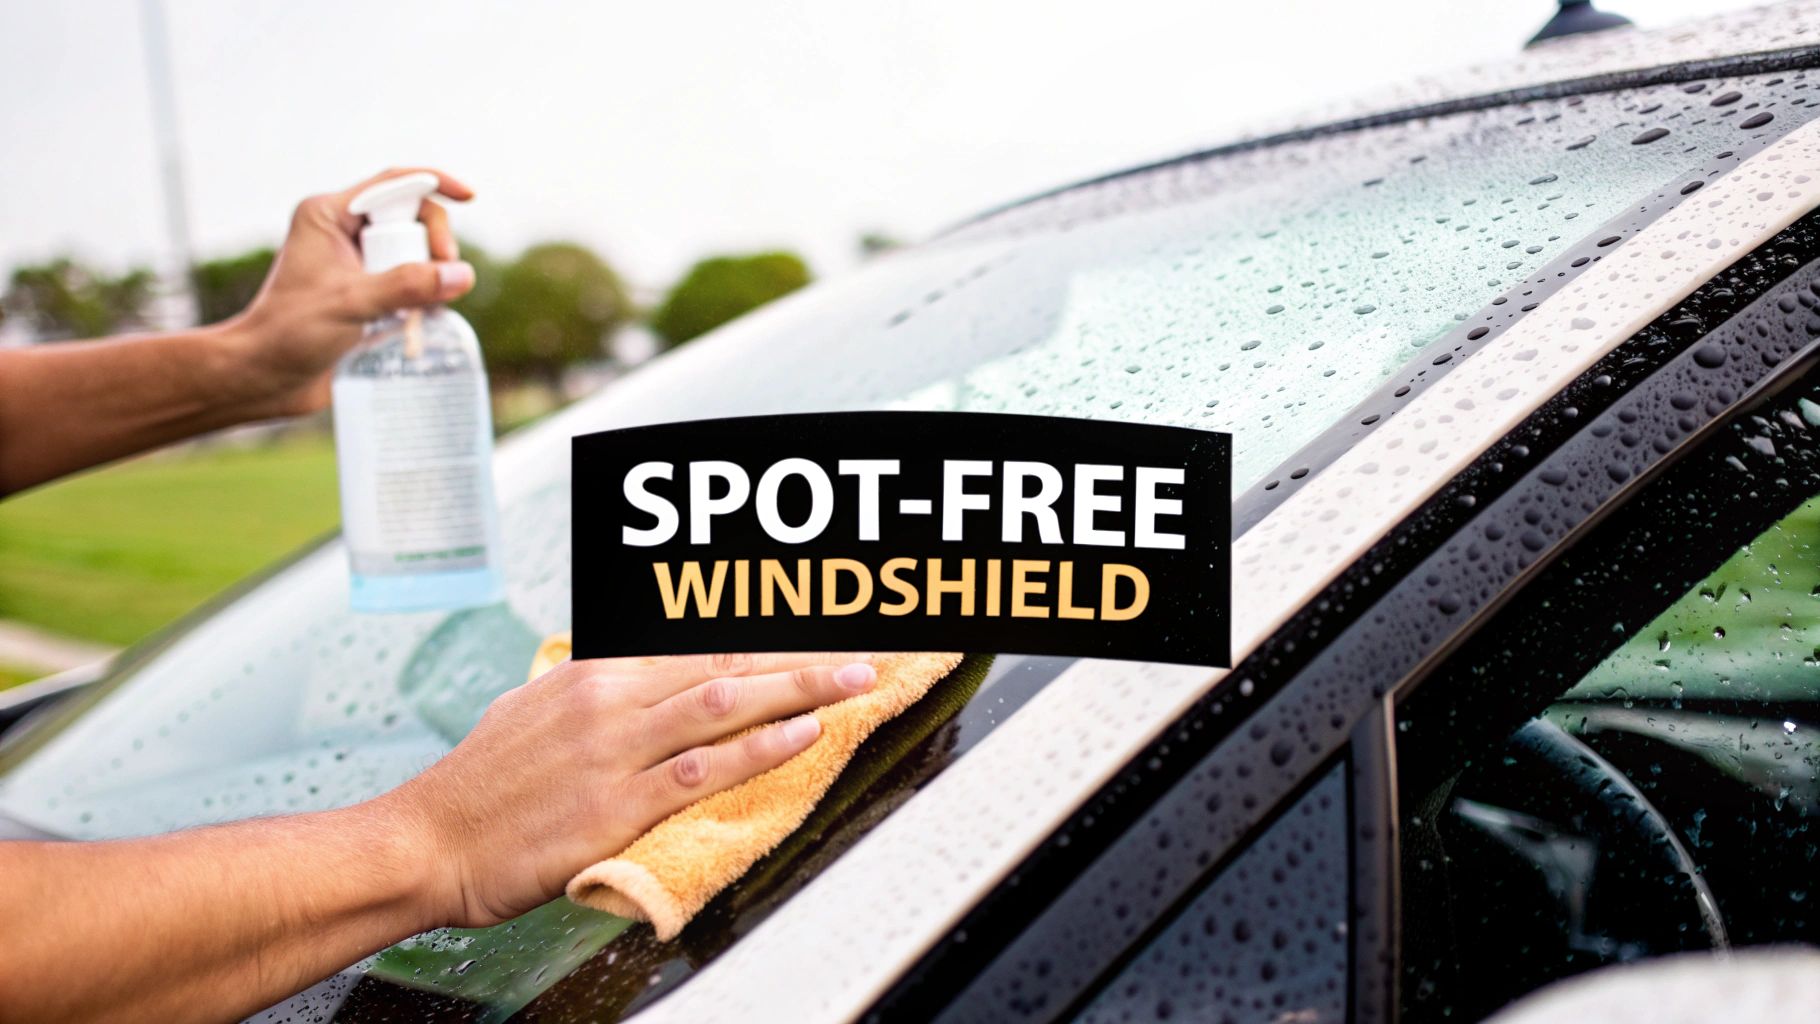
Your First Line of Attack With Household Solutions
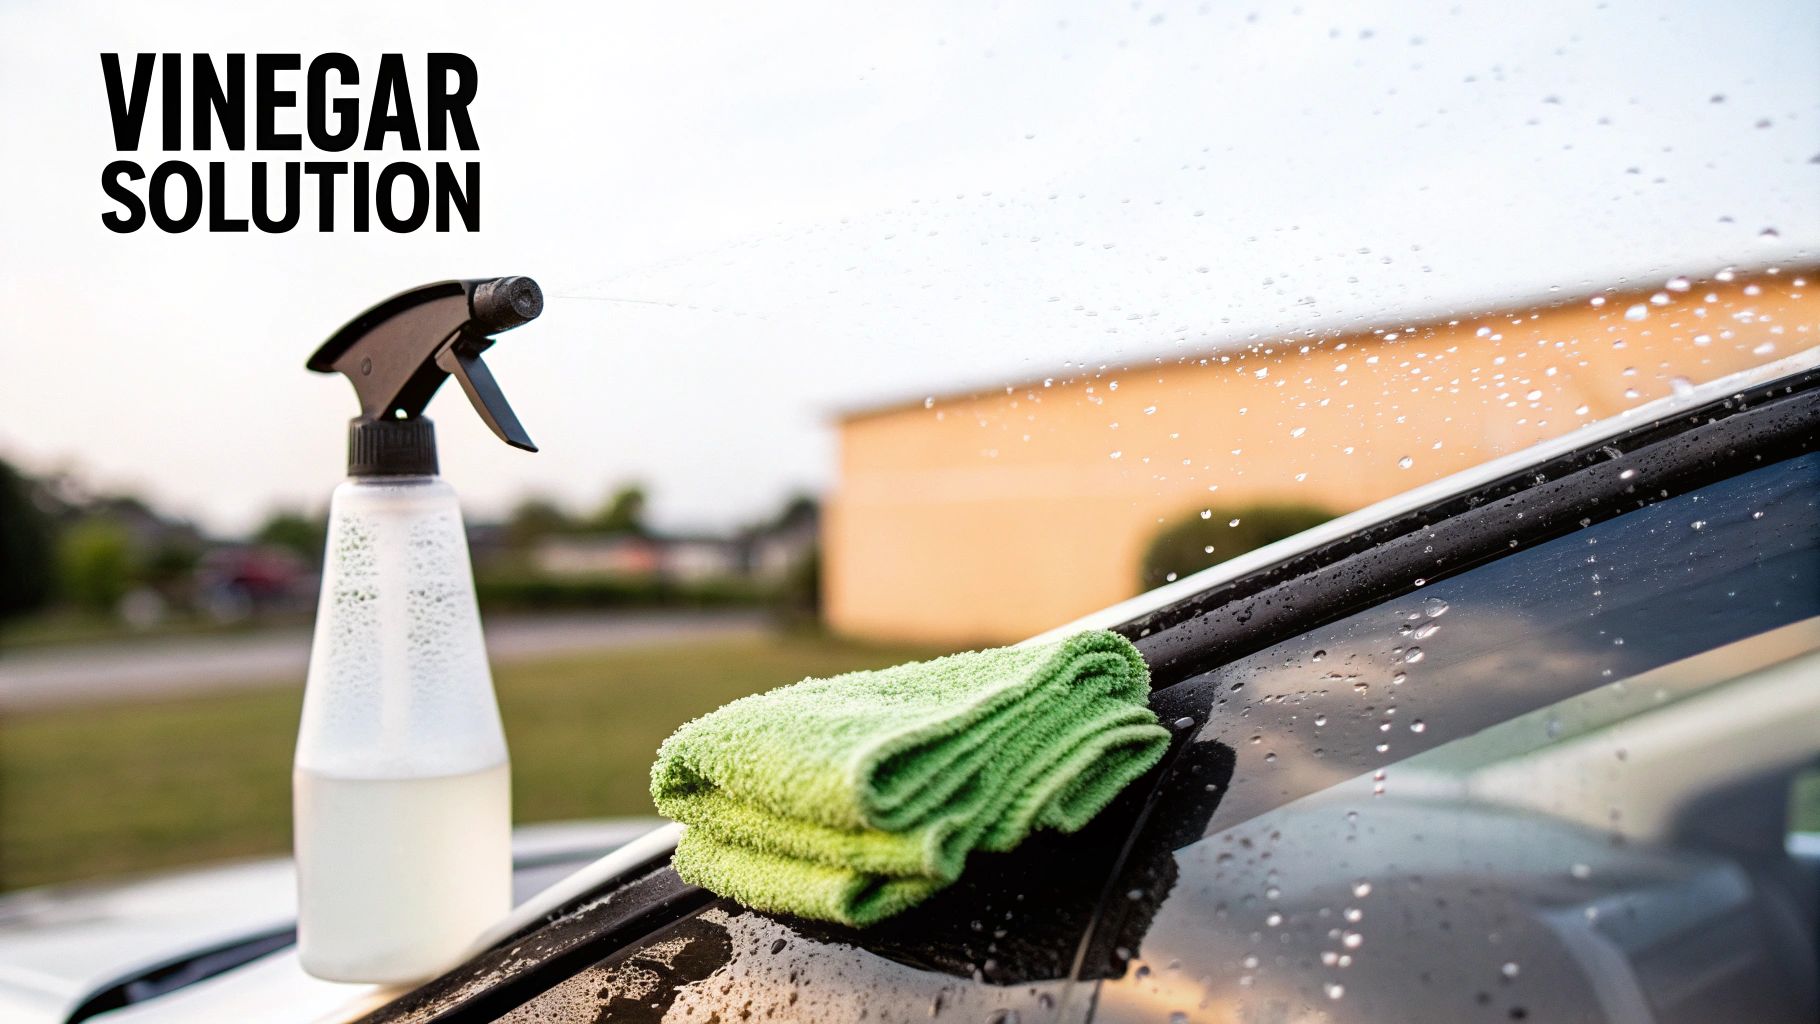
Before you head out to buy a specialty cleaner, take a detour to your kitchen pantry first. You'd be surprised how often a simple mix of white vinegar and distilled water can knock out light to moderate water spots. It's not magic—just basic chemistry. Those annoying spots are alkaline mineral deposits, and the mild acetic acid in the vinegar is perfect for dissolving them.
This DIY method is my go-to starting point because it's cheap, easy, and effective. The most common recipe is a 50/50 blend of white vinegar and distilled water in a spray bottle. Give the glass a good soak, let the vinegar work its magic on the calcium and magnesium deposits, and then wipe away.
The Right Tools and Technique
Getting this right is all about having the proper setup. A little prep work goes a long way and makes the job much smoother.
Here's what you'll need to grab:
Distilled White Vinegar: This is the key ingredient that does the actual work.
Distilled Water: Don't skip this! Using regular tap water can just add more minerals back onto the glass, completely defeating the purpose.
Spray Bottle: The best way to get even coverage without making a huge mess.
Microfiber Towels: Have at least two clean ones ready—one for cleaning and another for drying.
Start by mixing your vinegar and distilled water in the spray bottle. Spray the solution generously over the water spots on your windshield. Now, give it a minute or two to sit and break down the minerals. The most important thing here is to not let it dry on the glass.
Using your first microfiber towel, scrub the spots with a gentle, circular motion. You don’t need to apply a ton of pressure; let the acidic solution do the hard work for you. Once you’ve scrubbed the area, rinse the windshield thoroughly with more distilled water to wash away the dissolved minerals and any remaining vinegar. Grab your second, dry microfiber towel and wipe the glass completely dry to make sure no new spots form.
Critical Safety Precautions
Vinegar might seem harmless, but its acidic properties mean you need to be careful around your car’s more delicate surfaces. Overspray can easily drip onto your paint, plastic trim, or rubber seals and cause damage if it's left to sit for too long.
Pro Tip: Always work on a cool windshield, preferably in the shade. If you try this on hot glass, the solution will evaporate almost immediately, leaving behind a concentrated acidic residue that can make things even worse.
A simple trick is to tuck a few old towels along the base of the windshield to protect the cowl area and wiper arms from any runoff. When you’re all done, give the entire area one final rinse with clean water just to be safe. While this method is great for light spots, for more in-depth advice on dealing with stubborn hard water, check out a homeowner's guide to removing hard water stains from glass.
Time to Bring in the Big Guns: Commercial Water Spot Removers
So, the vinegar trick didn't quite cut it. That's okay—it happens. When those stubborn mineral rings from sprinklers or acid rain just laugh off your homemade solution, it's time to step up your game. This is where dedicated commercial products earn their keep.
For those tougher jobs, a specialized auto hard water spot remover is the next logical move. These formulas are engineered specifically for automotive glass. They pack a much bigger punch than household remedies but are designed to be safe on your car when you follow the directions.
Chemical Removers vs. Abrasive Polishes
Walking down the car care aisle can feel overwhelming. You’ll see a lot of products claiming to fix water spots, but they generally fall into two camps. Knowing the difference will save you time, money, and frustration.
Chemical Water Spot Removers: Think of these as supercharged vinegar. They usually come in a gel or spray and use mild acids to chemically dissolve the mineral deposits. They're your go-to for heavy, caked-on spots that haven't permanently etched the glass.
Glass Polishes: These are a completely different beast. They contain micro-abrasives that physically level the glass surface, almost like a super-fine sandpaper. Instead of dissolving the spot, a polish grinds down the glass ever so slightly to remove the etched-in damage, revealing a smooth, fresh surface underneath.
It's simple, really. If you can feel the deposit with your fingernail, start with a chemical remover. If you've cleaned the spot off but can still see a faint "ghost" of it, that's etching, and you'll need a glass polish.
A Practical Walkthrough with a Gel Remover
Let’s say you’ve got some nasty sprinkler spots that have been baking in the sun for a week. A gel-based chemical remover is a great choice here because it clings to the windshield instead of immediately running down.
Start with a clean, cool, and dry windshield. Working on a hot surface or in direct sun is a recipe for disaster, as the product can dry too quickly. Squeeze a dime-sized amount of the gel onto a microfiber applicator pad.
Now, focus on a small area, maybe 2x2 feet at a time. Work the product into the glass using firm, overlapping circles. You're not trying to scrub the glass raw; just let the chemicals do their job with a bit of agitation. After about a minute, before the product has a chance to dry, grab a clean, damp microfiber towel and wipe away all the residue. Immediately follow up with a separate dry towel to buff the area clean.
Crucial Reminder: Read the bottle! Every product is a little different. Some need to be rinsed thoroughly with water, while others are a simple wipe-on, wipe-off affair. Guessing is a great way to end up with a hazy mess or damaged trim.
The Pro Trick for When Nothing Else Works
For those impossibly stubborn, cemented-on mineral deposits, there's a technique many pros keep up their sleeve: #0000 steel wool. This is an expert-level move and requires a healthy dose of caution. Only "quadruple-aught" steel wool is fine enough for glass; anything coarser will leave you with a windshield full of scratches.
Never, ever use it dry. Always spray the glass with a lubricant like a standard glass cleaner or even your vinegar-water mix. With very light pressure, gently work the steel wool over the spot in a small circular pattern. You're just trying to knock the head off the deposit, not scrub it into oblivion. This is your last resort before getting into machine polishing for truly etched glass.
When all the cleaners and elbow grease in the world won't cut it, you're past dealing with simple mineral deposits. The water spots have physically etched into the glass, creating tiny pits that no amount of scrubbing will ever remove. At this stage, you're not just cleaning anymore—you're getting into glass restoration.
This kind of damage requires glass polishing. The process involves carefully abrading the surface of the windshield to level it out and remove that top, etched layer. The go-to product for this job is cerium oxide, a fine powder that turns into a powerful micro-abrasive when mixed with water. It can restore optical clarity without creating distortion, but only if you use it correctly.
Gearing Up for Glass Polishing
Polishing your windshield is pretty much the last stop on the DIY train before you need to call in a professional. It takes the right tools and a whole lot of patience. If you try to wing it without the proper equipment, you’re more likely to make things worse than better.
Here’s what you absolutely need:
Cerium Oxide Powder: This is the magic ingredient that does the actual polishing.
Dual-Action (DA) Polisher: Don't even think about skipping this. A DA polisher is much safer for a beginner than a high-speed rotary tool. Its oscillating motion drastically cuts down the risk of building up too much heat and warping your glass.
Glass Polishing Pads: You can't use your paint correction pads here. Glass-specific pads, usually made of rayon or felt, are built to withstand the friction and heat that glass polishing generates.
Spray Bottle with Water: Keeping the glass cool and lubricated is non-negotiable. It’s your primary defense against heat buildup and potential damage.
Safety Gear: Put on safety glasses and gloves. Cerium oxide is a very fine powder, and you definitely don't want it getting in your eyes or all over your hands.
The Cautious Approach to Polishing
Let's be clear: this process removes a microscopic layer of glass. The entire goal is to work slowly and methodically. Rushing is your worst enemy.
Start by mixing the cerium oxide powder with a bit of water until you have a slurry that looks like a thin paste. Dab a small amount onto your polishing pad. Pick a small 2x2 foot section to start with and use the polisher on its lowest speed to spread the compound evenly.
Once it's spread, bump the speed up slightly. Begin working in slow, overlapping passes using light to moderate pressure. Keep that spray bottle handy—after every few passes, give the area a quick mist of water to keep it cool and lubricated. Heat is the real danger here. If the glass ever gets too hot to comfortably touch, stop immediately. Let it cool down completely before you even think about starting again.
After a couple of minutes of polishing, wipe the slurry off and check your work. You should see the etching slowly starting to fade. If the spots are incredibly deep and you’re not seeing any improvement, the damage might be beyond a DIY fix. Pushing it further by polishing too aggressively could distort the glass, creating a dangerous "funhouse mirror" effect. If you find yourself in that boat, the smartest and safest move is to seek professional windshield repair or a full replacement.
Keeping Your Windshield Permanently Spot-Free
https://www.youtube.com/embed/yMi5PtyqUI8
You’ve put in the elbow grease and finally gotten rid of those stubborn water spots. It feels great, but the real win is making sure they never come back. The last thing you want is a fresh batch of mineral deposits showing up after the next rainstorm. The secret is to shift from a reactive mindset to a proactive one.
The easiest and most effective habit? Always dry your windshield after it gets wet. It’s that simple. Don't let water air-dry, whether you’ve just come from the car wash or driven through a downpour. Grab a quality microfiber towel and wipe away every last drop. This physically removes the minerals before they have a chance to bond to the glass.
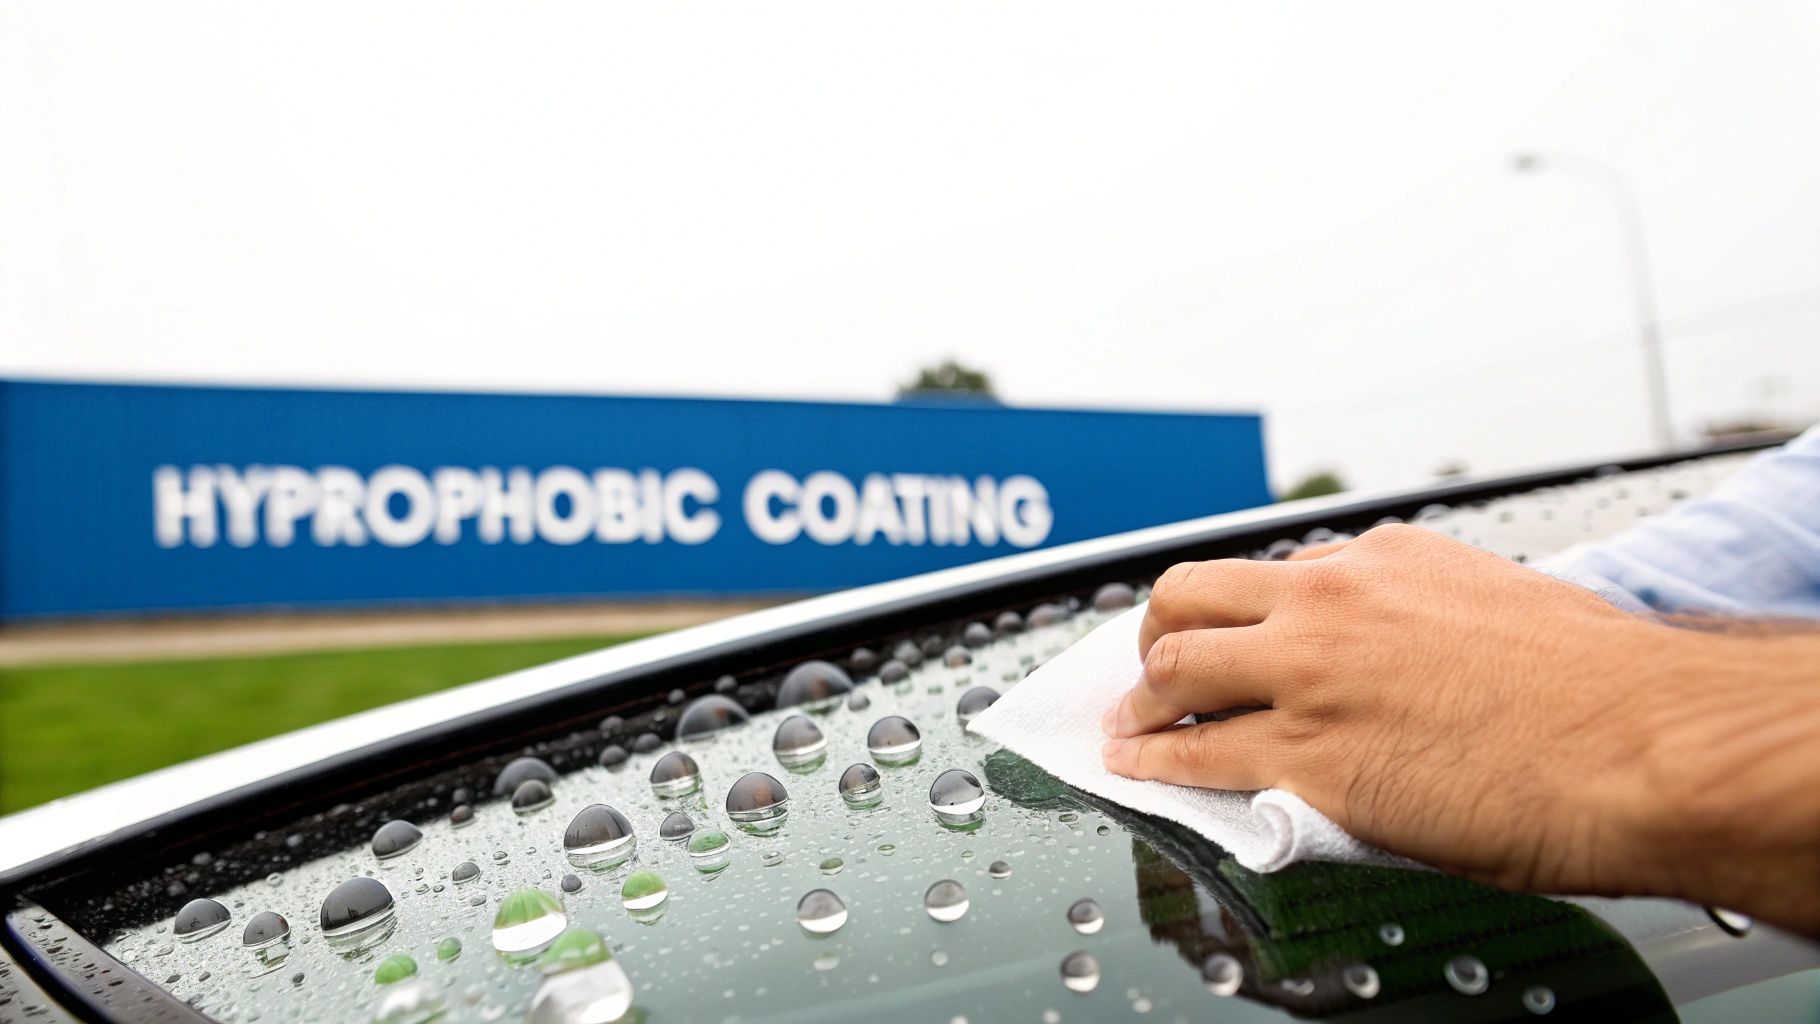
Take Protection to the Next Level with a Glass Sealant
For a more robust defense, it's time to look into a dedicated glass sealant or hydrophobic coating. It’s like wax for your paint, but specially formulated for glass. These products create an invisible, super-slick barrier that forces water to bead up into tight little spheres and roll right off, taking dirt and minerals with it.
This approach gives you two huge advantages:
Water spots become a non-issue. Since water can't linger on the surface, the minerals it carries never get a chance to dry and etch into the glass.
Visibility in the rain is dramatically improved. The hydrophobic effect is often so strong that at highway speeds, rain simply sheets off, meaning you’ll barely need to use your wipers.
Most sealants are a simple wipe-on, buff-off application that provides months of protection. Trust me, taking a few minutes to apply a coating is a whole lot easier than scrubbing away etched spots down the road.
Smart Habits for Spot-Free Driving
Beyond specific products, a few tweaks to your routine can make a huge difference. It’s all about being more aware of the water your car comes into contact with every day.
Think about where you park. That spot next to a perfectly manicured lawn might look nice, but it could put your car in the direct path of an irrigation sprinkler. Sprinklers are one of the biggest culprits behind severe hard water spots. Likewise, if your local tap water is particularly hard, using filtered or distilled water for the final rinse when you wash your car can eliminate the problem at the source.
Proactive care is always easier than reactive repair. A hydrophobic coating paired with smart parking and proper drying techniques can make water spots a problem of the past, keeping your glass pristine and your visibility sharp.
These preventative habits don't just protect your windshield; they help maintain all your vehicle's glass. This is especially true if you have aftermarket additions. For instance, if you're thinking about upgrades, proper care is key. You can learn more about professional window tint applications and their specific maintenance needs to ensure everything on your vehicle looks great and lasts for years to come.
Common Questions About Windshield Water Spots
Even with the best game plan, questions always come up when you're elbow-deep in a project. Getting the right answers can be the difference between a pristine windshield and a frustrating afternoon. Let's tackle some of the most common things people ask when dealing with water spots.
We'll cover everything from the water you use in your DIY mix to handling tinted windows and knowing when it's time to call in a pro. Think of this as your go-to guide for those "what if" moments.
Does It Matter If I Use Tap Water in My Vinegar Solution?
Yes, it absolutely matters. This is one of those little details that can make or break your results. Using tap water, especially if you live in an area with hard water, is a classic mistake. You're basically trying to clean off minerals by using water loaded with the exact same minerals—calcium and magnesium.
Once that tap water evaporates, it leaves a fresh set of mineral deposits behind, and you’re right back where you started. To get a truly spot-free finish, always use distilled water. It has zero mineral content, so you know your cleaning solution isn't adding to the problem.
Will These Cleaning Methods Damage My Window Tint?
This is a big one, and you need to be careful here. If you have aftermarket tint on the inside of your windows, you must only use these cleaning methods on the exterior glass.
Chemicals, vinegar, and definitely abrasives like steel wool will ruin that tint in a heartbeat. They can discolor, scratch, or even strip the film right off. The adhesives and dyes in tint are surprisingly delicate. For the inside, play it safe and stick to an ammonia-free glass cleaner with a soft microfiber cloth.
Remember, the goal is to get rid of water spots, not create a bigger, more expensive problem by destroying your tint. Keep your interior and exterior cleaning jobs completely separate.
What If the Spots Are Still There After I’ve Tried Everything?
It's incredibly frustrating when you've done everything right—the vinegar, the commercial cleaners, maybe even a light polish—and those ghostly outlines just won't budge. If you're at this stage, you're not dealing with a surface problem anymore.
What you're seeing is etching, where the minerals have physically eaten into the glass itself. Pushing further with more aggressive DIY methods is a bad idea; you risk distorting the glass or causing permanent damage. It's time to call a professional detailer or an auto glass specialist. They have the right equipment to assess if the glass can be saved or if a replacement is the only safe move. This is especially true if the damage is near any ADAS sensors, as a replacement would require a proper ADAS windshield calibration.
Can I Use a Household Product Like CLR on My Windshield?
No. Absolutely not. Never use a product like CLR (Calcium, Lime, Rust Remover) or any other harsh household cleaner on your car. Those products are formulated with powerful acids designed for toilets and tubs, not for delicate automotive finishes.
Just a little overspray or a single drip can permanently stain your paint, bleach your plastic trim, or ruin rubber seals. It’s a shortcut that can lead to hundreds of dollars in damage. Always, always stick to products specifically made for cars.
At Auto Renu Auto Glass LLC, we handle the toughest auto glass challenges, from severe water spot damage to complete windshield replacements and ADAS recalibration. If DIY methods aren't enough, trust our mobile experts to restore your visibility safely and efficiently. Visit us at https://www.autorenu911.com to schedule your service.